GoodMeasure Integrator Installation Guide v3.1 www.goodmeasure.net Page 3
Step 3: Setup WiFi access to the GoodMeasure service
1. Activate the hotspot device you set up in step 1.
2. Switch on the meter (if not already on) and ensure
that the Power LED on the integrator comes on and
is steady RED. If not, check the RJ45
interconnections are secure.
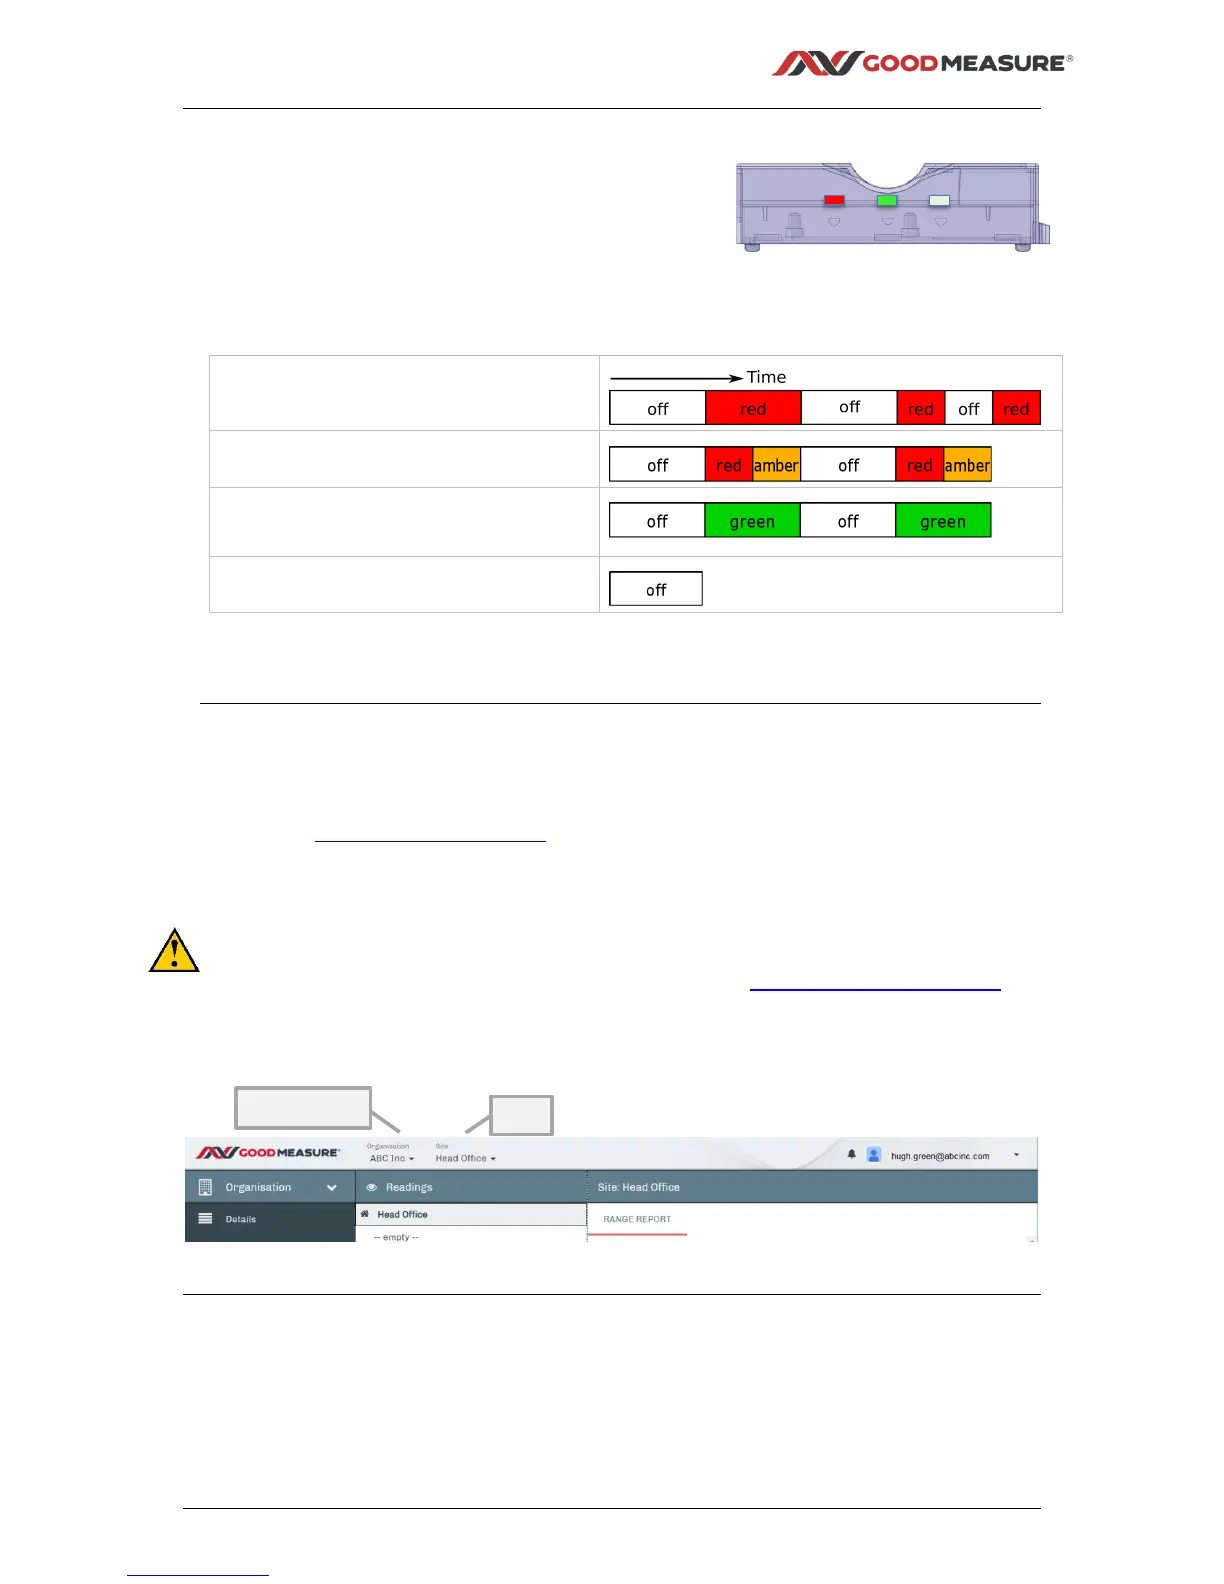
The Status LED should then follow this sequence:
Flash RED when no connection
available…
Flash RED/AMBER when connecting…
Flash GREEN for a few seconds when
successfully connected…
Stay off once connected and operating
3. The GoodMeasure administrator must now login to GoodMeasure to configure the
Integrator settings and to connect to a permanently available local WiFi SSID.
Step 4: Login to GoodMeasure
The installation is not complete until the following steps are performed.
1. Go to www.goodmeasure.net using a tablet or laptop.
2. Log in using the link in the top right of the screen.
You will need a Google or Microsoft account that has been authorised on your
organisation’s GoodMeasure account to perform these steps.
Contact the person who administers these installations or sales@goodmeasure.net if
you are unsure which account to use.
You will see a page heading like the one below.
 Loading...