11
Power Limit Solution for Grid-Tied PV Inverters User Manual V1.0-2022-09-15
Step 1 SEC1000 is in the dynamic IP mode as default. Connect the SEC1000 NET port to the Router LAN port with the network cable.
(Press RELOAD button for about 4 seconds, and the EzLogger Pro inside of SEC1000 is reset and switched to dynamic IP mode.)
Step 2 Connect the computer to the Router network for communication.
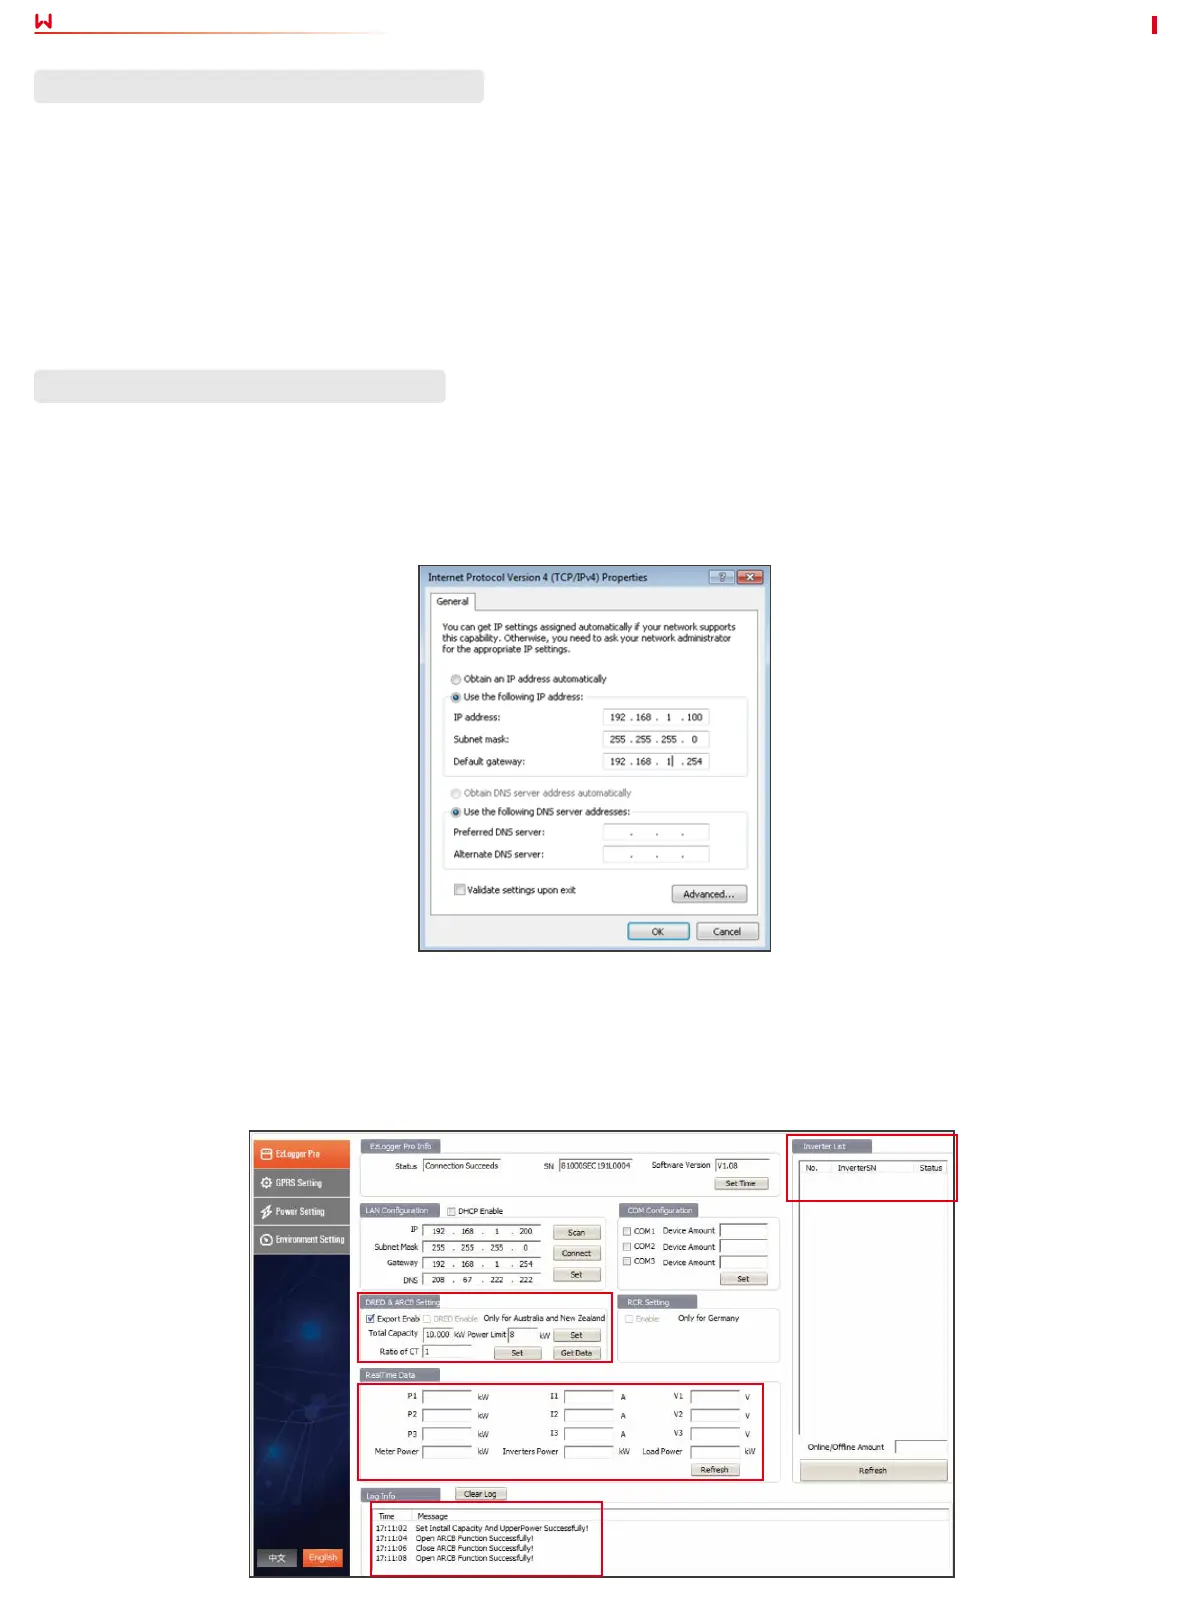
Step 2 The IP addresses for the computer and EzLogger Pro shall be in the same network segment. Set the computer IP
address at 192.168.1.xxx (1 ≤XXX ≤250 and XXX ≠200).
Step 3 Set the Total Capacity, Power Limit and Ratio of CT, then click “Export Enab” on ProMate UI to nish export power limit setting.
Step 3 Set the Total Capacity, Power Limit and Ratio of CT, then click “Export Enab” on ProMate UI to nish export power limit setting.
Step 4 Monitor the data such as Active Power, Voltage and Current on ProMate UI in real time, ensuring power limit function is
enabled.
Step 4 Monitor the data such as Active Power, Voltage and Current on ProMate UI in real time, ensuring power limit function is
enabled.
Step 1 Press RELOAD button for about 10 seconds, and the EzLogger Pro inside of SEC1000 is reset and switched to static IP mode.
(The default IP:192.168.1.200 and default gateway: 192.168.1.254)
Log Info: conrm whether the operation is nished.
Inverter List: conrm
whether the online
quantity is accurate.
Parameter Setting (for Dynamic IP Mode)
Parameter Setting (for Static IP Mode)
ProMate UI
 Loading...