Do you have a question about the Goodwe GW250K-HT and is the answer not in the manual?
Explains GW250K-HT and GW225K-HT model naming conventions.
Describes the HT series inverters for grid-tied PV systems.
Lists the components included with the inverter.
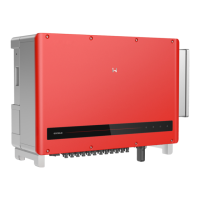
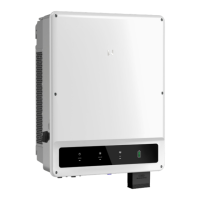
Details the physical appearance and components of the inverter.
General guidelines and precautions for installing the inverter.
Factors to consider when choosing a suitable installation location.
Step-by-step instructions for mounting the inverter on a wall or bracket.
Procedure for connecting AC cables to the inverter.
Recommends circuit breakers and explains protection devices.
Step-by-step guide for connecting DC cables to the inverter.
Instructions for connecting the external ground terminal.
Details on connecting the inverter via RS485 for data logging.
Information about PLC 2.0 communication setup.
Instructions for setting up cloud monitoring via the app.
Explains the inverter's LCD display and button functions.
Lists error messages and their meanings for troubleshooting.
Troubleshooting guide for common system errors and displays.
Troubleshooting guide for specific inverter fault messages.
Troubleshooting for other issues like no display or utility loss.
Detailed technical specifications of the inverter models.
Illustrates the internal circuit diagram of the inverter.
Instructions for cleaning the inverter's fan.
Guidance on checking the DC switch for proper operation.
Periodic checks for electrical connections and sealing.
The Goodwe HT Series User Manual describes a range of three-phase grid-tied PV string inverters designed to convert DC power from PV strings into AC power, which is then fed into the power grid. These inverters are transformerless and are suitable for large-scale or commercial and industrial PV systems. A typical grid-tied PV system incorporating these inverters consists of a PV string, the inverter itself, a transformer, and the utility grid. The GW250K-HT and GW225K-HT models are specifically mentioned, with the "HT" indicating the model code.
The HT series inverters serve as the central component in photovoltaic systems, facilitating the conversion of solar energy into usable electricity for the grid. They are designed to operate optimally within specific environmental conditions, with an ambient temperature not exceeding 45°C for optimal performance. The inverters are equipped with a DC switch, which allows for the safe disconnection of the DC input when necessary. The inverter automatically initiates operation once the input and output requirements are met, and the DC switch is turned to "ON."
The inverters feature multiple DC terminals for connecting PV strings, ensuring flexibility in system design. Communication capabilities are provided through a USB port for Bluetooth connectivity, RS485 communication ports for connecting to RS485 devices, and a tracking system communication port. An AC junction box is included for connecting AC cables, and grounding terminals are provided for reliable grounding of the inverter.
The operational status of the inverter is indicated by a combination of LED lights (Green Light, Red Light) and, in models equipped with an LCD, a display screen. The LCD provides detailed information on power supply status, operation status, and SEMS (Smart Energy Management System) status. For instance, a steady green light indicates normal grid-tied operation, while a blinking red light signifies a system fault. The LCD can display various parameters such as grid-tied power generation, input voltage and current, utility voltage and frequency, and fault information.
The inverter incorporates several protective features to ensure safe and reliable operation. These include a leakage current detection unit that disconnects the inverter from the power grid if external leakage current exceeds a predefined limit. It also features anti-islanding protection, DC reverse polarity protection, and surge arresters for both DC and AC sides. Overcurrent and overvoltage protection mechanisms are integrated for AC circuits, and some models offer optional DC Arc Fault Circuit Interrupter and PID Recovery functions.
For monitoring and configuration, the inverters can be managed via the SolarGo App for models without an LCD, or directly through the LCD and buttons for models with a display. The app allows users to download and install the application, then complete the necessary configuration operations. The LCD provides a user-friendly interface for checking operating parameters, setting the safety country, adjusting time settings, and configuring the shadow MPPT function to optimize power generation under partial shading conditions.
Installation of the HT series inverters requires careful consideration of several factors to ensure optimal performance and safety. The inverters should be installed in a well-ventilated area, away from flammable and explosive materials, and in a location with a strong signal and no electromagnetic interference. The installation height should be at eye level for ease of operation and maintenance. The mounting bracket can be fixed to a wall or a dedicated stand, with specific instructions provided for drilling holes and securing the inverter. Handles or lifting rings are used to safely lift and position the inverter onto the mounting bracket.
Electrical connections involve connecting AC cables to the AC junction box and DC cables from the PV strings to the DC terminals. Specific guidelines are provided for selecting appropriate AC cables, stripping them, and crimping them with terminals. The waterproof silicone ring must be adjusted to match the wire diameter to ensure the equipment remains sealed. For DC connections, it is crucial to keep the DC switch off before connecting PV strings and to ensure correct polarity to prevent damage to the inverter. The open-circuit voltage of each PV string must remain below the inverter's maximum input voltage.
Communication connections, particularly for RS485 models, involve connecting the inverter's RS485 port to a Data Logger. The total length of the communication cable should not exceed 1000m, and it should be kept away from power cables to avoid interference. For systems with multiple inverters, up to 20 inverters can be connected in a daisy chain to the data logger. Cloud monitoring is available through the goodwe.cloudview APP, which can be downloaded by scanning a QR code or visiting the provided website, allowing users to register and monitor their system remotely.
The inverter's interface, whether through the app or LCD, allows for various operational adjustments. Users can check real-time power generation, fault history, inverter model, and software version. The time setting function enables users to set the current system time, which is crucial for accurate data logging. The shadow MPPT function can be turned on or off to manage power generation efficiently in scenarios where PV strings experience partial shading. The normal power-on sequence involves the inverter starting when the input voltage exceeds the turn-on voltage, followed by self-checking and grid-tied power generation.
Regular maintenance is essential to ensure the longevity and optimal efficiency of the HT series inverters. Before any maintenance, it is critical to turn off the AC circuit breaker, then the DC circuit breaker, and wait for at least 5 minutes to allow residual voltage to dissipate.
One key maintenance task is cleaning the fan combination, which is responsible for heat dissipation. The external fan of the HT series inverter should be cleaned annually using a vacuum cleaner. This involves turning off both AC and DC power, waiting for the fan to stop running, removing the fan net, and carefully disassembling the fan net and fan bracket. The fan blades should then be cleaned with a soft brush, cloth, or compressed air, and the components reassembled. It is important not to pull out a single fan, as the internal circuit remains connected.
Another maintenance check involves the DC switch. While the DC switch does not require regular maintenance if used normally, it is recommended to check it periodically. This involves turning the DC switch on and off 10 times continually once a year. This action helps to clean up the device and extend its service life. Again, the AC circuit breaker must be turned off first, followed by the DC switch, before performing this check.
Electrical connection checks should be performed every six months. This includes verifying that all cables are securely connected, that the PE (protective earth) cables are reliably grounded, and that the waterproof covers for any unused ports are correctly sealed. These checks help prevent potential issues such as loose connections, poor grounding, or water ingress, which could compromise the inverter's safety and performance.
In the event of abnormal operation or system faults, the manual provides a comprehensive troubleshooting guide. This guide lists various error messages, such as "Grid outage," "Vac Fail," "Isolation Fail," and "PV Over Voltage," along with corresponding troubleshooting steps. These steps often involve disconnecting the DC switch, checking impedance, measuring voltages, and verifying cable connections. If the fault persists after following the troubleshooting steps, users are advised to contact the local service center. The manual also notes that frequent inverter startup due to insufficient sunlight is normal and does not indicate damage to the inverter.
| Model | GW250K-HT |
|---|---|
| Type | String Inverter |
| Rated Power | 250 kW |
| Max. Input Voltage | 1100 V |
| Start-up Voltage | 200 V |
| No. of MPPT Trackers | 2 |
| Number of MPPTs | 2 |
| No. of Strings per MPPT Tracker | 2 |
| Rated AC Output Power | 250 kW |
| Max. AC Apparent Power | 275 kVA |
| Rated Output Voltage | 400 V |
| Output Voltage | 400 V |
| Rated Grid Frequency | 50 Hz / 60 Hz |
| Frequency | 50 Hz / 60 Hz |
| THDi | <3% |
| DC Switch | Yes |
| AC Surge Protection | Type II |
| DC Surge Protection | Type II |
| Protection Degree | IP66 |
| Protection Class | Class I |
| AC Voltage Range | 320-480 V |
| Power Factor | 0.8 leading - 0.8 lagging |
| Operating Temperature Range | -25°C to 60°C |
| Humidity Range | 0-100% |
| MPPT Voltage Range | 200 V - 1000 V |
| MPPT Range | 200 V - 1000 V |