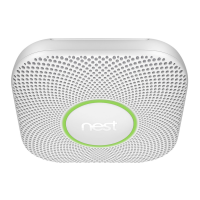
EasyManuals Logo

Google Nest Protect User Manual

Google Nest Protect
24 pages
To Next Page IconTo Next Page
To Previous Page IconTo Previous Page
Page #13 background imageLoading...
Page #13 background image
Terminal block
Terminal block
Wire
Tip: All smoke alarms prefer to live in a dust-free area,
so remove any dust before you install Nest Protect.
WARNING
Mixing the live and neutral connections when
connecting alarms will damage all the alarms
ensure that the same colours are used throughout
the premises for live, neutral and interconnect
wires (if present).
13
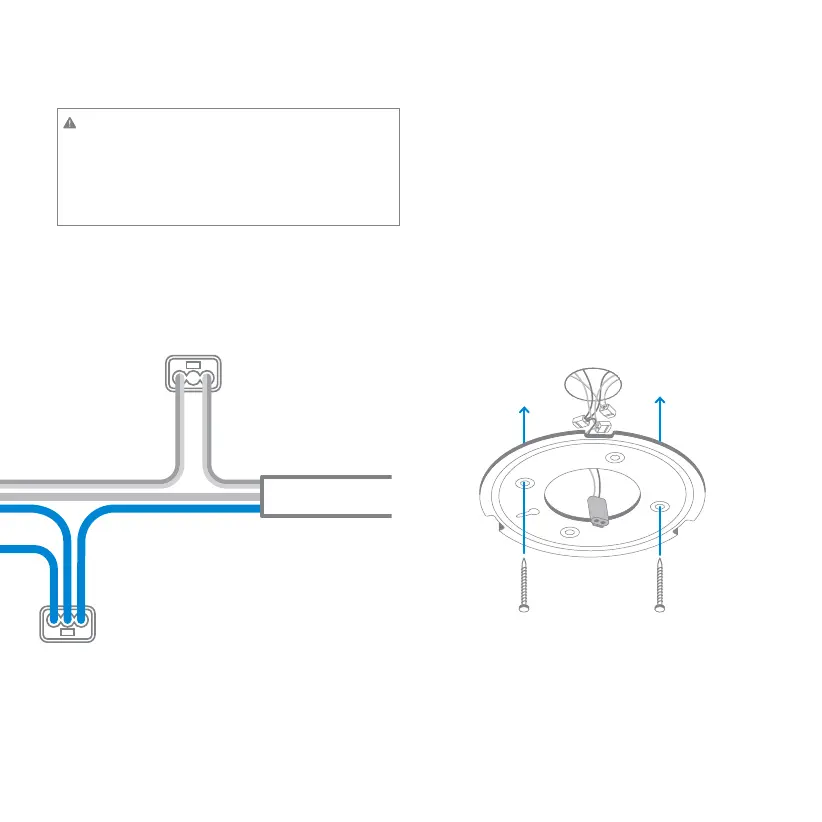
9. Install the new back plate
Screw the back plate directly into the ceiling or wall
with the screws. The screws are self-tapping so
there’s no need to drill pilot holes. If you’re installing
on an electrical box, you can re-use the old screws.
Make sure that the screws are driven all the way in
and snug against the back plate.

Other manuals for Google Nest Protect

Questions and Answers:

Question and Answer IconNeed help?

Do you have a question about the Google Nest Protect and is the answer not in the manual?

Google Nest Protect Specifications

General IconGeneral
LED colorRed / Green / Blue
Detector typeCarbon monoxide detector
Maximum range15 m
Mounting typeSurface-mounted
Product colorWhite
Speaker power2 W
Alarm decibels85 dB
Number of LEDs6
Housing materialPlastic
Languages supportItalian
Placement supportedHorizontal/Vertical
Wireless connectionYes
Number of simultaneously connected devices (max)18
Package typeBox
Quantity per pack1 pc(s)
Wi-Fi frequency2.4 GHz
Wi-Fi standards802.11b, 802.11g, Wi-Fi 4 (802.11n)
Bluetooth version4.0
Connectivity technologyWireless
Number of screws4
Power sourceBattery
Battery voltage1.5 V
Battery technologyLithium
Compatible battery sizesAA
Operating temperature (T-T)4 - 38 °C
Operating relative humidity (H-H)20 - 80 %
Weight and Dimensions IconWeight and Dimensions
Depth38.5 mm
Width135 mm
Weight379 g