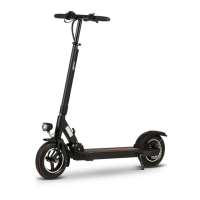
3. Dashboard
Press to change to a faster speed mode
Odometer, trip meter, operaon me or error display.
Press to change to a slower speed mode, hold down to turn on lights.
Baery charge level
Speedometer
Press for 3 seconds to turn the scooter on or off. Press the buon
briefly to change between the odometer, trip odometer, operaon
me and error code display.
Throle
Indicaon of your current speed mode. 1 is slowest 3 is fastest.
Sengs - to access or exit the sengs hold the + and - buons down together for 3 seconds.
Use the middle buon to navigate between the sengs and the + and - buons to change the value
of the seng.
P02: Change between units. 0: km/h, 1: mph
P04: Automac power off. Range 1-60 minutes. 0 means no automac power off.
P06: Wheel diameter in inches. This needs to be set to 10.
P07: Number of magnets in the motor. This needs to be set to 30.
P09: Zero start seng. 0: the throle is acve from standsll, 1: you need to push the scooter up to
3 km/h for the throle to acvate.
P12: Starng acceleraon. 0 is the weakest acceleraon, 5 is the strongest.
P15: Motor power in percentage (1-100%).
P16: Cruise control. 0: cruse control is off, 1: cruise control is on. If the cruise control is on, then it will
acvate automacally aer you maintain the same speed for 10 seconds. To disengage it press either
the brake or the throle.
5. Charging
Charge port
Before charging, turn off the scooter. First insert the charger into an
electrical outlet and then connect it to the scooter.
Charging from 0%-100% takes about 7 hours (about 5.5 hours with
Joyride Eco).
We recommend recharging the scooter at regular room temperature.
WARNING!
DO NOT charge the scooter if the charge port or power cord is wet.
DO NOT charge or use your baery if it is damaged or see trace of
water.
Close the charging port cover when not charging the scooter.
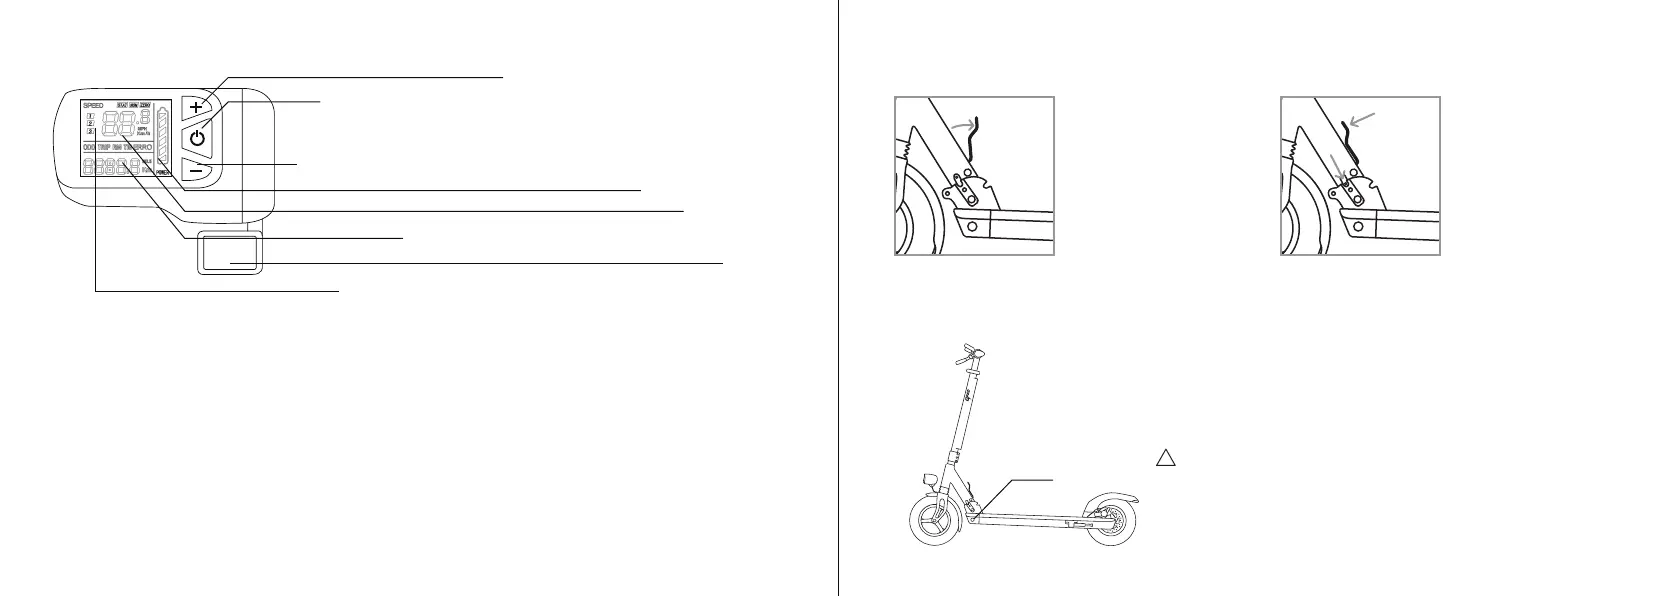
4. Folding
5 (ENG) 6
Turn your scooter off before
folding. To fold or unfold the
scooter pull back on the quick
release lever located near the
folding mechanism. If you have
difficulty moving the quick release
lever push the steering column
forwards as you pull the lever.
DO NOT ride the scooter if the folding mechanism is damaged or if the locking pin is not properly secured in its socket.
Once the scooter is in
the desired posion
(folded or unfolded)
press down on the quick
release lever marked as A.
Make sure that the locking
pin marked as B locates
securely into its socket.
2.
A
B
1.
!
 Loading...