Bailing hose for ADVENTURE:
Opening the bailing hose:
When travelling on white waters pull the
bilge hose outside and close the snap
closure inside. If the boat is heavily laden,
a few litres of water will remain inside the
boat. Any additional water, however, will
run off quickly, and the ADVENTURE
remains manoeuvrable even in powerful
rapids.
Closing the bailing hose:
Pull the hose inside and open the snap
closure.
Lay out the hose as far as possible free
of folds and roll together from top to
bottom as far as possible (at least 4
times).
Close snap closure again.
ATTENTION: It is still possible that a
small amount of water will enter the boat.
If you want to be completely dry, there is a
bilge hose clamp (available as accessory)
that prevents any water entering the boat.
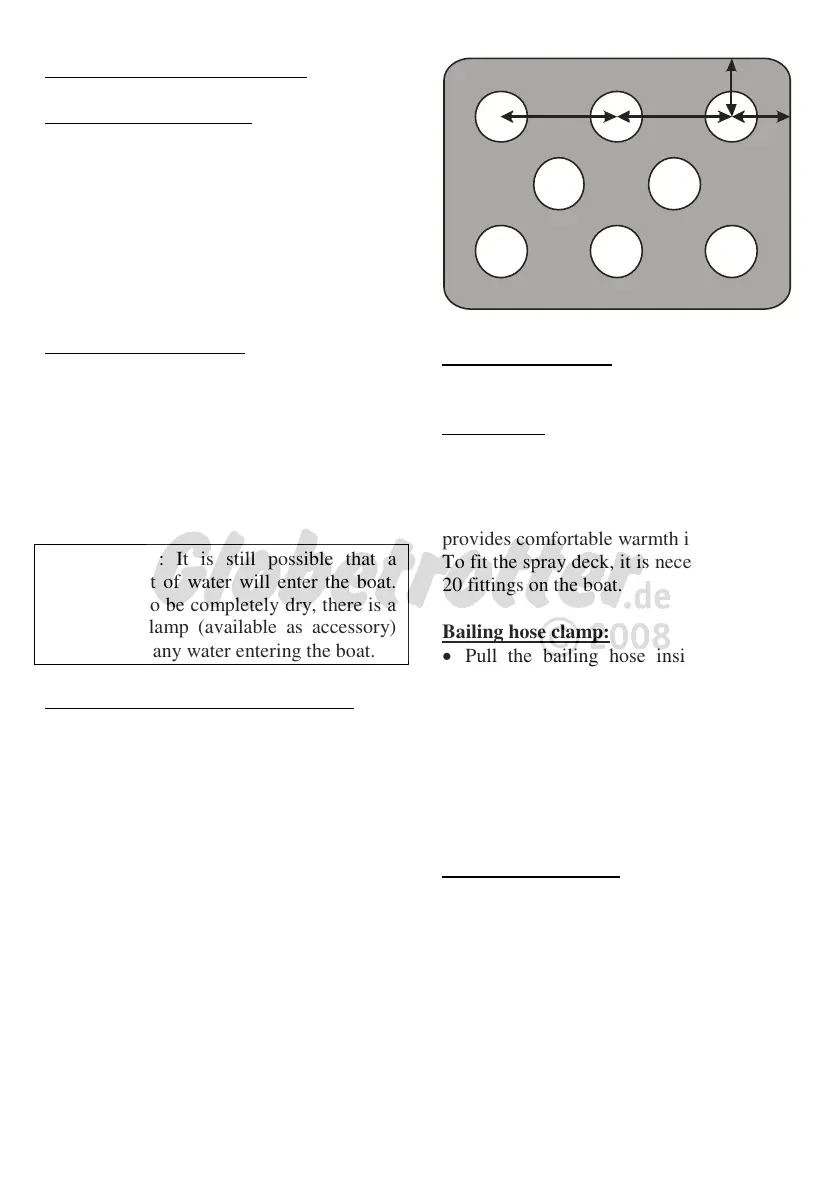
Bailing holes for ECONOMY and SL:
Instead of the bilge hose there is a flat area
on the floor of your ADVENTURE
ECONOMY/SL, where you can punch the
bailing holes additional.
Mark the position of the bailing holes
according to the illustration.
Punch the holes in the flat area of the
boat floor with a hollow punch (approx.
20 mm/ 3/4”).
ACCESSORIES
not standard equipment
Spray deck:
Furthermore, the luggage you may take
with you on the boat will be covered and
thus protected against falling out of the
boat. In cold weather, the spray deck
provides comfortable warmth in the boat.
To fit the spray deck, it is necessary to glue
20 fittings on the boat.
Bailing hose clamp:
Pull the bailing hose inside, open the
snap closure.
Lay out the hose free of folds and fold
down the top part.
Unscrew the bailing hose clamp.
Push the clamp over the bailing hose and
screw tightly together, using the two
knurled nuts.
Bailing hole stopper:
To close the bailing holes watertight to any
time.
Unscrew the bailing closure from one
another.
Put the part with the screw through the
bailing holes from the underside.
Put the other part onto the screws and
screw the two pieces together with the
knurled nuts.