9 / 18
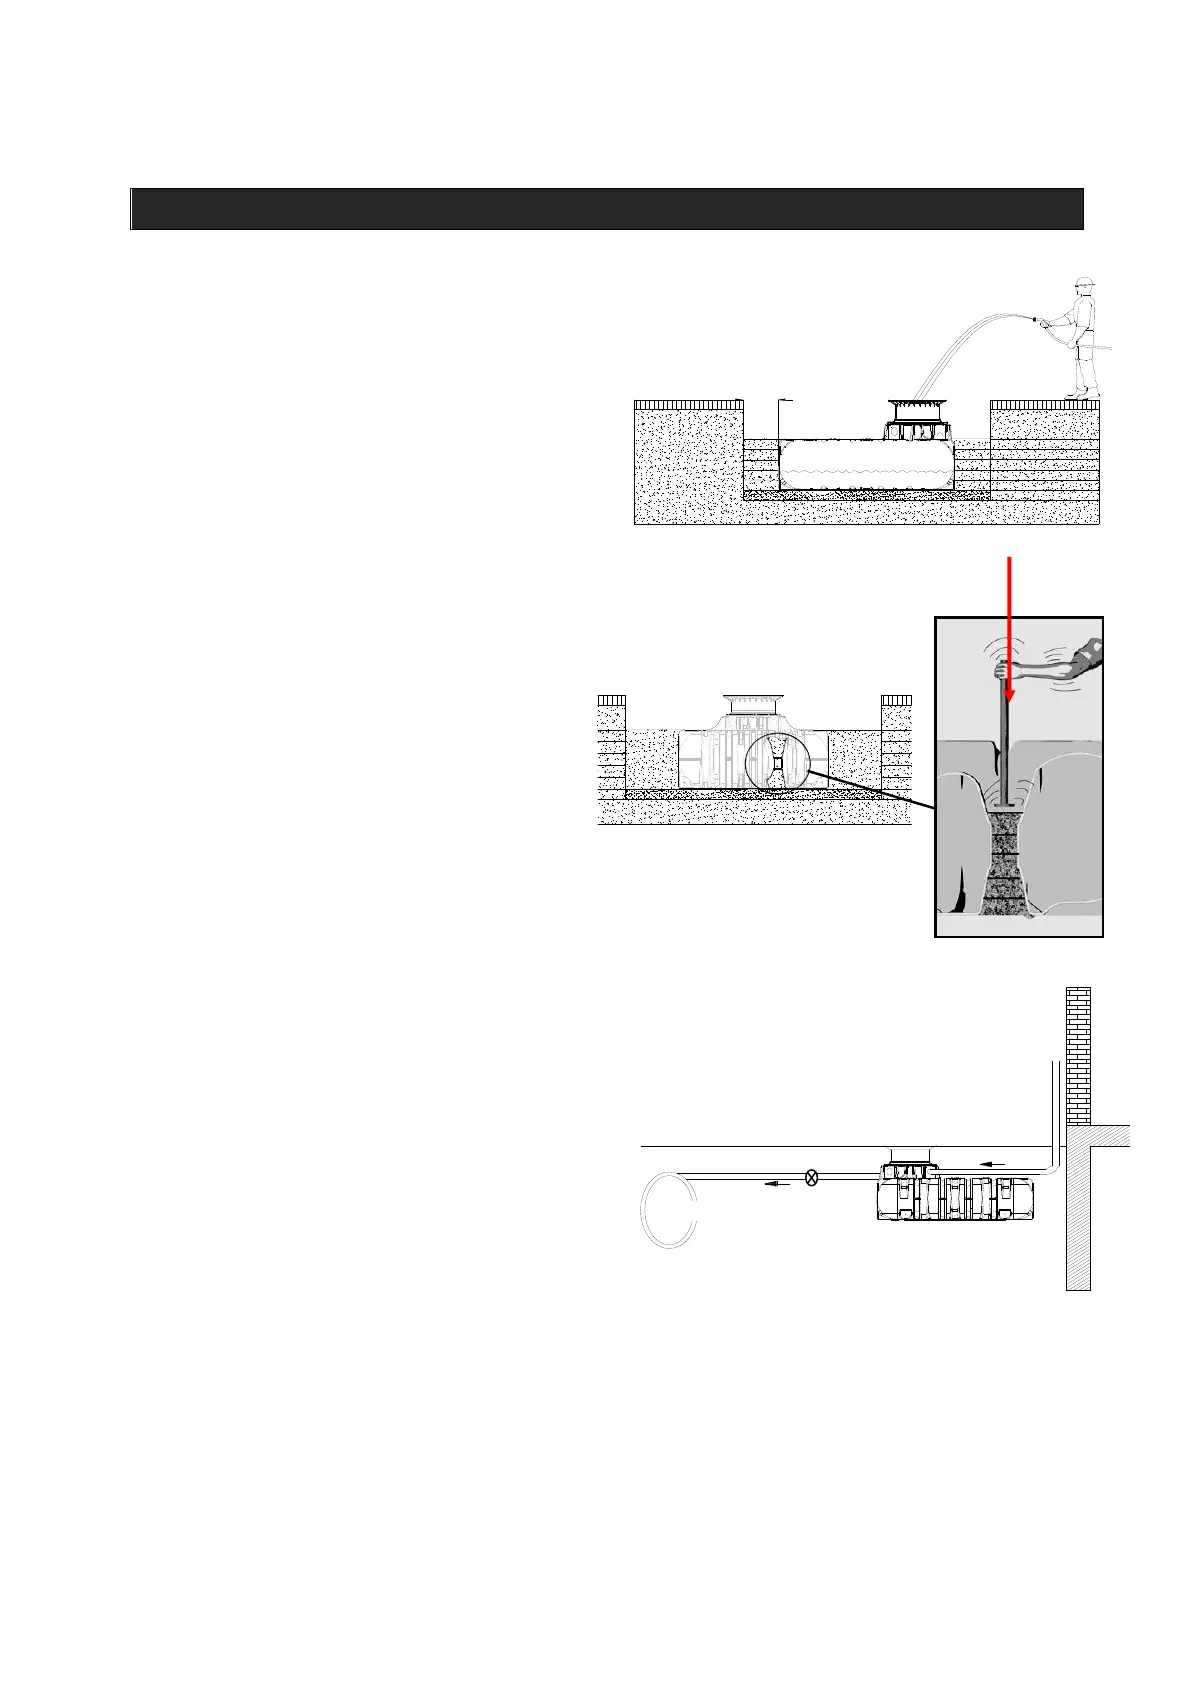
5.3 Insertion and filling
The tanks must be inserted, impact-free, into
the prepared trench using suitable
equipment. To avoid deformities, the tank is
to be 1/3 filled with water before undertaking
any backfilling.
Ensure minimum distances between trench
wall (100mm) and between tanks (500mm).
Once sufficient water is in the tank the
surrounding trench is then filled with 7mm
Minus in layers of 30 cm steps and is
manually compacted. See page 2.
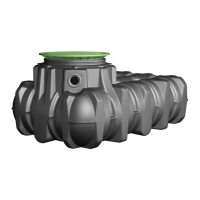
The individual layers as well as the
anti floatation holes (see pictures to the right)
must be well-compacted by manual tamper.
Damage to the tank must be avoided during
compaction. Mechanical compaction
machines must not be used under any
circumstances.
Note: The surrounding trench must be a
minimum 100mm wider on all sides than
then the tank.
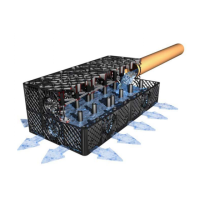
5.4 Plumbing connections
All feed and overflow pipes must be plumbed
with a decline of at least 1% in the direction of
flow (possible, subsequent settling must be
taken into consideration in this case). If the tank
overflow is connected to the public storm water,
this must be protected against reflux by means
of a Reflux Valve refer AS/NZS3500.1:2003
All suction, pressure and control lines must be
routed inside an empty pipe, which must be routed
as straight as possible, without bending, to the tank
with a decline. Necessary bends must be formed
using 45° moulded sections.
Important: The empty pipe must be connected to an aperture above the maximum water level.
5. Installation and assembly