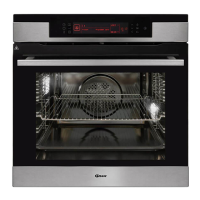
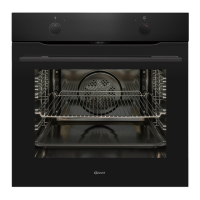
This document describes the Gram IO 18610-90 B, IO 18610-90 X, and IO 18610-90 W ovens, which are designed for household use. The manual emphasizes safety, proper operation, and maintenance to ensure efficient and long-lasting use of the appliance.
Function Description
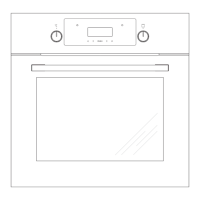
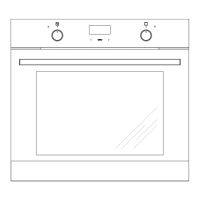
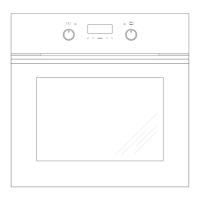
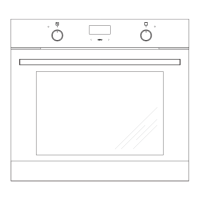
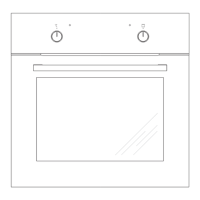
The oven is equipped with various heating functions to accommodate different cooking needs. These functions are selected using the oven function selection knob and the temperature control knob.
Oven Functions:
- Oven is off: The default state when no function is selected.
- Rapid Preheating: Activates the ring heater and roaster to quickly preheat the oven.
- Defrosting: Uses only the fan, with all heaters off, to gently defrost food.
- Fan and combined grill on: This function combines the grill and fan, speeding up grilling and enhancing the taste of dishes. It should be used with the oven door shut.
- Enhanced roaster (super roaster): Both the roaster and top heater are active, increasing the temperature in the upper part of the oven for browning and roasting larger food portions.
- Roaster on: Ideal for cooking small portions of meat (steaks, schnitzel, fish, toasts, Frankfurter sausages). Dishes should be 2-3 cm thick and turned over during roasting.
- Bottom heater on: Heats the oven using only the bottom heater, suitable for baking cakes from the bottom until done, especially moist cakes with fruit stuffing.
- Top and bottom heaters on: This is the conventional baking setting, ideal for cakes, meat, fish, bread, and pizza on one oven level. Preheating the oven and using a baking tray are recommended.
- Convection with ring heating element: Uses a heating element with forced air circulation by a rotating fan in the back wall. This allows for lower baking temperatures than conventional ovens and ensures uniform heat circulation.
- Convection with ring heating element and bottom heater on: The convection fan and bottom heater are on, increasing the temperature at the bottom of the dish for intense bottom heat, suitable for moist cakes and pizza.
- Top heater, bottom heater and fan are on: Most suitable for baking cakes, particularly convection baking. If the temperature knob is set to zero, only the fan will operate, which can be used to cool the dish or the oven chamber.
- Independent oven lighting: Turns on the oven interior light.
- Eco fan assisted heating: An optimized heating function designed to save energy. The oven lighting is off in this mode. Preheating is not recommended, and the oven door should not be opened during cooking.
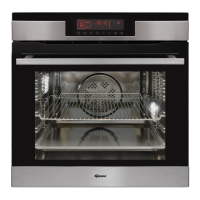
Oven Operation Signal Lights:
- Two signal lights (3 and 4) indicate oven operation.
- Light 4 turning on means the oven is working.
- Light 3 going out means the oven has reached the set temperature. For recipes requiring a warmed-up oven, wait until light 3 goes out for the first time. During baking, light 3 will cycle on and off to maintain the temperature.
- Light 4 may also turn on when "oven chamber lighting" is selected.
Usage Features
The oven is designed for ease of use and efficiency.
Before First Use:
- Remove all packaging and clean the oven interior.
- Wash oven fittings (grill grate, baking tray, roasting tray, sideracks) with warm water and a little washing-up liquid.
- Ensure good ventilation in the room by switching on a fan or opening a window.
- Heat the oven to 250°C for approximately 30 minutes to burn off any manufacturing residues. Afterwards, remove any stains and clean carefully.
Retractable Knobs:
The oven features retractable knobs for a sleek design. To select a function:
- Gently press and release a knob to make it pop out.
- Turn the knob to the desired function or temperature.
Symbols around the knob indicate available functions. The oven is switched off by setting both knobs to the "●"/"0" position.
Child Safety Lock:
The oven door includes a child safety lock to prevent accidental opening. The appliance is supplied with the lock engaged. To release it, follow the instructions in the manual. The lock re-engages automatically when the door is closed.
Baking Tips:
- Use the provided baking trays. Black trays are recommended for better heat conduction and shorter baking times.
- Avoid bright or shiny baking tins with conventional heating (top and bottom heaters) as they can lead to undercooked bases.
- Preheating is generally not necessary for the ultra-fan function but is recommended for other heating types.
- Check if cakes are ready by inserting a wooden stick; it should come out dry and clean.
- After baking, leaving cakes in the oven for about 5 minutes after switching off is advisable.
- When using the ultra-fan function, temperatures are usually 20-30 degrees lower than conventional baking.
- Refer to the manual's tables for approximate baking parameters, which can be adjusted based on experience.
Roasting Meat Tips:
- Cook meat weighing over 1 kg in the oven; smaller pieces can be cooked on gas burners.
- Use heatproof ovenware with high-temperature resistant handles.
- When roasting on the drying rack or grate, place a baking tray with a small amount of water on the lowest level to catch drips.
- Turn meat at least once during roasting and baste with its juices or hot salty water (avoid cold water).
Maintenance Features
Regular cleaning and maintenance are crucial for the oven's continued fault-free operation.
General Cleaning:
- Always switch off the oven and ensure all knobs are set to "●"/"0" before cleaning.
- Wait until the oven has completely cooled down.
- Clean the oven after every use. Turn on the oven lighting for better visibility.
- Use a cloth wrung out with warm water and a small amount of washing-up liquid for cleaning the oven chamber.
- Do not use harsh abrasive cleaners or sharp metal objects on the oven door glass to prevent scratching and potential shattering.
- Do not use steam cleaning devices.
Steam Cleaning Function:
- Pour 250ml of water (1 glass) into a bowl placed on the first level from the bottom of the oven.
- Close the oven door.
- Set the temperature knob to 50°C and the function knob to the bottom heater position.
- Heat the oven chamber for approximately 30 minutes.
- Open the oven door, wipe the chamber with a cloth or sponge, and wash with warm water and washing-up liquid.
- Wipe the chamber dry after cleaning.
Replacing the Halogen Bulb:
- Disconnect the appliance from the electric mains to avoid electric shock.
- Unplug the appliance.
- Remove shelves and trays.
- Unscrew and wash the lamp cover, then wipe it dry.
- Pull out the halogen bulb using a cloth or paper. Replace with a new 230V, 25W halogen bulb if necessary.
- Replace the halogen bulb in its socket.
- Screw in the lamp cover.
- Caution: Do not touch the halogen bulb directly with your fingers.
Removing and Installing Wire Shelf Supports:
- Wire shelf supports are easy to remove for washing.
- Pull the front catch, tilt the support, and remove it from the rear catch.
- Installation is the reverse process.
Door Removal and Inner Panel Cleaning:
-
To clean the oven chamber more easily, the door can be removed.
-
Tilt the safety catch part of the hinge upwards (Fig. A).
-
Close the door lightly, lift, and pull it out.
-
To refit, ensure the hinge notch is correctly placed on the hinge holder protrusion.
-
Carefully lower the safety catch after fitting the door. Failure to do so may damage the hinge.
-
Removing the inner panel:
- Pull the upper door slat loose (Fig. B, C).
- Pull the inner glass panel from its seat in the lower section of the door (Fig. D, D1).
- Clean the panel with warm water and cleaning agent.
- Reassemble in reverse order, ensuring the smooth surface of the glass panel faces upwards.
- Important: When fitting the top door strip, first place the left end on the door, then press the right end until it clicks, and finally press the left end until it clicks.
Regular Inspections:
- Periodically inspect control elements and cooking units.
- After the guarantee expires, have a technical inspection at a service centre at least every two years.
- Fix any operational faults promptly.
- Carry out periodical maintenance of the oven's cooking units.
- Caution: All repairs and regulatory activities must be performed by an appropriate service centre or authorized fitter.
Troubleshooting (In Case of Emergency):
- If the appliance does not work, check the household fuse box and replace a blown fuse if necessary.
- If the oven lighting does not work, the bulb may be loose or damaged. Tighten or replace the blown bulb.
- In an emergency, switch off all working units, disconnect the mains plug, and call the service centre.