Grandstream HT814 and HT818 ATA Device Installation Guide
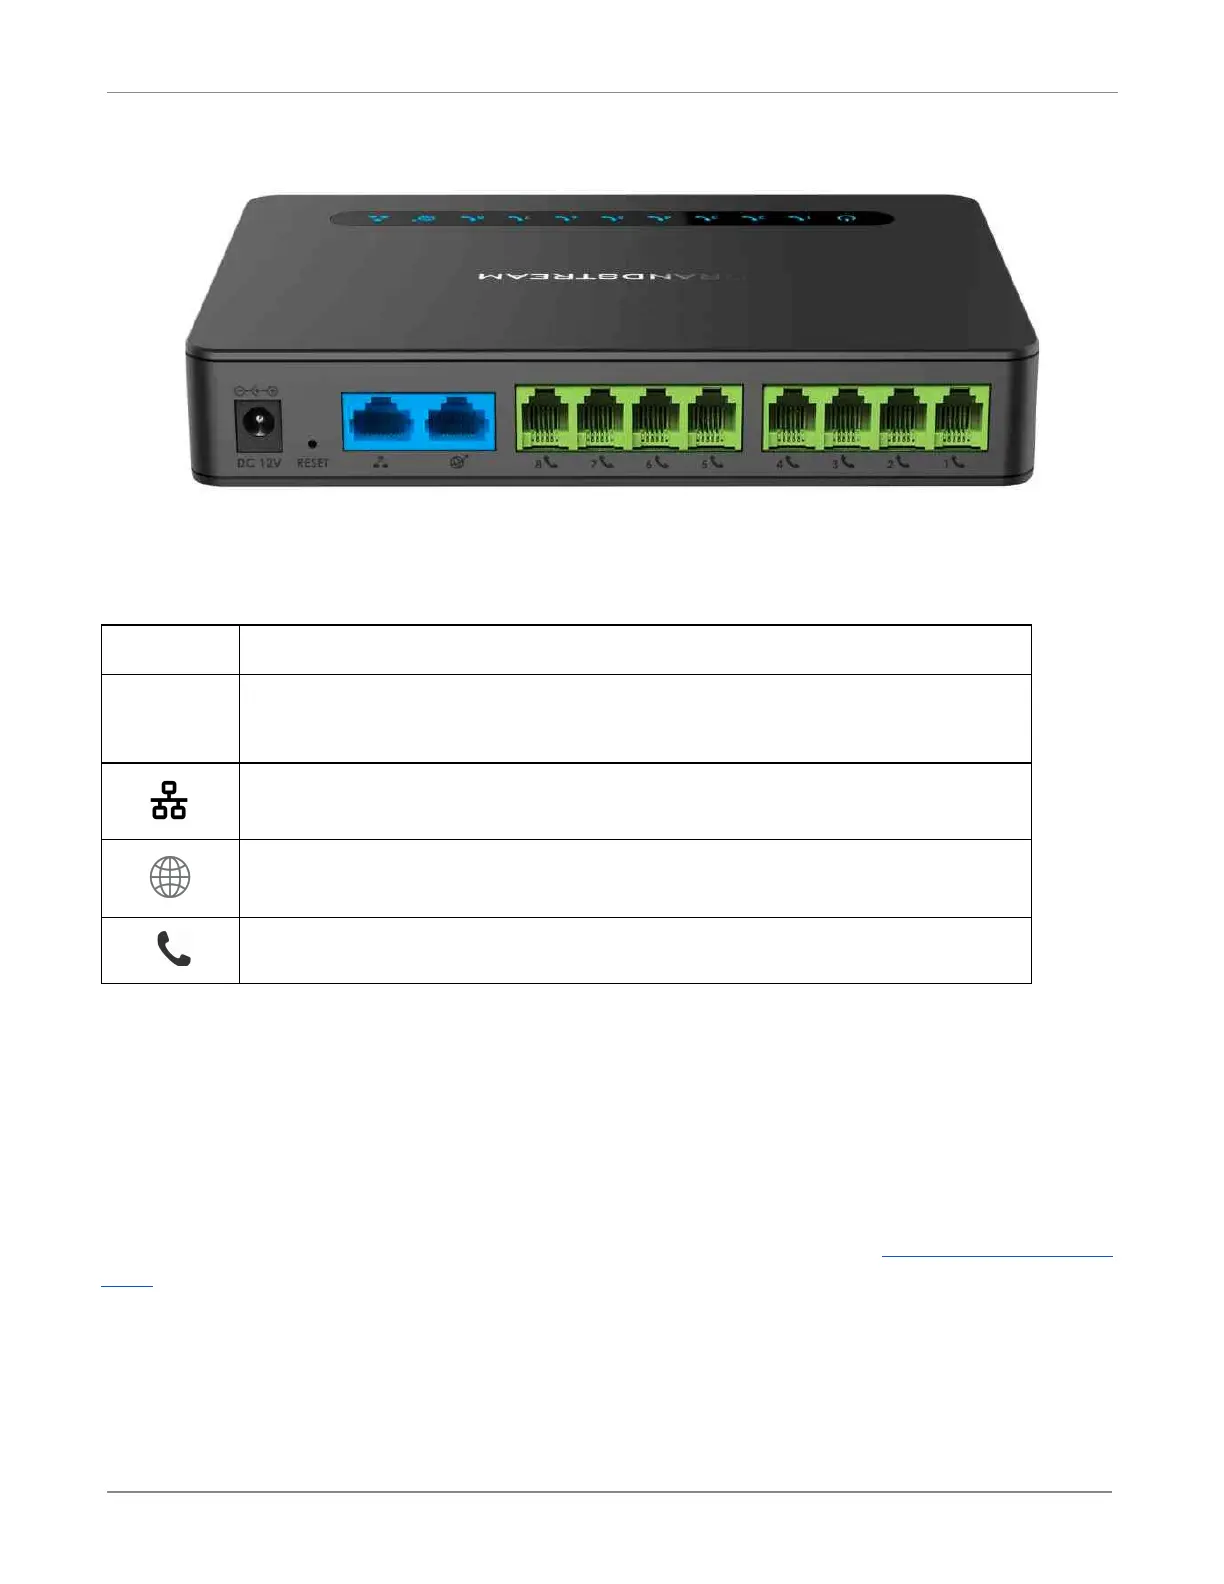
The rear panel of the HT818 has a power connection, eight RJ11 telephone connectors, and two RJ45 network
connectors, as shown in the following picture:
HT818 Rear View
The connectors are used as follows:
Power connector. Connect the provided AC power supply here.
Note: Does not operate on Power over Ethernet (PoE).
Connection to the local network (if used as a local device) or to a WAN connection (if
used as a remote device).
The LAN port is only used to access the HT814 or HT818’s built-in configuration server from a connected laptop.
This is necessary to perform the initial configuration. After the device is configured, the LAN cable can be
disconnected.
Pre-Installation Configuration
Ensure that the HT814 or HT818 device is added to the customer system and correctly provisioned using the
portal. ATA devices are added via the Multi-Extension Devices page in the portal. Analog phone and fax Extensions
are configured via the Extensions page in the portal. For more information, refer to the ATAs Portal Configuration
Guide.
The HT814 and HT818 can be configured for either local (On-Net) or remote (off-net) use. If you are re-deploying
an HT814 or HT818 that was already configured, follow the instructions in the Factory Reset
section below. Then,
configure the device for either local or remote operation. A device configured for local operation does not work as
a remote device and vice-versa, so it is important to apply the correct configuration to the HT814 or HT818.
Page 2
 Loading...