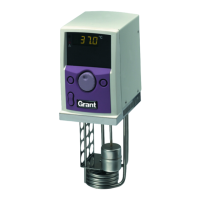
6 Removal and Access
WARNING: Before carrying out the
following procedures switch off the unit and
disconnect it from the power supply. For
some procedures it may be necessary to
remove the safety protective earth
connection from the ac power input socket
and/or internal earth connections. You must
ensure that these connections are remade
tightly on completion of reassembly.
6.1 Tools Required
62 nonslip cross point screwdrivers
(small & medium blade)
61 flat or socket spanner 14mm A/F
61 socket wrench 2mm
6Heat conducting paste (for triac and
temperature probe)
6Pencil bit soldering iron
6.2 Removal of Cover
Remove four fixing screws 'B' using
the 2.0mm socket wrench. Loosen two
screws 'A' in rear of unit. Carefully slide
cover off, checking that the earth wire is not
caught.
When clear of unit unplug earth wire.
Replace cover in reverse order. When
replacing ensure that the tongue on the
cover correctly fits into the recess in the
middle of the front moulding and the slots go
over the rear screws.
Ensure that the cover earth wire is
reconnected.
6.3 Removal of front panel assembly
Remove the two screws marked 'C' in
chassis under the panel. Remove leads from
mains switch. Disconnect plugs 5&7 from
display pcb. Remove neons from holes in
front panel. Note: the neon with the yellow
sleeve goes into the lower hole for refitting.
Unscrew over-temperature cut-out from
panel and remove carefully, noting positions
of button, spring and stop plate (see FIG 20).
With a small screwdriver gently lift clips
holding printed circuit board. Panel is now
free to be removed.
See Fig 7
See Fig 8
6.4 Removal of Display PCB.
Remove front panel above.
Remove processor IC9 to gain
access to pcb clip.
Unscrew over temperature cut out and
remove carefully noting position of button,
spring and stop plate. for re-
assembly. (GD 120 only).
Squeeze together the two clips 'D'
and lift off PCB.
6.5 Removal of PSU PCB.
Unplug all wires in turn from the PCB
recording position of each one.
Remove screw and nut 'F' holding triac to its
heat sink. Remove two screws 'E' holding
PCB to rear panel.
With a small screwdriver gently lift clips
holding the board to the front panel.
. The board may now be removed.
Note: When fitting new board apply a small
amount of heat conducting paste to the face
of the triac before screwing to the heat sink.
6.6 Removal of Heater.
Remove the leads from the heater
terminals. Unclip cut out bulb from heater
stem. Remove the two screws 'G' this will
release the heater. (In the case of GD100
these screws also hold one side of the
deflector plate).
6.7 Removal of Probe.
Remove the front panel .
Remove the psu pcb without unplugging the
leads .
This will allow the printed circuit board to be
moved aside far enough to allow the probe to
be withdrawn from the unit.
Remove the fixing screw 'N' and withdraw
probe from unit.
See Figs 9 & 10.
see 6.3
(see Fig 9)
See Fig 20
(see Fig
10)
See Figs 11 & 12.
(see Fig
12)
See Fig 13
See Fig 14
(see 6.3)
(see 6.5)
GD100/GD120
Part No. 17592/Issue 1 July 2002
Page 12