GRAUPNER GmbH & Co. KG D-73230 KIRCHHEIM/TECK GERMANY
Änderungen vorbehalten! Keine Haftung für Druckfehler Ident. # 0059200 10.2008
37
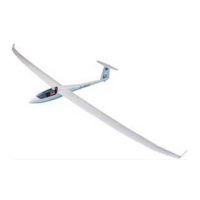
The outboard wing panels
All the joint areas for the servo mounts must be roughened using abrasive paper
before the servos are installed; the joint areas should have an overall matt
appearance (see also the note after the Adhesive table).
The aileron servo is installed in the outboard wing panel using the mounts supplied,
with the pushrod pointing directly to the aileron horn. The two servo mounts are first
fitted to the servo, then glued in the wing.
When the joints have set hard, remove the servo again and apply more glue round
the servo mounts to reinforce the joints. Ensure that you don’t apply glue to the area
where the servo fits.
Install the servo again once the glue has cured. Cut down the threaded shank of the
aileron horn to 8 mm, screw it to the aileron and make up the pushrod, which consists
of a piece of M2.5 studding, two M2.5 nuts and two M2.5 clevises. Measure off the
length of the pushrod from pivot pin to pivot pin, and cut the M2.5 studding to the
length required.
Cut down the cruciform servo output levers to the shapes shown in the photo.
The aileron must be at neutral when the aileron servo is at its centre position. When
the pushrod is adjusted correctly, apply a drop of UHU schraubensicher (thread-lock
fluid) to the clevis threads to prevent them working loose. Attach the servo well cover
using strips of adhesive tape. Repeat the whole procedure with the other aileron.
The small tip aileron is actuated by means of a steel pin which is simply glued into
the primary aileron as shown in the series of photos: first push the pin into the
aileron, leaving it projecting by about 2.5 mm, corresponding to full down-travel of
the aileron. Now use a pair of pointed-nose plies to push the steel pin into the tip
aileron to a depth of about 5 mm.
Inject a little epoxy into the primary aileron to prevent the steel pin slipping out.
The inboard wing panels
File a slot in the aileron leading edge to accept the aileron horn; it must be exactly in
the centre of the pushrod fairing. You will also need to pierce the wing trailing edge to
allow the aileron pushrod and clevis to pass through. Glue the horn in the aileron in
such a way that it rests squarely on the bottom shell; note that the linkage hole for the
clevis must line up accurately with the aileron hinge pivot axis.
To enable the camber-changing flaps to deflect up as well as down, the pushrod
fairing on the wing (not on the aileron) must be sanded back at an angle over a
distance of about 2 mm, so that a gap about 2 mm wide (measured at the top) is
present when the flap is at the neutral position; hold the flap at the full-down position
when filing back the fairing. The linkage hole in the output arm for the airbrake servo
must be drilled out to 2 mm Ø at a lever length of 11 mm. Now assemble and install
the swivel pushrod connector; tighten the self-locking nut just to the point where the
connector swivels smoothly, but without noticeable lost motion.
 Loading...