EasyManua.ls Logo

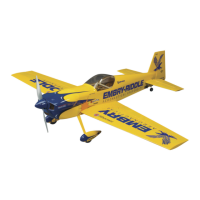
GREAT PLANES Christen Eagle II User Manual

GREAT PLANES Christen Eagle II
52 pages
To Next Page IconTo Next Page
Page #1 background imageLoading...
Page #1 background image
WARRANTY
Great Planes
®
Model Manufacturing Co. guarantees this kit to be free from defects in both material and workmanship at the date of
purchase. This warranty does not cover any component parts damaged by use or modification. In no case shall Great Planes' liability
exceed the original cost of the purchased kit. Further, Great Planes reserves the right to change or modify this warranty without notice.
In that Great Planes has no control over the final assembly or material used for final assembly, no liability shall be assumed nor
accepted for any damage resulting from the use by the user of the final user-assembled product. By the act of using the user-assembled
product, the user accepts all resulting liability.
If the buyer is not prepared to accept the liability associated with the use of this product, the buyer is advised to return this
kit immediately in new and unused condition to the place of purchase.
READ THROUGH THIS MANUAL BEFORE
STARTING CONSTRUCTION. IT CONTAINS
IMPORTANT WARNINGS AND INSTRUCTIONS
CONCERNING THE ASSEMBLY AND USE OF
THIS MODEL.
GPMZ0222 for GPMA1217 V1.0© Copyright 2003
Champaign, Illinois
(217) 398-8970, Ext 5
airsupport@greatplanes.com
INSTRUCTION MANUAL
Scale: 28.7%
Length: 62.5 in [1585mm]
Wingspan:Top: 68.5 in [1740mm],
Bottom: 64.5 in [1640mm]
Combined Wing Area: 1436 sq in [92.6 dm
2
]
Weight: 16.5 - 18 lbs [6800 - 8160 g]
Wing Loading: 26 - 29 oz/sq ft [79 - 88 g/dm
2
]
Radio: 4-channel, 8-9 servos
Engine: 1.6 - 2.2 cu in [26 - 35cc] two-stroke,
1.8 - 3.0 cu in [30 - 49cc] four-stroke,
2.0 - 3.2 cu in [32 - 52cc] gas

Table of Contents

Question and Answer IconNeed help?

Do you have a question about the GREAT PLANES Christen Eagle II and is the answer not in the manual?

GREAT PLANES Christen Eagle II Specifications

General IconGeneral
BrandGREAT PLANES
ModelChristen Eagle II
CategoryToy
LanguageEnglish

Summary

Introduction

IMAA

Information on the International Miniature Aircraft Association.

Scale Competition

Guidelines for competing in scale events.

Safety Precautions

Essential safety guidelines for modelers.

Decisions You Must Make

Key choices before starting assembly.

Radio Equipment

Selecting and setting up radio gear.

Engine Recommendations

Guidance on choosing engines.

Important Building Notes

Kit Inspection

Verifying kit completeness and quality before building.

Ordering Replacement Parts

Kit Contents

Itemized list of parts included in the kit.

Assemble the Wings

Prepare the Wings

Initial steps for wing panel preparation.

Hinge the Ailerons

Instructions for hinging aileron control surfaces.

Join the Wings

Process for joining wing panels together.

Hook Up the Ailerons

Connecting aileron servos and pushrods.

Assemble the Fuselage

Prepare the Tail Surfaces for Hingin

Preparing tail components for hinging.

Join the Stab and Fin to the Fuselage

Attaching the horizontal stabilizer and fin.

Mount the Engine

General instructions for mounting the aircraft engine.

Mounting a U.S. Engines 41cc Engine

Specific steps for mounting a US Engines 41cc engine.

Mounting a Fuji BT-50SB Gas Engine

Specific steps for mounting a Fuji BT-50SB gas engine.

Mount the Cowl

Securing the engine cowl to the fuselage.

Mount the Landing Gear

Fuelproof the Landing Gear Cutout

Protecting fuselage areas from fuel and exhaust.

Prepare the Wheel Pants

Steps to prepare wheel pants for installation.

Prepare the Landing Gear

Getting landing gear components ready.

Mount the Landing Gear Fairings

Attaching landing gear fairings to fuselage.

Mount the Wheel Pants

Securing wheel pants to the landing gear.

Final Assembly

Mount the Servos

Installing servos for control surfaces.

Mount the Tail Gear

Attaching the tail gear assembly.

Assemble the Fuel Tank

Preparing and installing the fuel tank.

Hook Up the Throttle

Connecting throttle servo and linkage.

Mount the Kill Switch

Installing engine kill switch for spark ignition.

Finish the Cockpit

Detailing and finishing the cockpit area.

Mount the Canopy

Attaching the aircraft canopy.

Glue on the Belly Pan

Attaching the belly pan to the fuselage.

Mount the Wings

Securing the wings to the fuselage.

Mount the Flying Wires (Optional)

Installing optional semi-scale flying wires.

Install the Aileron Extension Cord

Connecting aileron servo extensions.

Complete the Radio Installation

Finalizing radio setup and connections.

Get the Model Ready to Fly

Apply the Decals

Applying model decals for finishing.

Balance the Model (C.G.)

Setting correct Center of Gravity for safe flight.

Check the Control Directions

Verifying control surface response direction.

Set the Control Throws

Adjusting control surface travel for flight.

Balance the Model Laterally

Achieving lateral balance for stable flight.

Preflight

Charge the Batteries

Ensuring transmitter and receiver batteries are charged.

Balance Propellers

Balancing propellers to prevent vibration.

Ground Check

Pre-flight checks before starting the engine.

Engine Safety Precautions

Critical safety measures for engine operation.

Range Check

Testing the radio control range.

AMA Safety Code

Academy of Model Aeronautics safety guidelines.

IMAA Safety Code

International Miniature Aircraft Association safety rules.

Flying

Fuel Mixture Adjustments

Adjusting fuel mixture for engine performance.

Takeoff

Procedures for launching the model.

Flight

General flying techniques and advice.

Landing

Techniques for safe model landings.

Related product manuals