D 4. The unsightly glue that is visible now can be
hidden by applying striping tape around the base and back
of the canopy.
WING SEATING
D 1. Apply 1/4" wide foam wing seating tape to the
wing saddle area to seal the wing/fuse joints.*
D 2. Also apply a couple pieces of the roam tape to the
1/4" ply wing hold-down plate, which helps to distribute
the load when the nylon bolts are tightened.
*NOTE: An alternate method or sealing the wing/ruse
joint is to use "silicone bathtub sealer". This is an
excellent method, used by many experts because it results
in a permanent and nearly perfect wing saddle joint.
Briefly, the technique is as follows: 1. Cover the top of the
wing center section with waxed paper or plastic kitchen
wrap. Pull out all wrinkles and tape it to the wing. 2.
Squeeze out a bead of silicone sealer onto the wing saddle
area
of
the
fuselage.
3. Lay
the
wing
in
into
saddle and push
down gently. The excess silicone sealer will squeeze out.
4. Allow to dry without disturbing for at least 24 hours. 5.
Remove the tape, then remove the wing from the saddle
(leaving the waxed paper or plastic wrap in place). 6.
Gcnily pull the waxed paper or plastic wrap away from the
sealer. 7. Using a new single-edge razor blade, trim the
sealer flush with the fuse sides.
BALANCE YOUR MODEL
NOTE:
This
section
is
VERY
important
and
must
not
be
omitted!
A
model
that is
not
properly
balanced
will
be
unstable and possibly unflyable.
D 1. Accurately mark the balance point on the bottom
of the wing on both sides of the fuselage. The balance
point is shown on the plan (CG), and is located approxi-
mately 35% back from the leading edge at the midpoint of
each wing panel (7-3/8 inches forward of the trailing edge
of the ailerons). This is the balance point at which your
model should balance for your first flights. Later, you may
wish to experiment by shifting the balance up to 1/4"
forward or back to change the flying characteristics.
Moving the balance forward may improve the smooth-
ness and arrow-like tracking, but it may then require more
speed lor takeoff and make it more difficult to slow down
for landing. Moving the balance aft makes the model
more
agile
with
a
ligliler
and snappier
"feel"
and
often
improves knife-edge capabilities. In any case, do not
balance your model outside the recommended range.
D 2. With the wing attached to the fuselage, all parts of
the model installed - wheels, spinner, etc. (ready to fly),
and an empty fuel tank, hold the model with the stabilizer
level.
D 3. Lift the model at the CG marks. If the tail drops
when you
lift,
the
model
is
"tail
heavy" and you
must
add
weight* to the nose to balance. If the nose drops, it is "nose
heavy" and you must add weight* to the tail to balance.
NOTE: Nose weight may be easily installed by using a
Prather "Spinner Weight" (available in assorted weights,
up to 2 ounces), or by gluing strips of lead into the tank
compartment. Tail weight may be added by using Prather
"stick-on" lead weights, and, later, if the balance proves to
be OK you can open the fuse bottom and glue these in
permanently.
*If possible, first attempt to balance the model by
changing the position of the receiver and battery. If you
arc unable to obtain good balance by doing so, then it will
be necessary to add weight to the nose or tail to achieve the
proper balance point.
FINAL HOOKUPS AND CHECKS
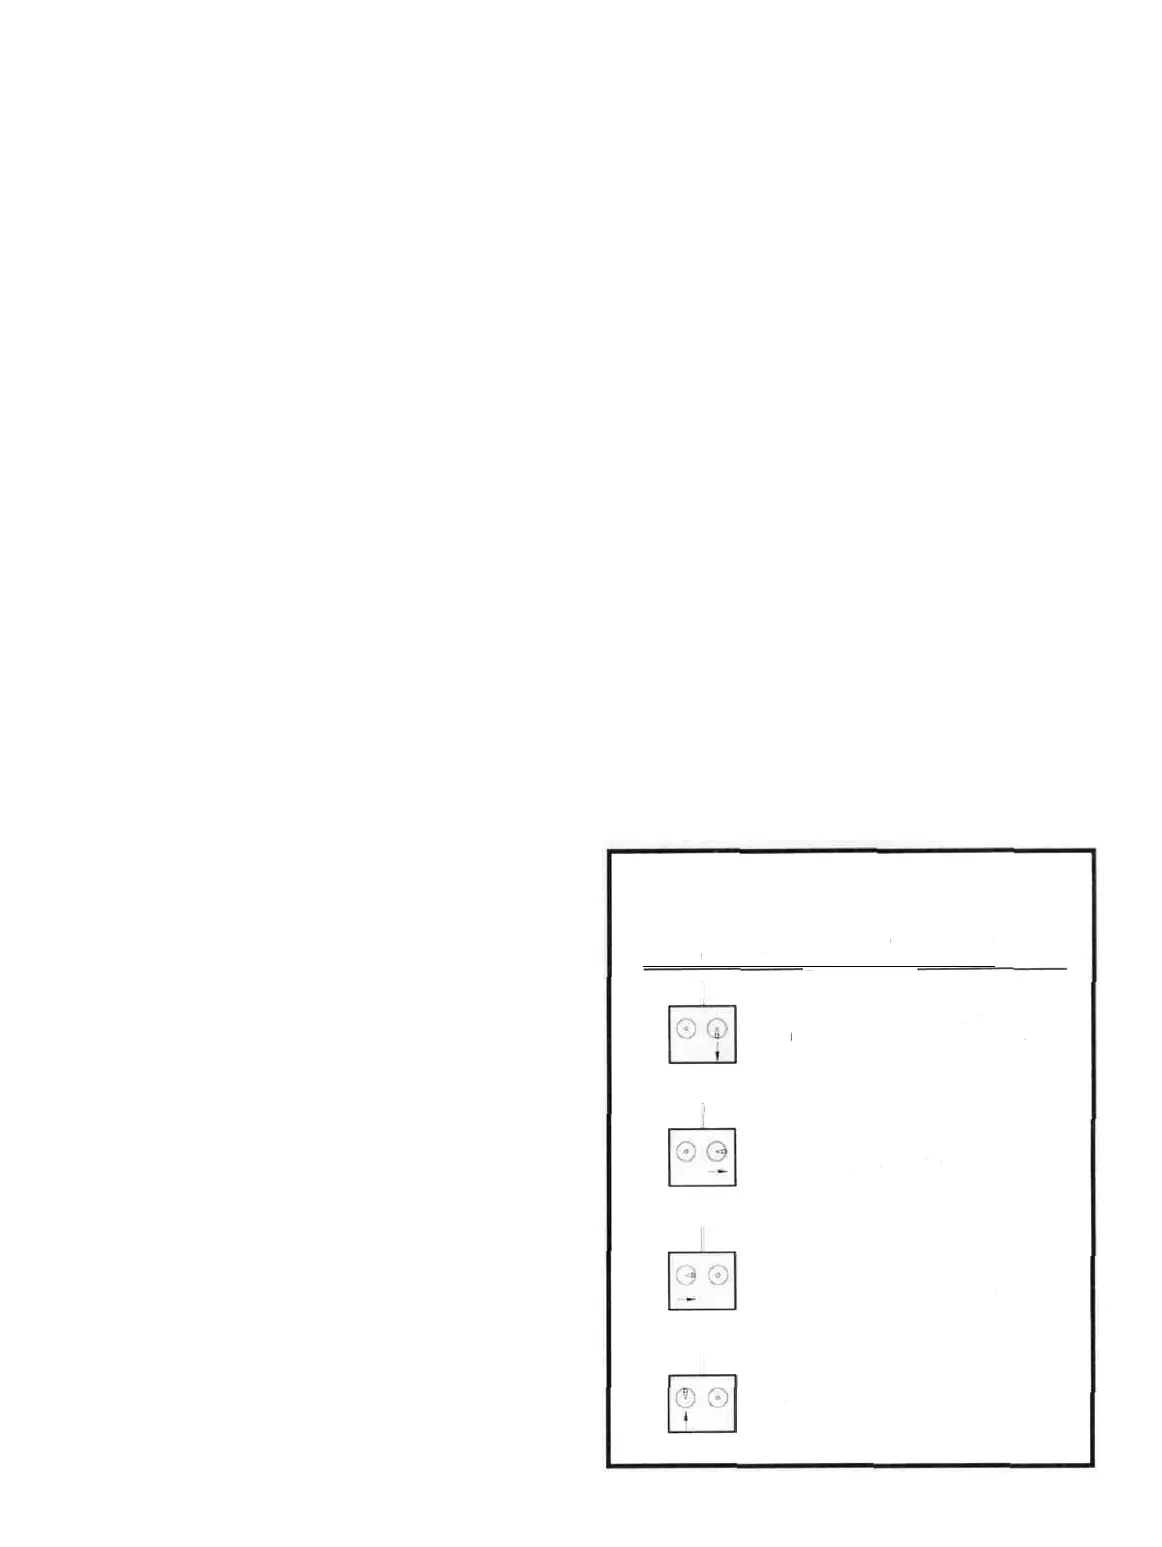
D 1. Make sure the control surfaces move in the proper
direction as illustrated in the following sketches:
CARBURETOR WIDE OPEN
RUDDER MOVES RIGHT
NOSE- WHEEL TURNS RIGHT
RIGHT AlLERON MOVES UP
LEFT AlLERON MOVES DOWN
ELEVATOR MOVES UP
TRANSMITTER
CONTROL
SURFACE
STICK MOVEMENTS__________MOVEMENTS
TRANSMITTER SETUP
36