52
Installation and Maintenance
Service Manual
2. Install Drain Joint(Only for cooling and heating unit)
(1) Connect the outdoor drain joint into the hole on the chassis. (2) Connect the drain hose into the drain vent.
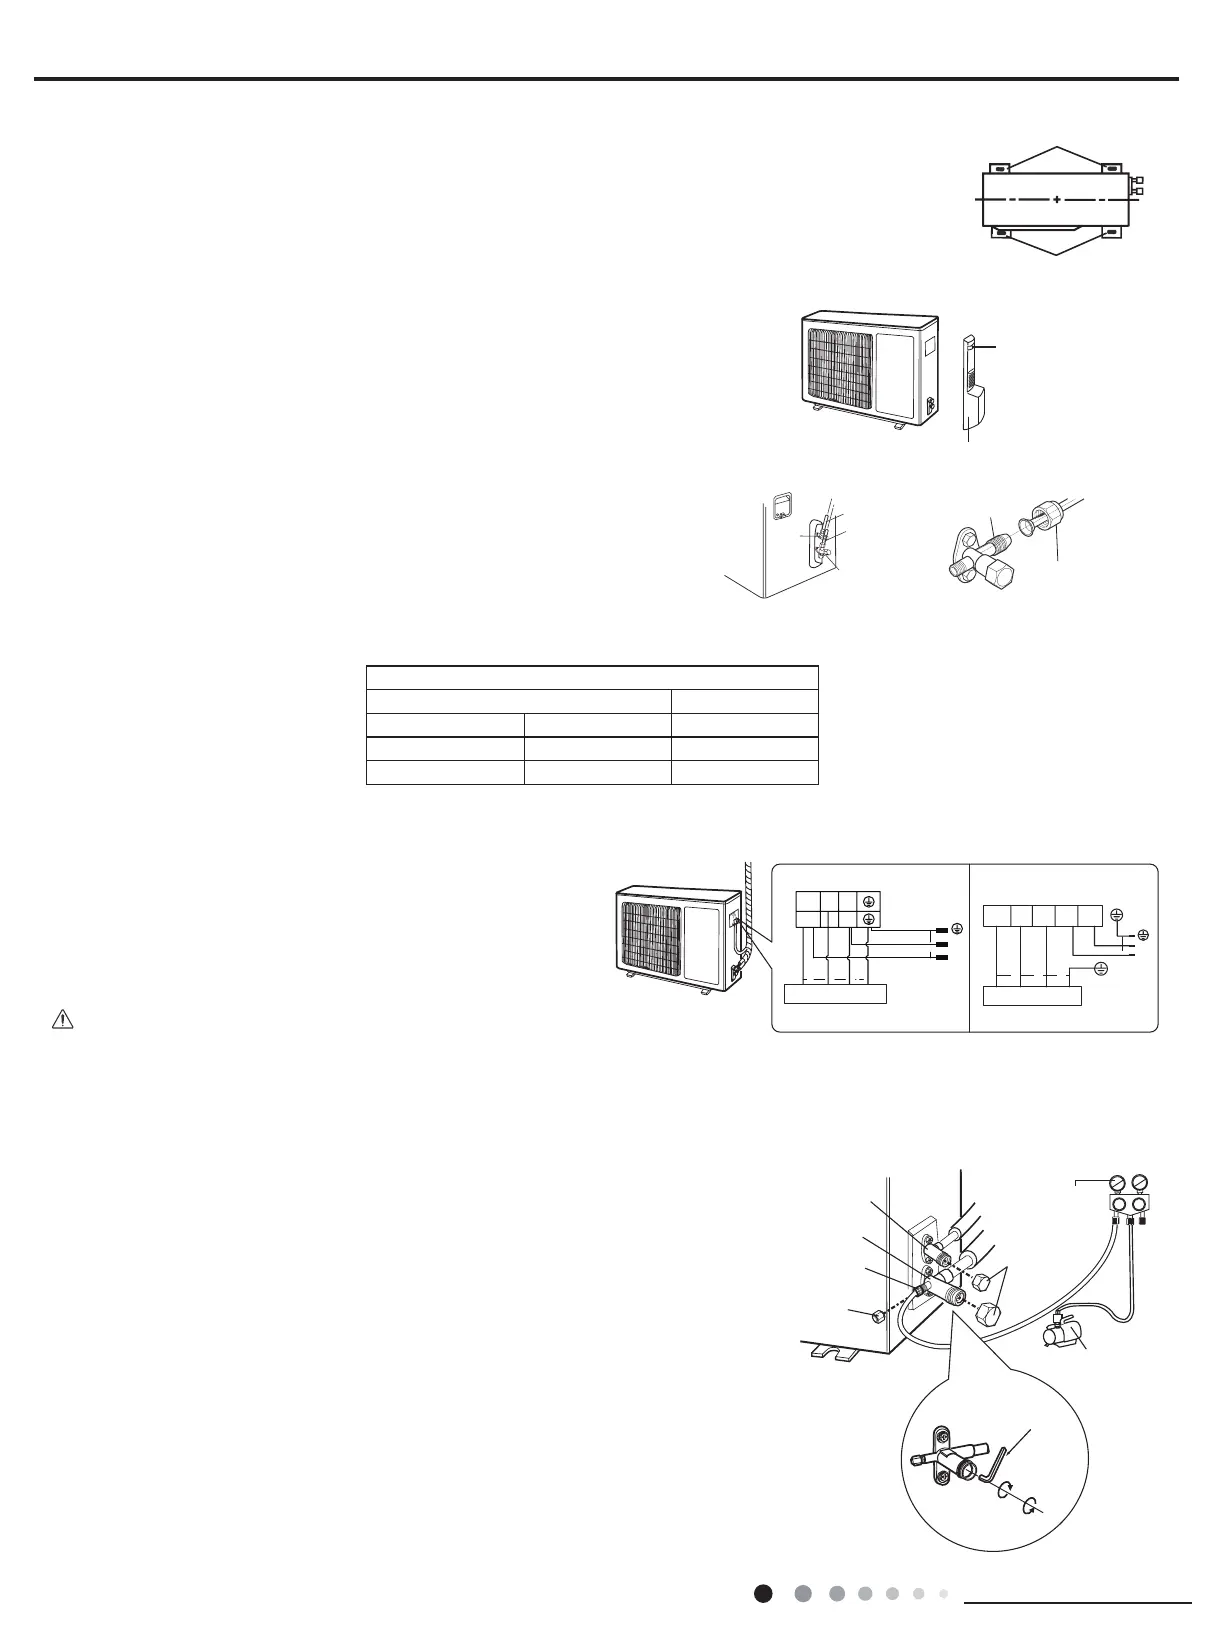
3. Fix Outdoor Unit
(1) Place the outdoor unit on the support. (2) Fix the foot holes of outdoor unit with bolts.
gas pipe
Liquid pipe
Liquid
valve
gas valve
Pipe joint
4. Fix Outdoor Unit
(1) Remove the screw on the right handle of outdoor unit and then remove the handle.
(2) Remove the screw cap of valve and aim the pipe joint at the bellmouth of pipe.
(3) Pretightening the union nut with hand.
(4) Tighten the union nut with torque wrench .
Refer to the following table for wrench moment of force
:
(1) After tightening the screw, pull the power cord slightly to
check if it is rm.
(2) Never cut the power connection wire to prolong or shorten
the distance.
Note:
5. Connect Outdoor Electric Wire
(1) Remove the wire clip; connect the power connection wire to the
wiring terminal according to the color; x them with screws.
(2) Fix the power connection wire with wire clip.
Indoor unit connectionIndoor unit connection
23L
L
N
NN(1)
POWER
blue
blue
black
(black)
brownbrown
blue
blue
black
(black)
brown
brown
yellow-
green
yellow-
green
yellow-
green
yellow-
green
18K:
12K:
NL
N(1) 23
POWER
N
L
Liquid valve
Gas valve
Refrigerant charging
vent
Nut of refrigerant
Charging vent
Vacuum pump
Piezometer
Valve cap
Lo Hi
Inner hexagon
spanner
Open
Close
1. Use Vacuum Pump
(1) Remove the valve caps on the liquid valve and gas valve and the nut of
refrigerant charging vent.
(2) Connect the charging hose of piezometer to the refrigerant charging vent of
gas valve and then connect the other charging hose to the vacuum pump.
(3) Open the piezometer completely and operate for 10-15min to check if the
pressure of piezometer remains in -0.1MPa.
(4) Close the vacuum pump and maintain this status for 1-2min to check if the
pressure of piezometer remains in -0.1MPa. If the pressure decreases, there
may be leakage.
(5) Remove the piezometer, open the valve core of liquid valve and gas valve
completely with inner hexagon spanner.
(6) Tighten the screw caps of valves and refrigerant charging vent.
8.4 Vacuum Pumping and Leak Detection
.
Flare nut tightening torque
Gas side Liquid side
12K 18K 12K/18K
3/8 inch 1/2 inch 1/4 inch
31-35 N.m 50-55 N.m 15-20 N.m
 Loading...