GMV5 DC INVERTER VRF UNITS SERVICE MANUAL
173
is faulty. Check communication lines connecting the ODU and IDUs.
Note: After AP1 is replaced, you should power on the ODU and IDUs at the same time or power on the
ODU first; otherwise, ―CC does not have module‖ will be prompted and a ―C0 fault‖ alarm will be reported
by the IDUs.
③Master ODU engineering debug setting
Debug the entire system after master module AP1 replacement.
④System parameter setting
After system debug, reset system parameters. For details, refer to section 1 ―ODU Function Setting‖, in
part II, chapter III.
1.3 Cautions on Replacement of Slave ODU AP1
Before replacing slave module AP1, set DIP identical to that of the faulty AP1, check wiring, and then
power on the AP1.
2. Cautions on IDU AP1 Replacement
Before replacing IDU AP1, determine the module is a master IDU or a slave IDU.
2.1 AP1 DIP Setting and Jumper Cap Confirmation
Whatever the AP1 you replace is a master IDU AP1 or a slave IDU AP1, after it is replaced,
check original DIP setting and model.
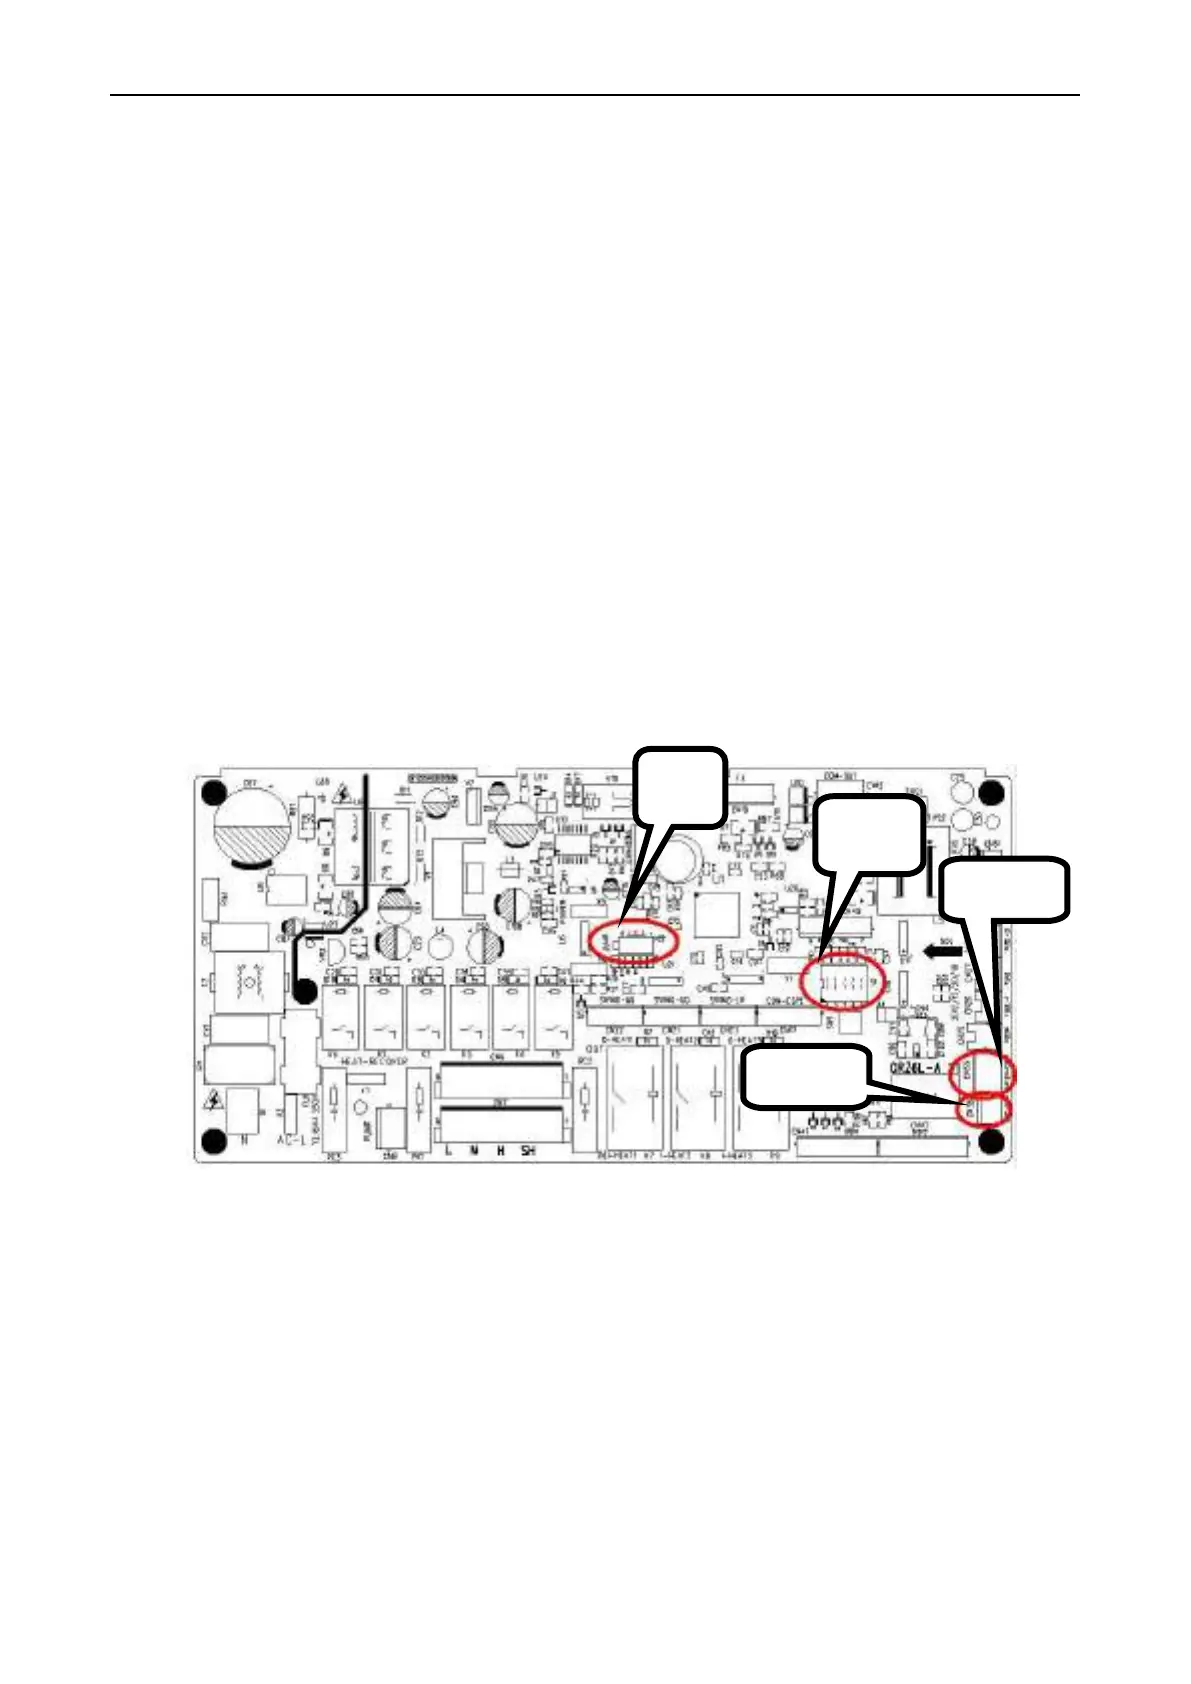
Configure capacity DIP for the new AP1 and confirm its jumper cap, fan overload detect
terminal, and overflow detect terminal. They should be kept identical to those of the faulty
AP1.
Their positions and corresponding silkscreen are as follows:
Capacity DIP: S1 (Capacity)
Jumper cap: U22 (Jump)
Overflow detect terminal: CN35(WATER-DTCT)
Fan overload detect terminal: CN36(OVC-FAN)
2.2. Restoring AP1 Engineering Parameters to Factory Settings (This Step Is Not
Required for Original Packaged Parts)
After wiring, whatever the AP1 is a master IDU AP1 or a slave IDU AP1, the new AP1 must
be restored to factory settings. There are three methods to restore engineering parameter
settings:
① If the IDU is configured with wired control, set P35 and P36 to default values.
② If the IDU is configured with wireless control, use the special control YV1L1 to set P35
and P36 to default values.
③ If the IDU is configured with wireless control and special control, you can restore
engineering settings through the AP1 SW1 button. After AP1 is powered on, press and
hold SW1 for 5 seconds. If a tick sound is heard, release the button.
 Loading...