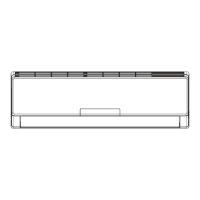
Installation de l'unité intérieure
Avis:
• Faites attention à la poussière et prenez
les précautions nécessaires lorsque vous
percez le trou.
• Vous devez vous procurer les chevilles
en plastique qui ne sont pas fournies.
1.Le tuyau peut être dirigé vers la
droite, l'arrière-droite, la gauche ou
l'arrière-gauche.
1.Alignez l'union du tuyau avec
l'orifice évasé correspondant.
2.Vissez l’écrou-raccord à la ma
in.
3.Serrez l'écrou-raccord à l’aide de la clé pour contre-écrou et de la clé
dynamométrique et appliquer la force de torsion selon le tableau de la
page suivante.
2. Lorsque vous aurez décidé où ira
le tuyau (gauche ou droite), assu-
rez-vous de faire un trou du côté
équivalent dans le bas du boîtier.
left
rear left
right
rear right
Intérieur Extérieur
droite
gauche
arrière-droite
arrière-gauche
gauche droit
coupure
du trou
union du tuyau écrou-raccord tuyau
Installation of the indoor unit
Step Four: outlet pipe
Step Five: connect the pipe of indoor unit
Note:
• Pay attention to dust prevention and
take relevant safety measures when
opening the hole.
• The plastic expansion particles are
not provided and should be bought
locally.
1.The pipe can be led out in the
direction of right, rear right, left or
rear left.
1.Aim the pipe joint at the corres-
ponding bell mouth
.
2.Pretighten the union nut with
hand.
3.Adjust the torque force by referring to the following sheet. Place the
open-end wrench on the pipe joint and place the torque wrench on the
union nut. Tighten the union nut with torque wrench.
2. When select leading out the pipe
from left or right, please cut off
the corresponding hole on the
bottom case.
Indoor
5-10
outdoor
/
left
rear left
union nutpipe joint
pipe
Indoor Outdoor
right
left
rear right
rear left
left right
cut off
the hole
pipe joint union nut pipe
Étape 4: le tuyau de sortie
Étape 5: connectez le tuyau de l'unité intérieure
00724_Owner's manual U-Crown_Mise en page 1 15-06-29 09:42 Page42
All manuals and user guides at all-guides.com
 Loading...
