1716
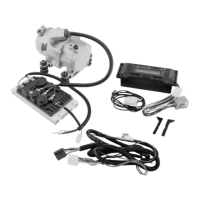
Electric Automotive Compressor 12V Kit with inverter/Command/Cable Module - DS105138
Electric Automotive Compressor 24V Kit with inverter/Command/Cable Module - DS105181
Electric Automotive Compressor 12V Kit with inverter/Command/Cable Module - DS105138
Electric Automotive Compressor 24V Kit with inverter/Command/Cable Module - DS105181
INSTALLATION
INSTRUCTIONS
3.
1 2 3
4 5 6
7 8 9
1 2 3
4 5 6
7 8 9
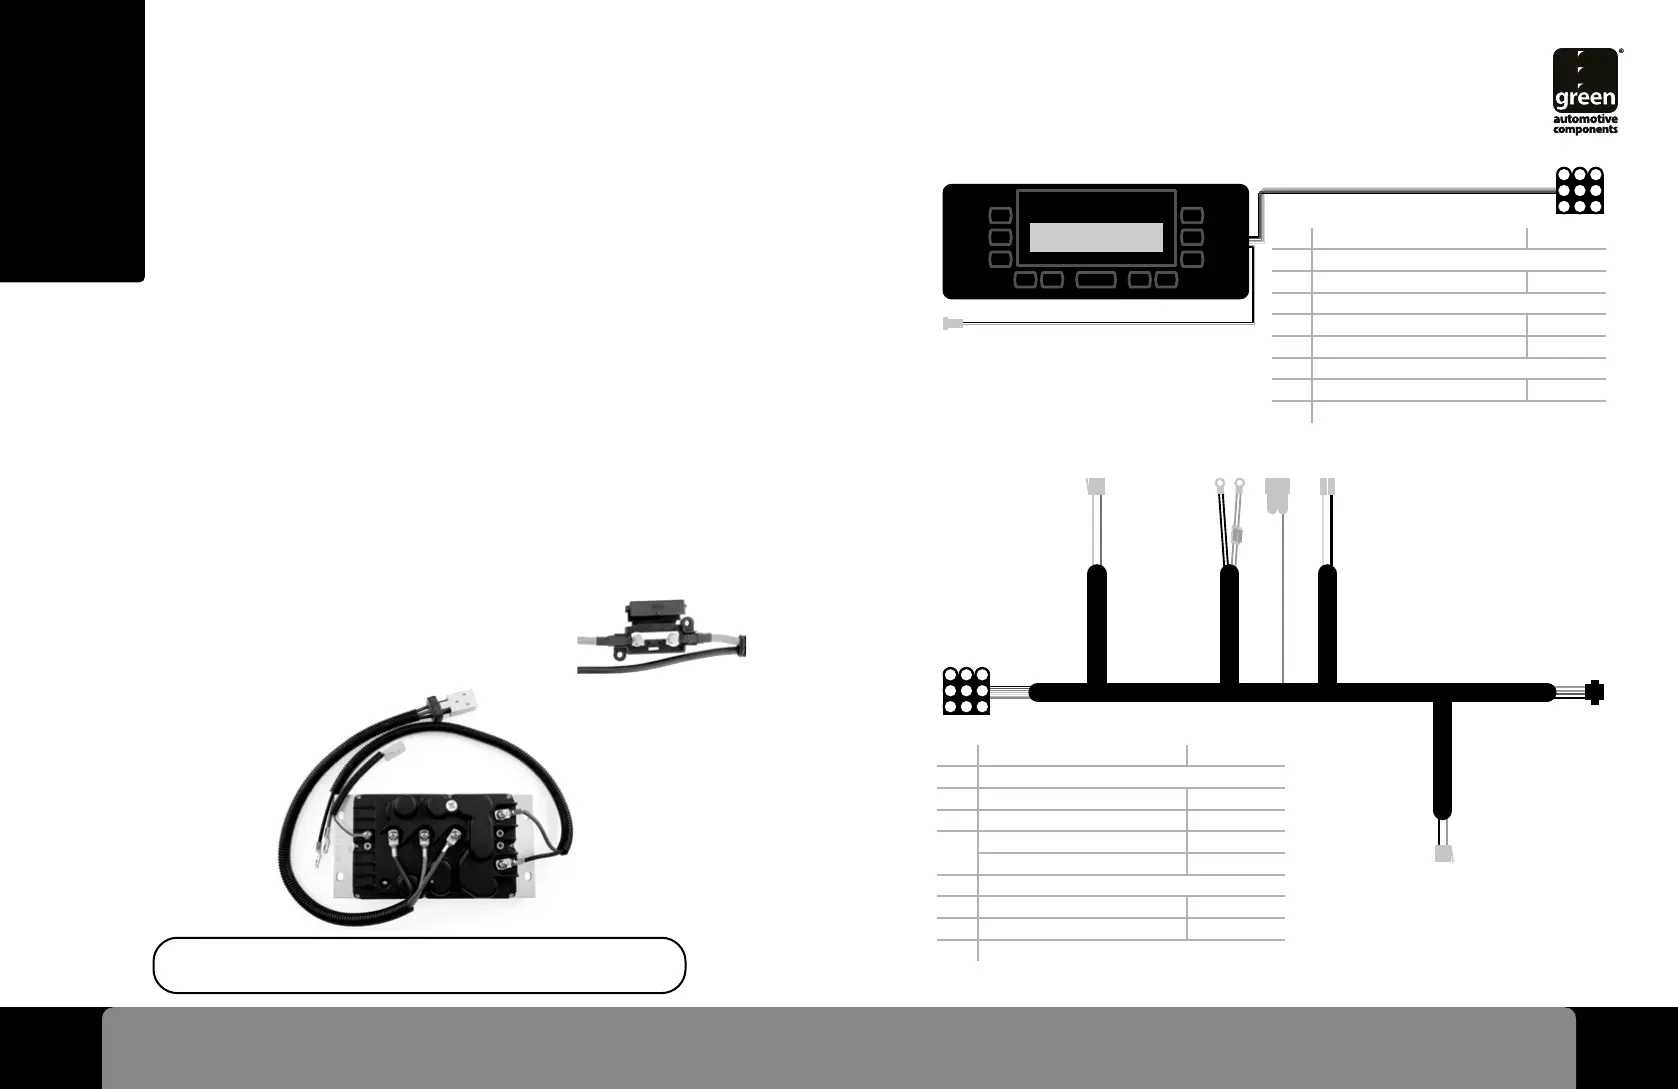
Blower Motor
Thermostat
Battery
Compressor
Pressure Switch
Condenser Fan /
Condenser Relay
Condenser Fan
Cable Connector on Control Panel
1 Compressor Green
2 Empty
3 Pressure Switch (-) White
4 Blower Motor (PWM) Brown
5
Battery (+) Red
Blower Motor (+) Yellow
6 Empty
7 Auxiliar output 24v Blue
8 Battery (-) Black
9 Empty
Cable Connection
1 Pressure Switch (-) Blue
2 Empty
3 Compressor Gray
4 Empty
5 Battery (+) White
6 Blower Motor (-) Brown
7 Empty
8 Battery (-) Black
9 Empty
Cable Connection
Compressor
Battery (+)
Red
Battery (-)
Black
Compressor
• Before installing the compressor, check if all components are turned off and
unplugged;
• Check if the system´s voltage is compatible with the product;
• Connect the electric circuit to the vehicle´s electric grid;
• Fix the red cable to the positive pole (+) and the black cable to the negative
pole (-);
• Proceed with the vacuuming process for an approximate period of 40-60
minutes, due to the compressor contains nitrogen (0,5 kgf/cm²) in order to
carry out leaking tests;
• Inject specific electric compressor oil, POLYESTER ISO VG 68 (the amount of
oil needed is according to each installation);
• Use a 10mm-cable and an 80A (on positive cable)
blade fuse. (Battery cable not included).
NOTE: The total length of the power cable shall
not be longer than 5 meters.
-
+
Inverter
Cable
Control Panel