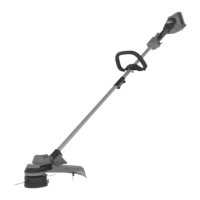
5.4 INSTALL THE CUTTING LINE
Figur
e 13 - 16.
NOTE
Do not put more than 15 feet of cutting line in at a time.
1. Line up the slots on the spool cap with the slots on the
trimmer head.
2.
Put the cutting line through the hole. Push the cutting line
until it exits the opposite hole.
3. Pull the cutting line through until there is an equal
quantity of cutting line on each side.
4. Turn the spool cap clock-wise to wind the cutting line
into the trimmer head. Keep approximately 5 in of cutting
line above out of each side of the trimmer head.
5.5 REMOVE THE TRIMMER HEAD
Figure 17 - 18.
1.
Put the metal rod in the specified angle transmission hole
to fix the trimmer head.
2. Turn the trimmer head clockwise to loosen it. Do not
remove the spacer from the shaft.
5.6 ASSEMBLE THE TRIMMER HEAD
Figure 17 - 18.
1.
Put the metal rod in the specified angle transmission hole
to fix the trimmer head.
2. Assemble the trimmer head.
3. Turn the trimmer head counterclockwise to tighten it.
4. Remove the metal rod.
IMPOR
TANT
You must install the cut-off blade when you use the trimmer
head.
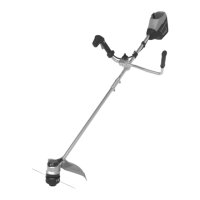
5.7 REMOVE THE BRUSH-CUTTER
BLADE
Figure 19-20.
W
ARNING
Apply the guard to the blade.
1. Put the metal rod in the specified angle transmission hole
to fix the trimmer head.
2.
Loosen the nut clockwise and remove the outer cup.
3. Remove the brush-cutter blade.
5.8 ASSEMBLE THE BRUSH CUTTER
BLADE
Figure 19-20.
W
ARNING
Wear gloves and be careful with sharp edges.
W
ARNING
Apply the guard to the blade.
W
ARNING
Use the specified Nylon locknut which is packed with the
blade, to assemble the blade.
W
ARNING
You must change the locknut after you use it for 20 times.
1. Put the metal rod in the specified angle transmission hole
to fix the trimmer head.
2.
Put the brush-cutter blade on top of the inner cup. Make
sure the blade is in the center.
3. Put the outer cup above the plate.
4. Put the locknut above the outer cup.
5. Tighten the lock-nut counter-clockwise to 44-58” N.M of
torque with a 19mm wrench.
6 TRANSPORTATION AND
STORAGE
6.1 MOVE THE MACHINE
When you move the machine, you must:
•
Wear gloves.
• Stop the machine.
• Remove the battery pack and charge it.
• Assemble the blade guard.
6.2 STORE THE MACHINE
• Remove the battery pack from the machine.
•
Make sure that children cannot come near the machine.
• Keep the machine away from corrosive agents such as
garden chemicals and de-icing salts.
• Secure the machine during transportion to prevent
damage or injury. Clean and examine the machine for any
damage.
9
English
EN
 Loading...