EasyManua.ls Logo

GreenWorks G40LT User Manual

GreenWorks G40LT
197 pages
To Next Page IconTo Next Page
Page #1 background imageLoading...
Page #1 background image
P0800797-04
P0800797-04
技术要求:
2.196P, 内容见电子档;
3.单黑印刷,保持色块始终朝外,要求无色差、无污点;
4.胶装,裁切均匀、无连页;
5.以封样为准。
6.料件需符合格力博HSF文件(编号:GLB-CGR-146) 里关于环保和有害物质的具体要求。
1.材质要求:封面封底120g双胶纸(4P),内页60g双胶纸(192P),85%本白;
常州格力博集团
说明书
陈丽
周艳
向叶春
李金涛
22.06.06
B
版本号
重要度等级
日 期
工艺
审核
校对
设计
标记
处数
签名
日期
阶段标记
视角标记
重量 比例
批准
审定
标准化
日期
更改文件号
145mm
105mm
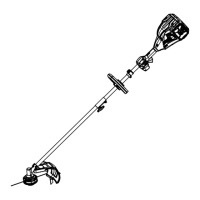
GWK 40V String Trimmer
2101507/2101507UA
B
祁婷婷
@设变前料号P0800797-02/P0800797-03,统一夹管类型,更改纸张尺寸
A
B
G40LT
OPERATOR MANUAL / BEDIENUNGSHANDBUCH / MANUAL DEL OPERARIO /
MANUALE DELL’OPERATORE / MANUEL OPÉRATEUR / MANUAL DE UTILIZAÇÃO /
JA
ARE /
/ KULLANIM
KILAVUZU /
KASUTUSJUHEND
STF305
Original Instructions / Übersetzung der Originalanweisungen / Traducción de las instrucciones originales / Traduzione delle istruzioni originali / Traduction des
instructions d'origine / Traduzido a partir das instruções originais / Vertaling van de originele gebruiksaanwijzing / Перевод оригинальных инструкций /
Alkuperäisten ohjeiden käännös / Översättning av originalinstruktionerna / Produsentens instruk
sjoner / Oversættelse af de originale vejledninger / Tłumaczenie
oryginalnej instrukcji / Překlad originálního vodu / Preklad originálneho vodu / Prevod originalnih navodil / Prijevod izvornih uputa / Az eredeti utasítás
fordísa / Traducere a instrucțiunilor originale / Превод на оригиналните инструкции / Αυθεντικές οδηγίες / / Orijinal
Talimatların Tercümesi / / samitrev sojicku
rtsni soilanigirO / Instrukciju tulkojums no oriģilvalodas / Originaalkasutusjuhendi lge

Table of Contents

Questions and Answers:

GreenWorks G40LT Specifications

General IconGeneral
Power sourceBattery
TypeString trimmer
Head typeBlade
Handle typeD-loop handle
Line diameter1.65 mm
Product colorBlack, Green, Silver
Rotational speed7000 RPM
Cutting diameter (max)300 mm
Weight and Dimensions IconWeight and Dimensions
Weight4200 g

Summary

Declaration of Conformity (UK)

Description

1.1 Purpose

Explains the intended use of the machine for cutting grass and weeds at ground level.

1.2 Overview

Provides a list of parts and components of the trimmer, referencing figures.

Safety

Installation

3.1 Unpack the machine

Instructions for opening the package, checking contents, and preparing for assembly.

3.2 Attach the edge guide

Details on how to attach the edge guide to the trimmer head for better cutting control.

3.3 Attach the guard

Steps for attaching the safety guard to the trimmer head for protection.

3.4 Assemble the shaft

Guide on connecting the upper and lower shaft sections using the coupler.

3.5 Attach the auxiliary handle

Instructions for attaching and positioning the auxiliary handle for better grip and control.

3.6 Install the battery pack

Procedure for inserting the battery pack into the machine until it locks.

3.7 Remove the battery pack

Steps to safely detach the battery pack from the trimmer.

Operation

4.1 Start the machine

Instructions on how to safely start the string trimmer using the lock-out button and trigger.

4.2 Stop the machine

Procedure for stopping the string trimmer by releasing the trigger.

4.3 Operation tips

Advice for safe and effective operation, including handling and cutting tall grass.

4.4 Cutting tips

Guidance on techniques for efficient cutting, avoiding obstacles, and preventing line breakage.

4.5 Adjust the length of the cutting line

Explanation of the auto-feed system for automatically advancing the cutting line.

4.6 Adjust the length of the cutting line manually

Method for manually extending the cutting line when the auto-feed is not functioning.

4.7 Line cut-off blade

Description of the line cut-off blade's function for maintaining consistent cutting diameter.

Maintenance

5.1 General information

Important notes and safety precautions before performing maintenance tasks.

5.2 Clean the machine

Instructions for cleaning the trimmer after each use to keep it in good condition.

5.3 Replace the spool

Step-by-step guide on how to remove and replace the spool for the cutting line.

5.4 Replace the cutting line

Detailed instructions for replacing the cutting line on the spool.

Transportation and storage

6.1 Move the machine

Guidelines for safely moving the trimmer, including wearing protective gear.

6.2 Store the machine

Recommendations for storing the trimmer safely when not in use, away from children and chemicals.

Troubleshooting

Technical Data

Warranty

EC Declaration of Conformity

Related product manuals