Thank you for purchasing iTrip Auto, the easy way to listen to your iPod
®
or
iPhone
™
through your car’s FM radio. iTrip Auto gets its power from your car’s
cigarette lighter or 12 volt accessory socket, and charges your iPod or iPhone as
you listen.
iTrip is an FM transmitter for iPod or iPhone. It works by broadcasting your music
wirelessly to your car’s FM radio, allowing you to listen through your stereo
speakers. iTrip setup and operation is an easy 3-step process. Here’s how to get
started:
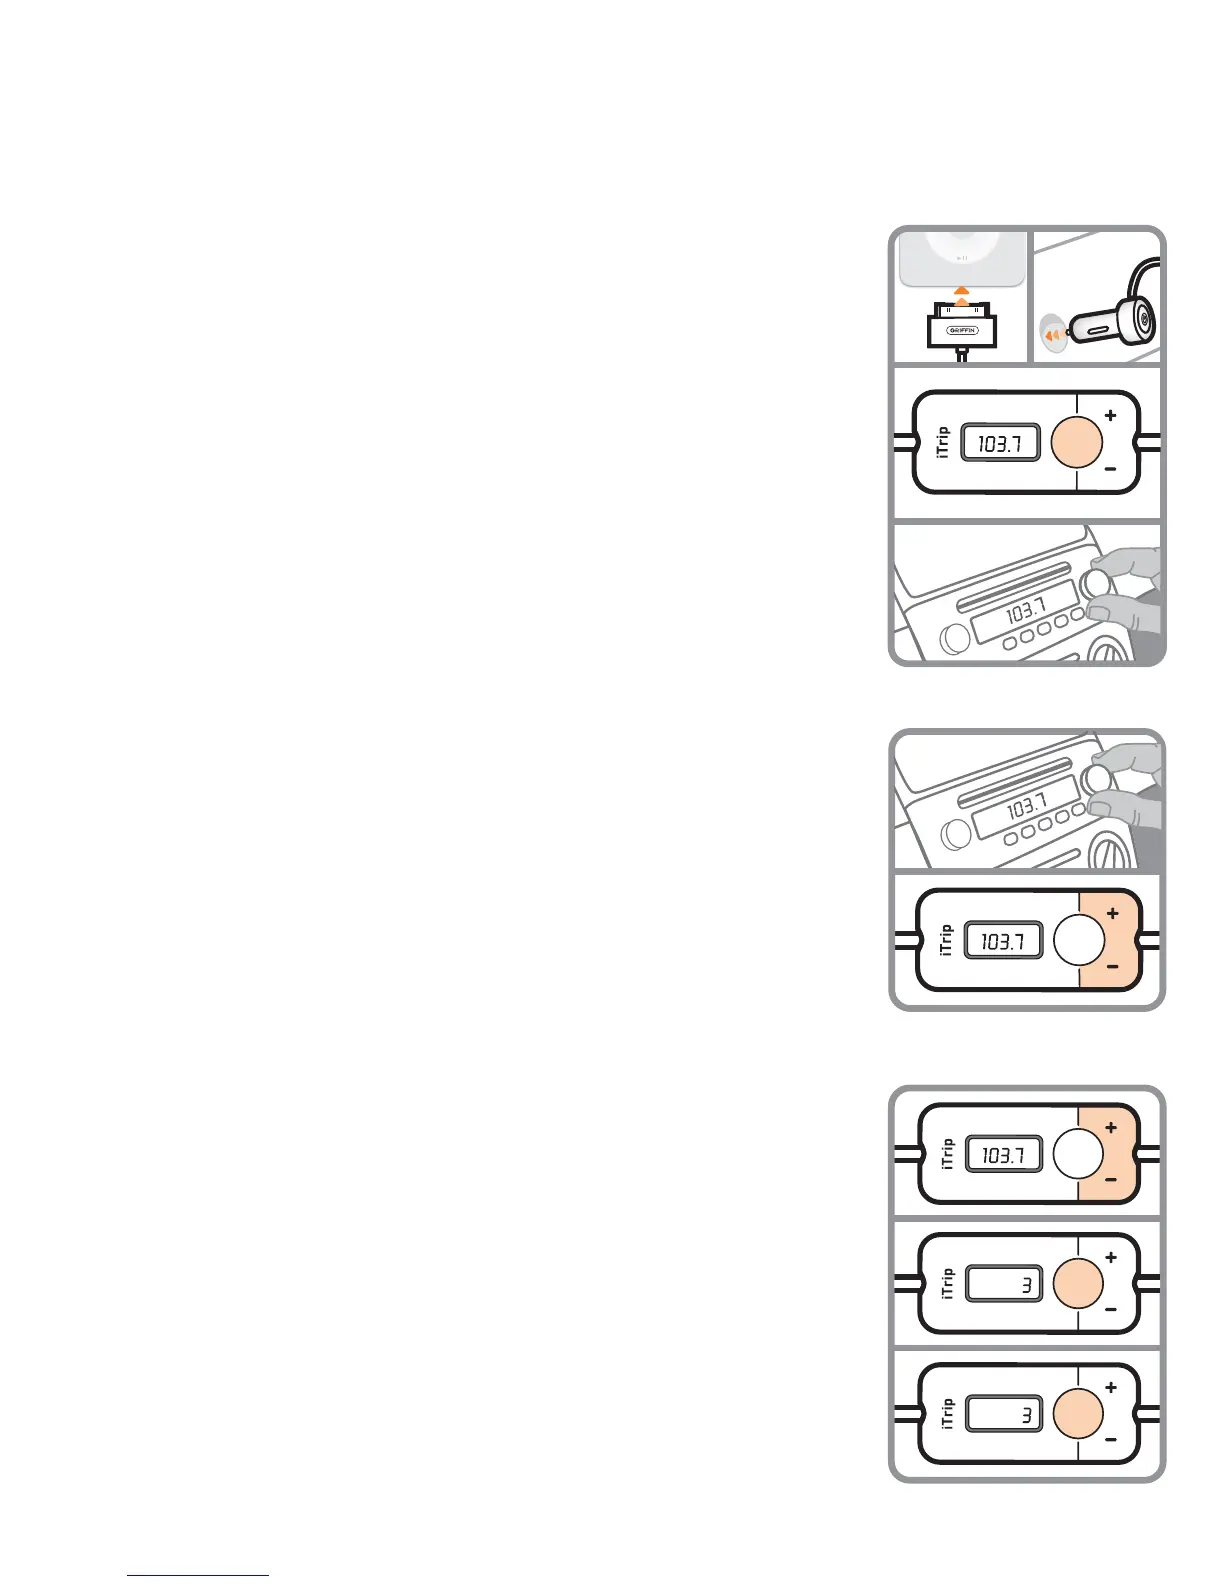
Quick Setup Using SmartScan
1. Plug iTrip into your player’s dock connector and begin playing some music
(though you won’t hear anything yet). Plug iTrip’s power adapter into your car’s
cigarette lighter or 12 volt accessory socket.
2. Press iTrip’s SmartScan button. In only a few seconds, SmartScan finds an
available FM frequency for you.
3. Tune your FM radio to the frequency now showing on iTrip’s display.
How To Set iTrip Manually
1. Plug iTrip into your iPod or iPhone and your car’s power socket and begin
playing music, as in Quick Setup.
2. Tune your FM radio to a frequency at which you hear nothing but static. An
ideal choice would be one with static on either neighboring frequency.
3. Use iTrip’s + and – buttons to tune it to the same frequency as your radio.
(You can press and hold the buttons to scan through the frequencies quickly.)
When you reach the desired frequency, release the button and iTrip will
lock into that frequency automatically.
Your music will now be playing through your speakers. Set your radio’s volume
controls to a comfortable listening level.
Using iTrip Auto’s Presets
You can save the best frequencies as presets for easy recall.
1. Tune iTrip Auto to the frequency you want to save.
2. Press and hold the SmartScan button until a preset number begins to flash
(1, 2, 3, or 4 on the iTrip display).
3. Select the desired preset location (1, 2, 3, or 4) by pressing the + or – buttons.
When the screen shows the desired number, press the SmartScan button
again to save the current frequency to this preset number.
iTrip
®
Auto User Guide
DX
SmartScan
2
3
SmartScan
DX
SmartScan
SmartScan
3
1
2
DX
SmartScan
1
2
3