Do you have a question about the Grohe MINTA TOUCH 31359 and is the answer not in the manual?
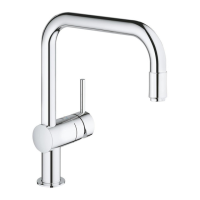
Specifies minimum distance to back wall and availability of a shorter lever.
Warns against stretching, twisting, or extending flexible hoses; advises on insulation if extended.
Instructions to insert the brass threaded shank through the faucet body.
Guides placement of escutcheon, insulating sleeve, and O-ring at the faucet body bottom.
Instructs on routing flexible hoses and threaded rod through the mounting hole.
Details installing the mounting kit to the threaded shank and securing the faucet body.
Guides greasing the spray hose ring, installing the nozzle, and routing the hose through the spout.
Connects the chrome T-connector to the cold water angle valve.
Connects cold water hose, flexible hose, hot water hose, and mixed water supply nipple.
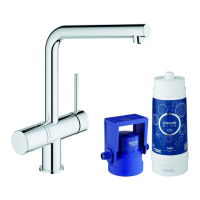
Advises mounting the control box within 12 inches of the faucet for battery access.
| Product Type | Kitchen Faucet |
|---|---|
| Model Number | 31359 |
| Type | Single-lever mixer |
| Material | Brass |
| Finish | Chrome |
| Number of Handles | 1 |
| Valve Type | Ceramic cartridge |
| Touch Technology | Yes |
| Power Source | Battery |
| Warranty | Limited Lifetime |
| GROHE StarLight finish | Yes |
| GROHE SilkMove ceramic cartridge | Yes |
| Swivel Area | 360 degrees |
| Adjustable Flow Rate Limiter | Yes |
| Protection Degree | IP44 |
| Installation Type | Deck Mount |
| Features | Touch activation |