STEP II
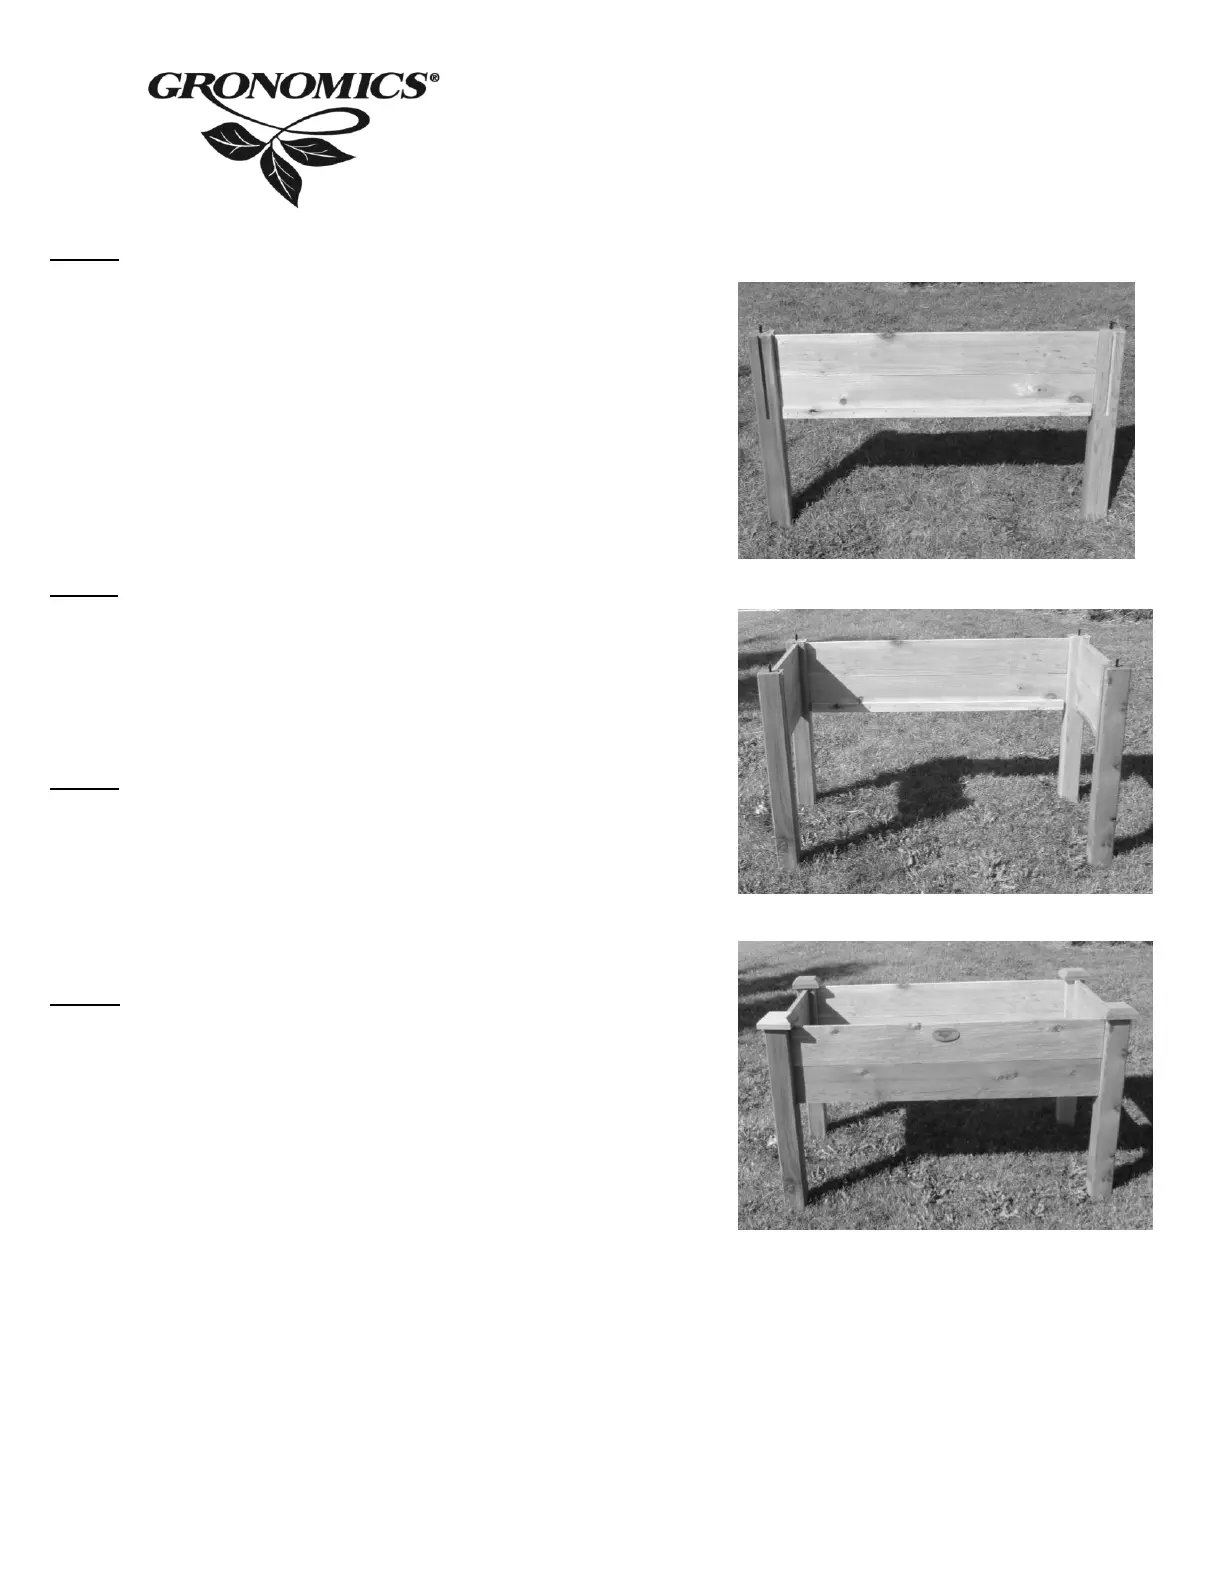
A) Start by standing up two of the four 4” x 4” x 30” posts.
B) Slide a 45” x 5½” x 1” side rail with cleat on bottom
between the posts. (see figure 1)
C) Repeat the same process with the other two 4” x 4” x 30”
posts and 45” x 5½” x 1” side rail with cleat.
Soil depth options: The directions as printed will provide an
elevated bed with a soil depth of approximately 10”. If you
want a soil depth of approximately 6”, just reverse the position
of the lower side rail with the cleat on top.
STEP III
A) Slide both of the 21” x 5½” x 1” side rails between the
posts on both sides. Slide the two 45” x 5½” x1” in next,
do the same with the two 21” x 5½” x 1” side rails.
Note: Placement of 45” x 5½” x 1” side rail w/logo.
(see figure 3)
STEP IV
A) Place the two 22” x 5½” x 1” corner notched bottom
boards on the end cleats. Make sure the corner cut-out
notches are in the corners.
B) Place the remaining 22” x 5½” x 1” bottom boards on the
cleats. (Gap between boards to allow water drainage.)
STEP V
A) Carefully remove the screw covers that are protecting the
cap screws. Place the cap on the center of the screw
utilizing the pre-drilled hole in bottom of the cap. – Do not
over tighten. (see figure 3)
B) Place the fabric liner on the bottom.
1-Year Warranty: All Gronomics
®
products are warranted against all manufacturing defects of material or craftsmanship for a period of ONE full
year from date of purchase. Warranty does not cover cracking, damage caused by negligence, alterations or abuse in any way.