Installation
12
Parallel-connected batteries
Positive terminal 1PCS (Min. 3 AWG)
Negative terminal 1PCS (Min. 3 AWG)
Network terminal 1PCS(Min. 26 AWG)
M6-OT 1PCS
M6 nut 1PCS
Positive terminal 2PCS (Min. 3 AWG)
Negative terminal 2PCS (Min. 3 AWG)
Network terminal 3PCS(Min. 26 AWG)
M6-OT 2PCS
M6 nut 2PCS
M8 expansion screw 2PCS
M8*H60 anchor bolt 2PCS
M8 expansion screw 4PCS
M8*H60 anchor bolt 4PCS
Parallel-connected batteries
M8 expansion screw 2PCS
M8*H60 anchor bolt 2PCS
Gradienter 1PCS
M8 expansion screw 4PCS
M8*H60 anchor bolt 4PCS
Gradienter 1PCS
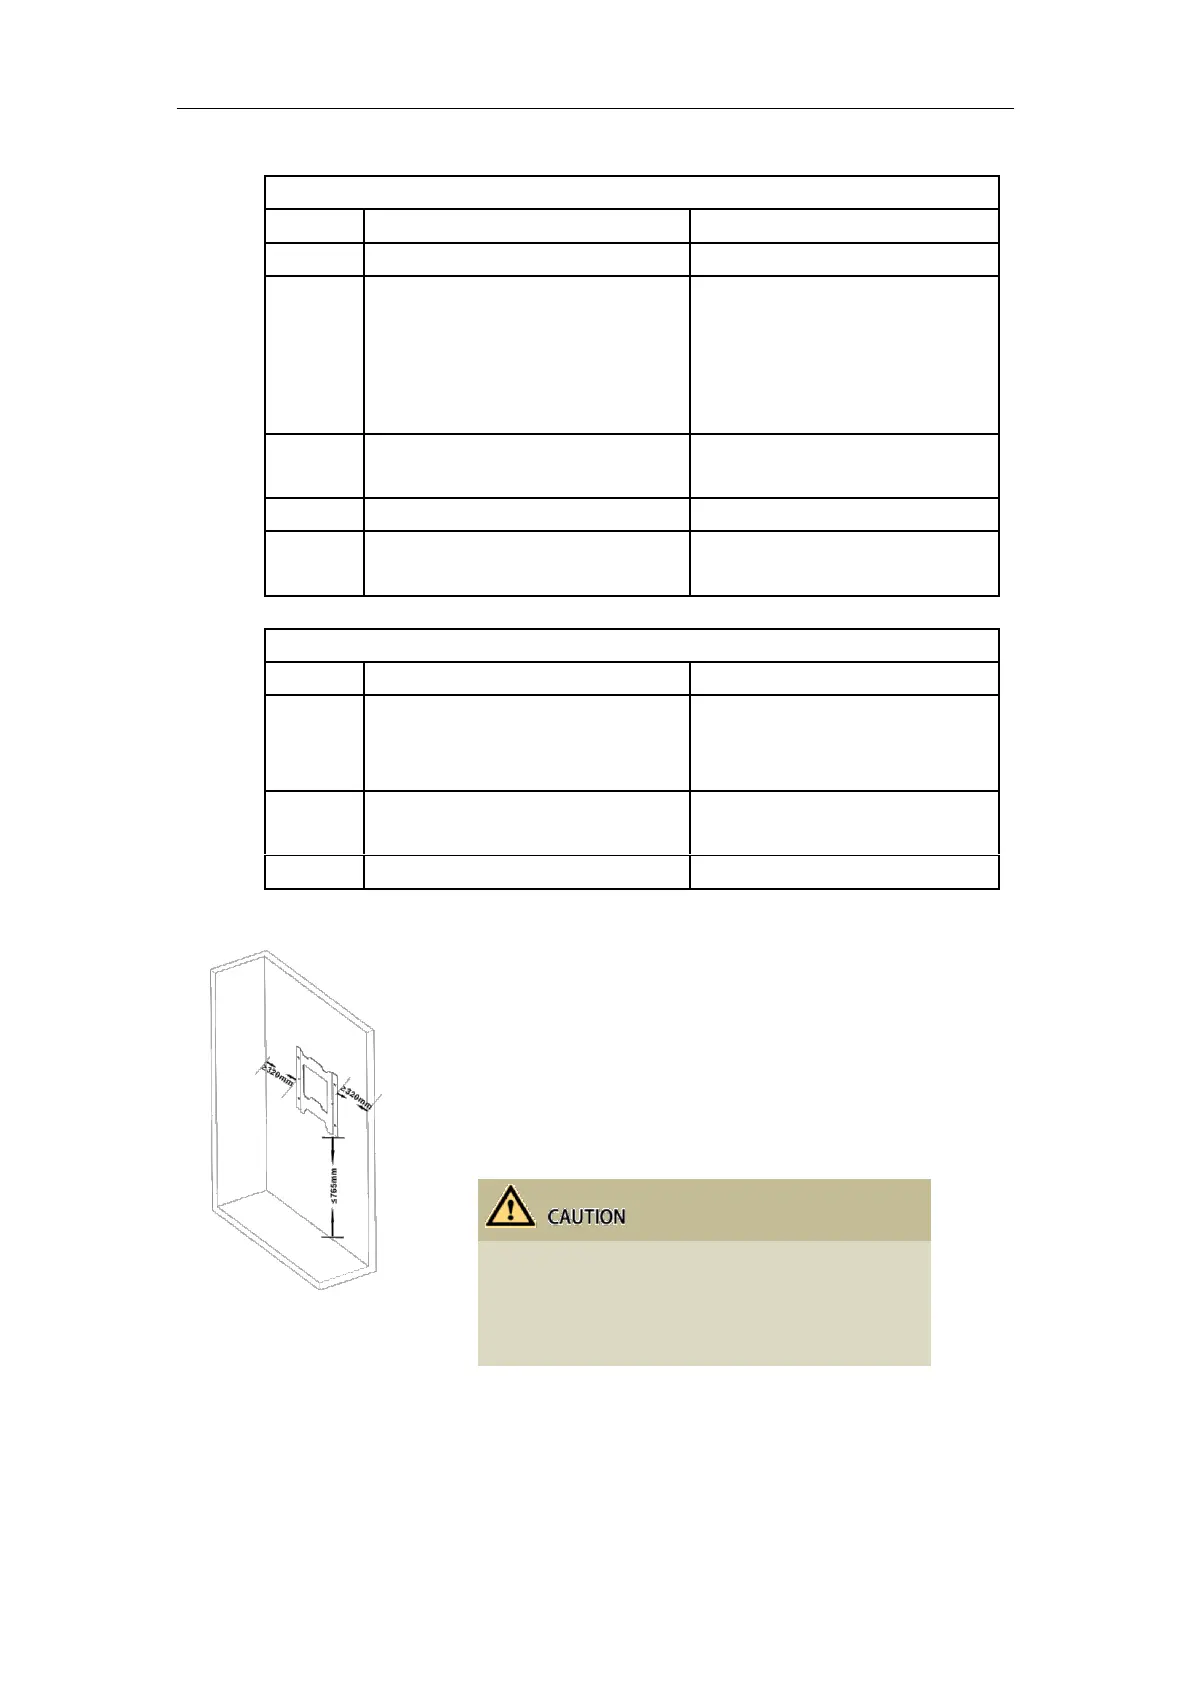
3.3.1 Wall Mounted Installation
The weight capacity of wall should exceed 4 times
weight of battery.
Keep the distance between bracket, wall and floor
as is shown (320mm, 320mm, 765mm).
Step 1 Confirm installation spot.
At least two persons participate the installation. One
person places the bracket on wall and ensure the
gradienter horizontal; the other person marks four spots
of screw driving. After confirming the spots to drive
screws, put down the bracket.
 Loading...