33
ENGLISH
SETTINGS
---------------------------------------------------------------------------------------------------------------------------------------
10 Select one of the WLAN regions by pressing
»
« or » « or by turning the Volume Knob
and confirm by pressing »OK«.
(This setting depends on the location where
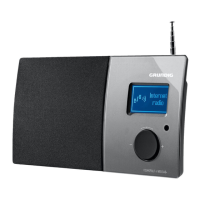
you are operating your Cosmopolit 4.)
– The »SSID« menu appears, and the available
networks (access points) are displayed.
Notes:
7
If the connection to the router is via a
WLAN, there are two options, depending
on the router in use: If the router supports
[WPS], then continue operation from step
10/11 or step. 10/12.
If the router does not support [WPS], then
continue operation from step 13.
7
If the network name (SSID) is suppressed on
the WLAN router for security reasons, the
network cannot be found. It must then be en-
tered manually. Select the option »[Manual
config]« with » « or » « or by turning the
Volume Knob and press »OK« to confirm.
Continue with the chapter “Special Settings”
– “Registering the device ...” (see "Long
manual").
11 Select your wireless [WPS] network with
»
« or » « or by turning the Volume Knob
and press »OK« to confirm.
Note:
7
There are two options for logging on to a
[WPS] network: using the push button on the
router or by entering a PIN on the router.
12 S elect the option »Push-Button« with »
« or
» « or by turning the Volume Knob and press
»OK« to confirm.
Activate the »Push Button« function on the
router (menu or button) and press »OK« on
the device within 2 minutes.
– Display: »Please wait, connecting« and
then »Connected«.
End setting with »OK« on the device;
or
13 S elect the option »PIN« with »
« or » « or
by turning the Volume Knob and press »OK«
to confirm.
– Display: PIN number that specifies the de-
vice.
Enter the PIN number in the router menu and
confirm.
– Display: »Please wait, connecting« and then
»Connected«.
14 Select your wireless network (SSID) with
»
« or » « or by turning the Volume Knob
and press »OK« to confirm.
– Key menu opens, the cursor is positioned in
the first input position.
Note:
7
If the network is encrypted, the network key
(security code WEP or WPA) must be en-
tered.
15 Enter your wireless security code:
Select the first character (capital and small
letters, numbers, symbols) with »
«, » «,
»
« or » « or by turning the Volume Knob
and press »OK« to confirm.
Repeat the procedure for all characters.
After you finish entering all characters, select
the push button »OK« with » «, » «, » « or
» « or by turning the Volume Knob and press
»OK« to confirm.
– The menu »Internet Setup« appears, the net-
work registration is processed.
– Display: »Please wait, connecting« and
then »Connected«.
– After successful registration, the message
»Setup wizard completed« appears.
Notes:
7
You can choose between numbers, lower and
upper case letters, and special characters.
7
Press » « or » « or by turning the Volume
Knob to scroll through the menu pages (num-
bers, letters, special characters, etc.).
7
If you make a mistake during entry, press
» «, » «, » « or » « or by turning the Vol-
ume Knob to select the push button »BKSP«
and press »OK« to confirm. The last charac-
ter is deleted.