This document describes the Grundig KM 8260 Coffee Maker, a household appliance designed for preparing coffee.
Function Description:
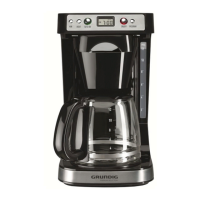
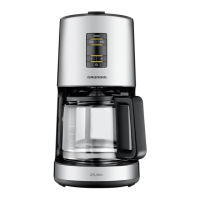
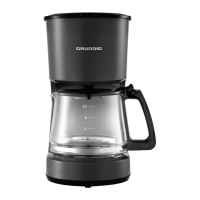
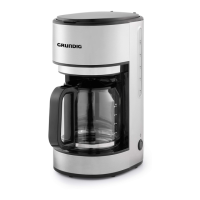
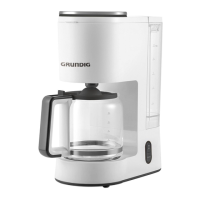
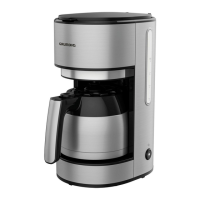
The Grundig KM 8260 is a drip coffee maker with a focus on ease of use and programmable features. Its primary function is to brew coffee from ground coffee and keep it warm. The appliance features a water tank with a clear water level indicator, a detachable filter basket for easy cleaning, and a glass jug with a capacity of 1.8 liters. A drip-stop function is integrated to prevent drips when the glass jug is temporarily removed during brewing. The coffee maker also includes an automatic brewing function, allowing users to set a desired start time for coffee preparation. The warming plate keeps the brewed coffee hot after the brewing process is complete.
Important Technical Specifications:
- Model: KM 8260
- Power Supply: 230 V~, 50 Hz
- Power: 950 W
- Max. Water Volume: 1.8 L (equivalent to approximately 12 coffee cups)
- Compliance: Conforms to European directives 2004/108/EC, 2006/95/EC, and 2009/125/EC.
- Special Features: High quality glass jug, automatic drip-stop function, programmable start, detachable filter basket.
Usage Features:
The coffee maker is designed for straightforward operation with several user-friendly features:
- Controls: The control panel includes buttons for setting minutes (MIN), hours (HOUR), activating auto-on (AUTO ON), turning the appliance on/off (ON/OFF), and programming (PROGRAM). A digital display shows the current time and program settings.
- Clock Setting: Users can easily set the current time using the "HOUR" and "MIN" buttons. An AM/PM indicator helps ensure correct time setting.
- Automatic Brewing (Auto Brew Function): This feature allows users to pre-set a time for the coffee maker to automatically start brewing. After setting the current time, the desired auto brew time is programmed using the "PROGRAM" button and the "HOUR" and "MIN" buttons. The "AUTO ON" button activates this function, indicated by a green light. When the auto brew cycle begins, the green indicator light turns off, and the red "ON/OFF" indicator illuminates.
- Brewing Process:
- Open the water tank cover (A) and fill the water tank (E) with cold, fresh drinking water using the glass jug (G), ensuring not to exceed the "MAX" mark on the water level indicator (D).
- Insert a suitable paper filter (1x4) into the filter basket (C).
- Add the desired amount of ground coffee to the filter using the supplied measuring spoon.
- Place the glass jug (G) accurately on the warming plate (H).
- Connect the appliance to a wall socket.
- Press the "ON/OFF" button (M) to start brewing. The button will illuminate, indicating the brewing process has begun.
- Drip-Stop Function (F): This function allows for brief removal of the glass jug during brewing to pour a cup of coffee without drips. It is crucial to quickly replace the jug (within 30 seconds) to prevent overflow.
- Keeping Warm: After brewing, the warming plate (H) keeps the coffee hot.
- Safety Precautions: The manual emphasizes not to operate the appliance without water, to avoid contact with hot surfaces, and to handle the glass jug by its handle only. It also warns against opening the cover or filter basket during brewing and against pulling out the filter basket if water is not draining.
Maintenance Features:
Regular cleaning and descaling are essential for maintaining the appliance's performance and extending its lifespan.
- Cleaning:
- Turn off and unplug the appliance, then allow it to cool down.
- Remove the glass jug (G) and the filter basket (C).
- Dispose of the used paper filter and coffee sediment.
- The filter basket (C) and glass jug (G) can be cleaned under running water with a mild cleanser or in the upper shelf of a dishwasher.
- The exterior of the appliance should be cleaned with a damp, soft cloth and a mild cleanser.
- Ensure all parts are thoroughly dry before reassembling and using the appliance.
- Avoid using petrol, solvents, abrasive cleaners, metal objects, or hard brushes for cleaning. Do not immerse the appliance or power cord in water.
- Descaling:
- Descaling should be performed at least four times a year, or more frequently depending on water hardness.
- Use a suitable descaler (e.g., commercially available descaler, white vinegar, or lemon juice).
- Fill the water tank to the MAX mark and add the descaler (mixing ratio: 4 parts water to 1 part descaler).
- Turn the appliance ON and allow approximately one large coffee cup of the mixture to run through.
- Turn the appliance OFF and let the mixture soak for about 15 minutes.
- Repeat steps 4-6.
- Turn the appliance ON again and let the entire mixture run through.
- After descaling, fill the water tank with cold, fresh drinking water and run all the water through. Repeat this step four times to rinse the appliance thoroughly.
- The appliance is then ready for brewing coffee again.
Storage:
For long-term storage, ensure the appliance is unplugged, completely dry, and stored in a cool, dry place, out of reach of children.
Environmental Note:
The product is made from high-quality, recyclable materials. It should not be disposed of with normal household waste but taken to a collection point for electrical and electronic equipment recycling.