This document describes the Grundig KM 8280 Coffee Maker, a household appliance designed for preparing coffee. The manual provides comprehensive instructions for safe operation, setup, brewing, cleaning, and descaling, ensuring users can enjoy their product for many years.
Function Description
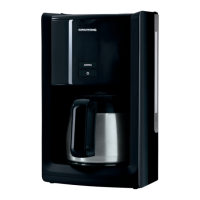
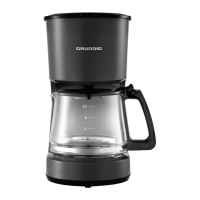
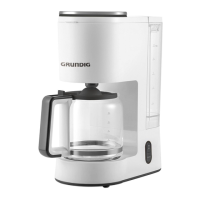
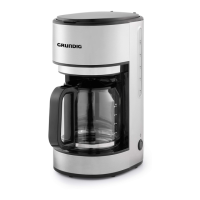
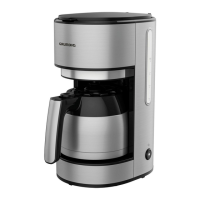
The Grundig KM 8280 Coffee Maker is designed to brew coffee efficiently and safely. It features a water tank, a filter basket, and a thermo jug to collect the brewed coffee. The appliance operates by heating water, which then passes through ground coffee in a paper filter, extracting the coffee's flavor and aroma into the thermo jug. A key feature is the "Aroma" button, which activates a unique brewing process to enhance the coffee's flavor and aroma by saturating the grounds gradually through several continuous cycles. This time-release process is designed to extract the best possible flavor. The appliance is equipped with a drip-stop mechanism located underneath the filter basket, allowing users to briefly remove the thermo jug to pour coffee before the brewing process is complete, without causing spills. The On/Off button controls the brewing process and illuminates when active.
Usage Features
Before first use, it is crucial to remove all packaging and stickers, and clean all parts that come into contact with water. The appliance should be run at least four times without coffee to ensure it is ready for use. For brewing, the coffee maker must be placed on a stable, flat, clean, dry, and non-slip surface.
To brew coffee:
- Fill the Water Tank: Pull off the water tank cover and fill the water tank with the required amount of cold, fresh drinking water, ensuring not to exceed the "10" mark on the water level indicator. Note that the brewed coffee volume will be about 10% less than the water filled due to absorption by coffee grounds and the filter. If too much water is added, it will drip out from the back of the appliance through a drip hole designed to prevent overfilling.
- Prepare the Filter Basket: Close the water tank cover and open the filter basket cover. Pull out the filter basket.
- Insert Paper Filter: Take a suitable paper filter (1 x 4 size) and insert it into the filter basket, making sure it does not bend or fold. Only one paper filter should be used at a time.
- Add Ground Coffee: Fill the filter with the desired amount of ground coffee, using the supplied measuring spoon for accuracy.
- Reinsert Filter Basket: Insert the filter basket back into its housing and close the filter basket cover.
- Position Thermo Jug: Place the thermo jug onto its support. It is critical that the filter basket is properly closed and the thermo jug is accurately placed; otherwise, the drip-stop function may not work correctly, potentially causing hot water or coffee to overflow.
- Connect to Power: Connect the plug to a wall socket.
- Start Brewing: Push the On/Off button. The button will illuminate, indicating that the brewing process has begun. The brewing process can be stopped at any time by pushing the On/Off button again.
- Aroma Enhancement (Optional): For a richer flavor, press the "Aroma" button. This will activate the special brewing cycle designed to enhance the coffee's taste and smell.
- Monitor Brewing: Ventilation slots allow steam output; ensure these are not blocked during use.
- After Brewing: Once the brewing process ends and the water level indicator is empty, there may still be hot liquid in the filter basket. Wait a few minutes for the remaining liquid to drip into the thermo jug.
- Serve Coffee: Remove the thermo jug from its support as soon as brewing is complete and the jug is filled. The coffee is ready to be served. The thermo jug can keep coffee hot for approximately one hour.
- Turn Off and Disconnect: To turn off the appliance, push the On/Off button. Disconnect the appliance from the wall socket.
If further brewing is desired, allow the appliance to cool down for at least 15 minutes between cycles. For optimal coffee, it is recommended to use softened or filtered water to prevent lime build-up. Unused coffee should be stored in a cool, dry place, and resealed tightly after opening to maintain freshness. Reusing coffee sediment is not recommended as it reduces flavor, and reheating coffee is discouraged as it is at its peak flavor immediately after brewing.
Maintenance Features
Proper cleaning and descaling are essential to extend the life of the Grundig KM 8280 Coffee Maker and ensure optimal performance.
Cleaning and Care:
- Safety First: Always turn off the appliance and disconnect it from the wall socket before cleaning. Allow the appliance to cool down completely.
- Avoid Harsh Cleaners: Never use petrol, solvents, abrasive cleaners, metal objects, or hard brushes to clean the appliance.
- No Immersion: Do not immerse the appliance or its power cord in water or any other liquid.
- Disassembly for Cleaning: Remove the thermo jug, open the filter basket cover, and pull out the filter basket. Dispose of the used paper filter and coffee sediment.
- Filter Basket Cleaning: The filter basket can be cleaned under running water with a small amount of mild cleanser. It is also safe to clean the filter basket in the upper shelf of a dishwasher.
- Exterior Cleaning: Use a damp soft cloth and some mild cleanser to clean the exterior of the appliance.
- Reassembly: After cleaning, insert the filter basket back into its housing, close the filter basket cover, and place the thermo jug onto its support.
- Drying: Before using the appliance again after cleaning, ensure all parts are carefully dried with a soft cloth or paper towel.
Descaling the Appliance:
Descaling should be performed at least four times per year, with the frequency depending on the water hardness in your area (harder water requires more frequent descaling).
- Obtain Descaler: Purchase a suitable descaler from a specialty store, specifying the appliance type.
- Read Instructions: Thoroughly read the descaler manufacturer's instructions. If they differ from the steps below, follow the manufacturer's guidelines.
- Prepare Descaling Solution: Fill the water tank to the "10" marking and add the descaler. The recommended mixing ratio is 4 parts water to 1 part descaler. Alternatively, white vinegar and lemon juice can be used as a commercially available descaler.
- Initial Run: Turn the appliance on and allow approximately one large coffee cup of the descaling mixture to run through.
- Soak: Turn the appliance off and let the mixture soak for about 15 minutes.
- Repeat: Repeat steps 4-6.
- Full Run-Through: Turn the appliance on and let the entire descaling mixture run through.
- Rinse Cycles: Fill the water tank with cold, fresh drinking water and run all the water through. Repeat this rinsing step four times to ensure all descaler residue is removed.
- Ready for Use: After completing the descaling and rinsing cycles, the appliance is ready to brew coffee again.