GRUNDIG Service 1 - 11
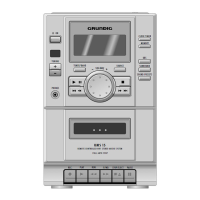
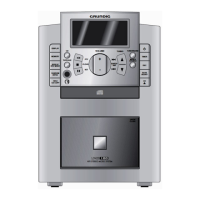
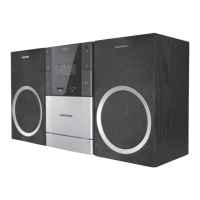
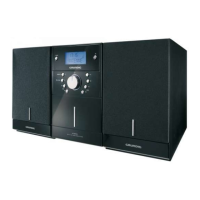
UMS 1 / UMS 2 Allgemeiner Teil / General Section
Switching on and off
When you insert the power supply cable plug into the mains
socket, the unit automatically switches to standby.
The time is shown in the display.
When you want to switch your system on, press the POWER
button The POWER button will light up.
The system will be activated and the last selected source will
be selected.
You can also activate the system by pressing CD, TUNER,
TAPE or AUX to select the respective source.
If you want to completely disconnect the unit from the power
supply, remove the plug from the mains socket.
Note: In case of a power breakdown or removal of the mains
plug, the actual clock time is stored in the memory. When
power returns the clock start running again from the stored
time onwards.
Stand By
You can switch the system to STAND BY with the y button on
the remote control or with the POWER button.
The display shows the clock time.
When you want to switch your system on again, simply press
one of the input selection buttons on the unit or on the remote
control or the POWER button.
Source Selection
To select a listening source, press either the corresponding
button on the unit or the corresponding button on the remote
control.
Volume
The volume can be adjusted with the rotary VOLUME knob.
The volume can also be controlled via the remote control with
the VOLUME +/– buttons.
MUTING
The volume can be completely muted by pressing the
ĭĭ
button
on the remote control. The display shows ‘MUTE’
This is useful, for example, if you want to take a telephone call
and do not want to be distracted by music, news, etc., from
your system.
If the muting function is used when recording a tape, this has
no effect on the subsequent recording volume level as only the
speakers are muted.
The click you hear when you press the
ĭĭ
button comes from
the relay which mutes the speakers.
The MUTING function can be deactivated by pressing the
ĭĭ
button again.
Equalizer function
The equalizer function, which digitally controls the sound
signals, utilizes state-of-the-art digital technology to create an
atmosphere in accordance with style of music you select.
Use the SOUND button on the unit or the EQUALIZER button
on the remote control, to select the possible settings one after
the other. Simply press the button to switch to the next setting.
FLAT: the equalizer function is deactivated.
JAZZ: for the cool metallic bite of a jazz quartet.
CLASSIC: for the dramatic depth of classical music in a
concert hall.
POP: for the electrifying atmosphere of sound in a stadium at a
concert.
DISCO: for the subtle enhancement of musical dimensions.
USER: this is a setting you can programme yourself as follows
Select USER with the SOUND button and press within 2
seconds the EDIT button.
The first frequency band on the display starts flashing.
With the A and B buttons you can select the next or previous
frequency bands.
Use the S and T buttons to adjust the level of the
selected band. The adjustment will be shown on the display.
After you have carried out your settings press EDIT again to
store the equalizer setting.
Amplifier part
TUNER
• Press the TUNER button on the unit, or one of the
TUNER/-STATION 1/2 buttons on the remote control.
– 'TUNER' appears in the display.
• Press the TUNER BAND button to select the wave band.
FM, AM and then FM again appear one after the other.
• Start the automatic station search by holding the TUNING
A or Bbutton down until the frequency starts running,
and then releasing it.
– The tuner automatically searches for the first station with
sufficient signal strength. Repeat this step to search for
other stations.
• To tune to a weak station, briefly press the TUNING A or
B button several times until the correct frequency is
displayed, or until reception quality is best.
• If the quality of FM stereo reception is unsatisfactory, press
the MONO button.
'LAST STATION MEMORY'
LAST STATION MEMORY means that the unit 'remembers' the
last station that was tuned to. This function ensures that the
station which was selected before the radio was switched off is
automatically selected again when your radio is switched back
on.
RDS Radio Data System (only UMS 2)
Your tuner is an RDS tuner.
RDS (Radio Data System) stands for a new generation of radios
that provides the listener/user with more comfort and better
reception in the short term, but also opens up completely new
information options for the future.
RDS-equipped receivers identify the tuned station (if it
transmits 'RDS signals') and indicate the name of the
programme in the 8-place display (e.g. BAYERN 3, SDR 3).
If you are tuned to an RDS station, the name of the station will
be indicated after a short time.
For more information, please see page 24.
Storing stations
You can manually store a max of 49 stations.
• Press the TUNER BAND button to select the wave band.
• Select the desired station by pressing one of the TUNING
A or B buttons.
– Your unit then will search the next station of sufficient
signal strength. Repeat this step until the desired station is
received.
•
Switch to mono reception if reception quality is unsatisfactory
(when the station you tune to is too weak for stereo reception).
• Press the MEMORY button.
– The frequency of the station you have set is stored in the
next available memory position. Pressing the button again
moves the frequency to the next available memory position,
and the original position is unoccupied once again.
–'MEM FULL' appears in the display for approx. 1 second
when the memory is full.
Calling up a stored station
• When you want to call up a stored station, press STATION-
ST. The stations are called up in ascending or
descending order.
Stations can also be selected via the system remote control:
• Select the radio input by pressing the TUNER button.
• Press the 1 STATION 2 buttons.
– The display shows the selected memory location number,
and the unit switches to this memory location.
– It is not possible to select a memory location which has not
(yet) been assigned to a station.
Example:
Memory location 6 is not assigned to a station.
If you are situated at memory location number 5 and press
once STATION T the unit will jump to memory location
7 (provided this location has been assigned to a station).
Deleting a memory location
• If you want to delete a memory location to which a station is
assigned, first call up its number.
• Press STATION STuntil you reach the station
you want to delete.
You may also use the STATION 12buttons on the
remote control.
• Press CANCEL.
– The memory location is deleted, and the memory location
number does not light up on the display anymore.
 Loading...