5 of 15
TOOLS REQUIREMENT
Tools needed: two 1/2” wrenches
IMPORTANT ASSEMBLY TIP: Do not tighten any nut and bolt combinations completely until all parts are
assembled together! Finger tighten plus one turn of a wrench only! This will temporarily hold the lock nut on the
bolt while helping align all parts! After all parts are assembled together, all nut & bolt combinations can be
completely tightened
ASSEMBLY INSTRUCTIONS
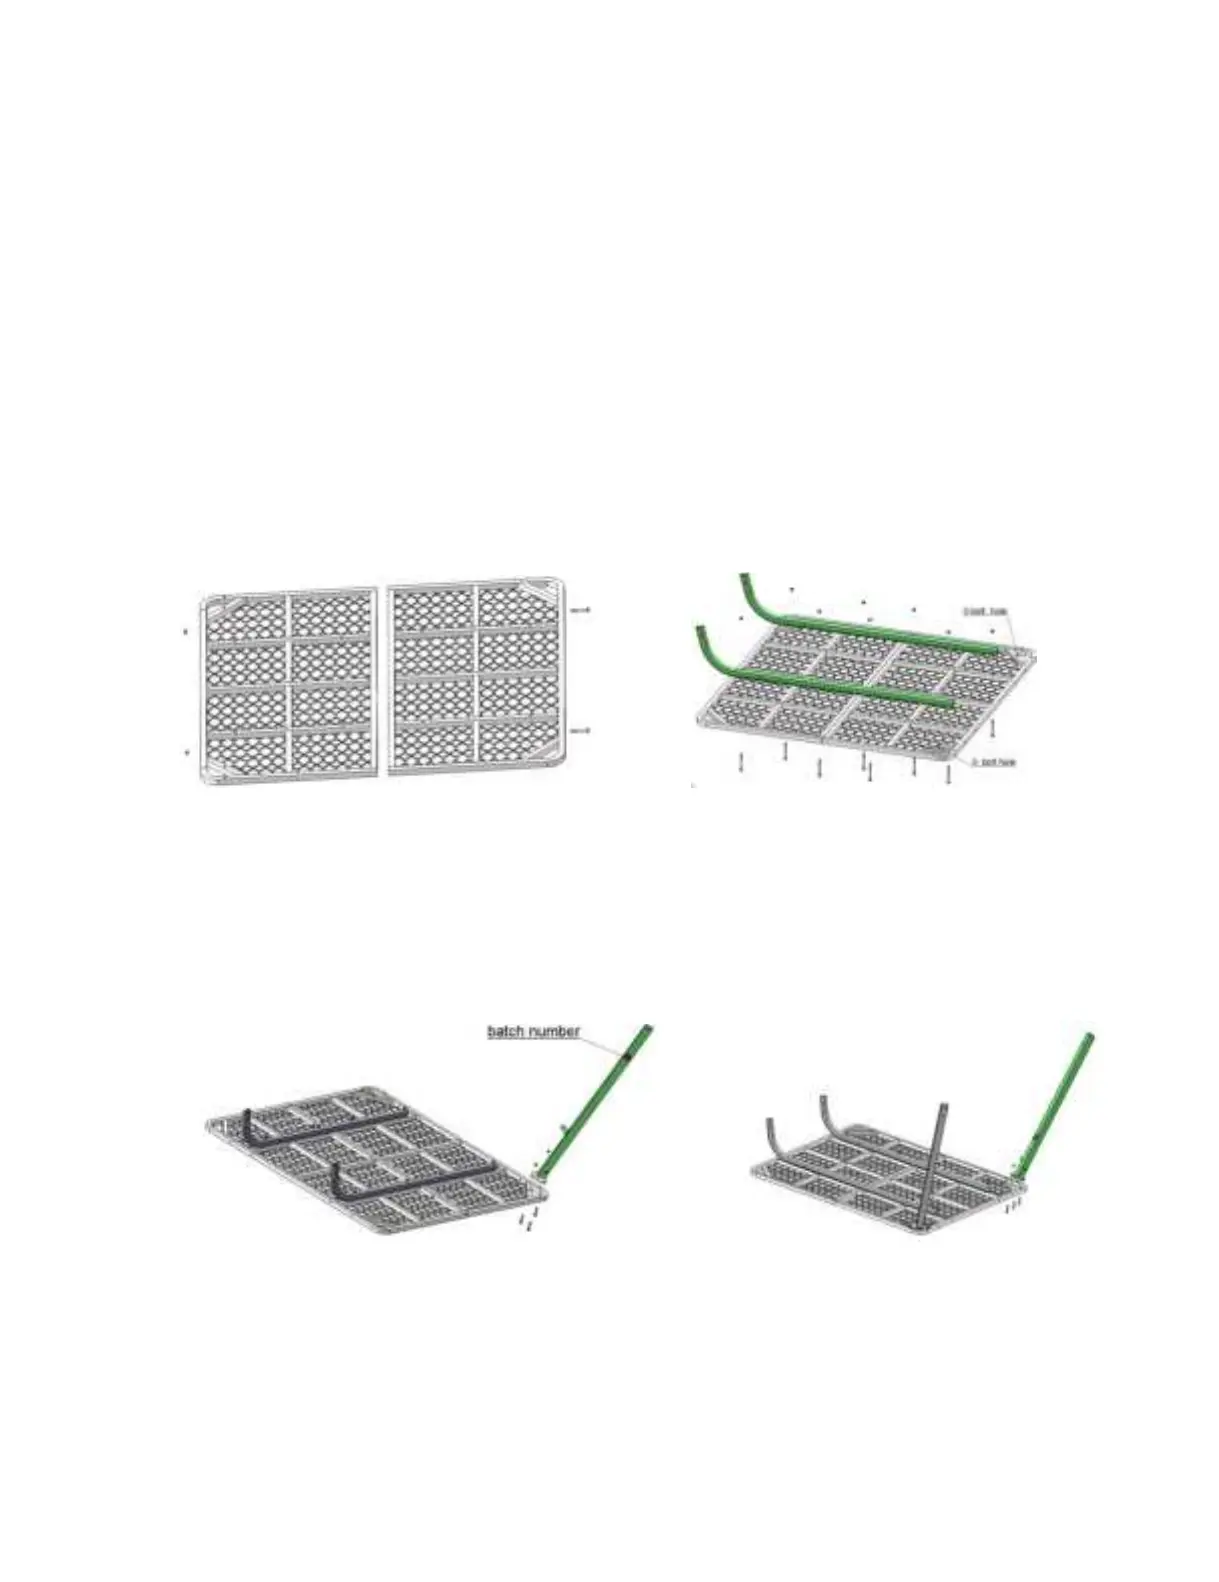
Step 1
: Assemble the platform one (TS305.05) to the platform two (TS305.10) by using two 1/4"-20×2-1/4"
bolts (48271B) and two 1/4" lock nuts (48752B). The expanded metal should face up. Leave these hand tight for
now ( Figure 1).
Step 2:Attach the two platform braces (TS305.18) to the assembled platform by using eight 1/4"-20×3" bolts
(48275B) and eight 1/4" lock nuts (48752B). Please kindly noted the position of the platform braces need to
same as figure 2. Leave these hand tight for now (Figure 2).
Figure 1 Figure 2
Step 3: Attach the right upper leg (TS305.21) to the platform by using three 1/4"-20 × 1-1/2" bolts (48240B) and
three 1/4" lock nuts (48752B). The right upper leg (TS305.21) has the batch number . Leave these hand tight
for now (Figure 3).
Step 4:Attach the left upper leg (TS305.09) to the platform by using three 1/4"-20 × 1-1/2" bolts (48240B) and
three 1/4" lock nuts (48752B). Leave these hand tight for now ( Figure 4).
Figure 3 Figure 4