OPERATING INSTRUCTIONS
The SH6000 Skate Sharpening Fixture has three detent knobs. Each knob will raise or lower the top plate which
the skate blade is clamped to.
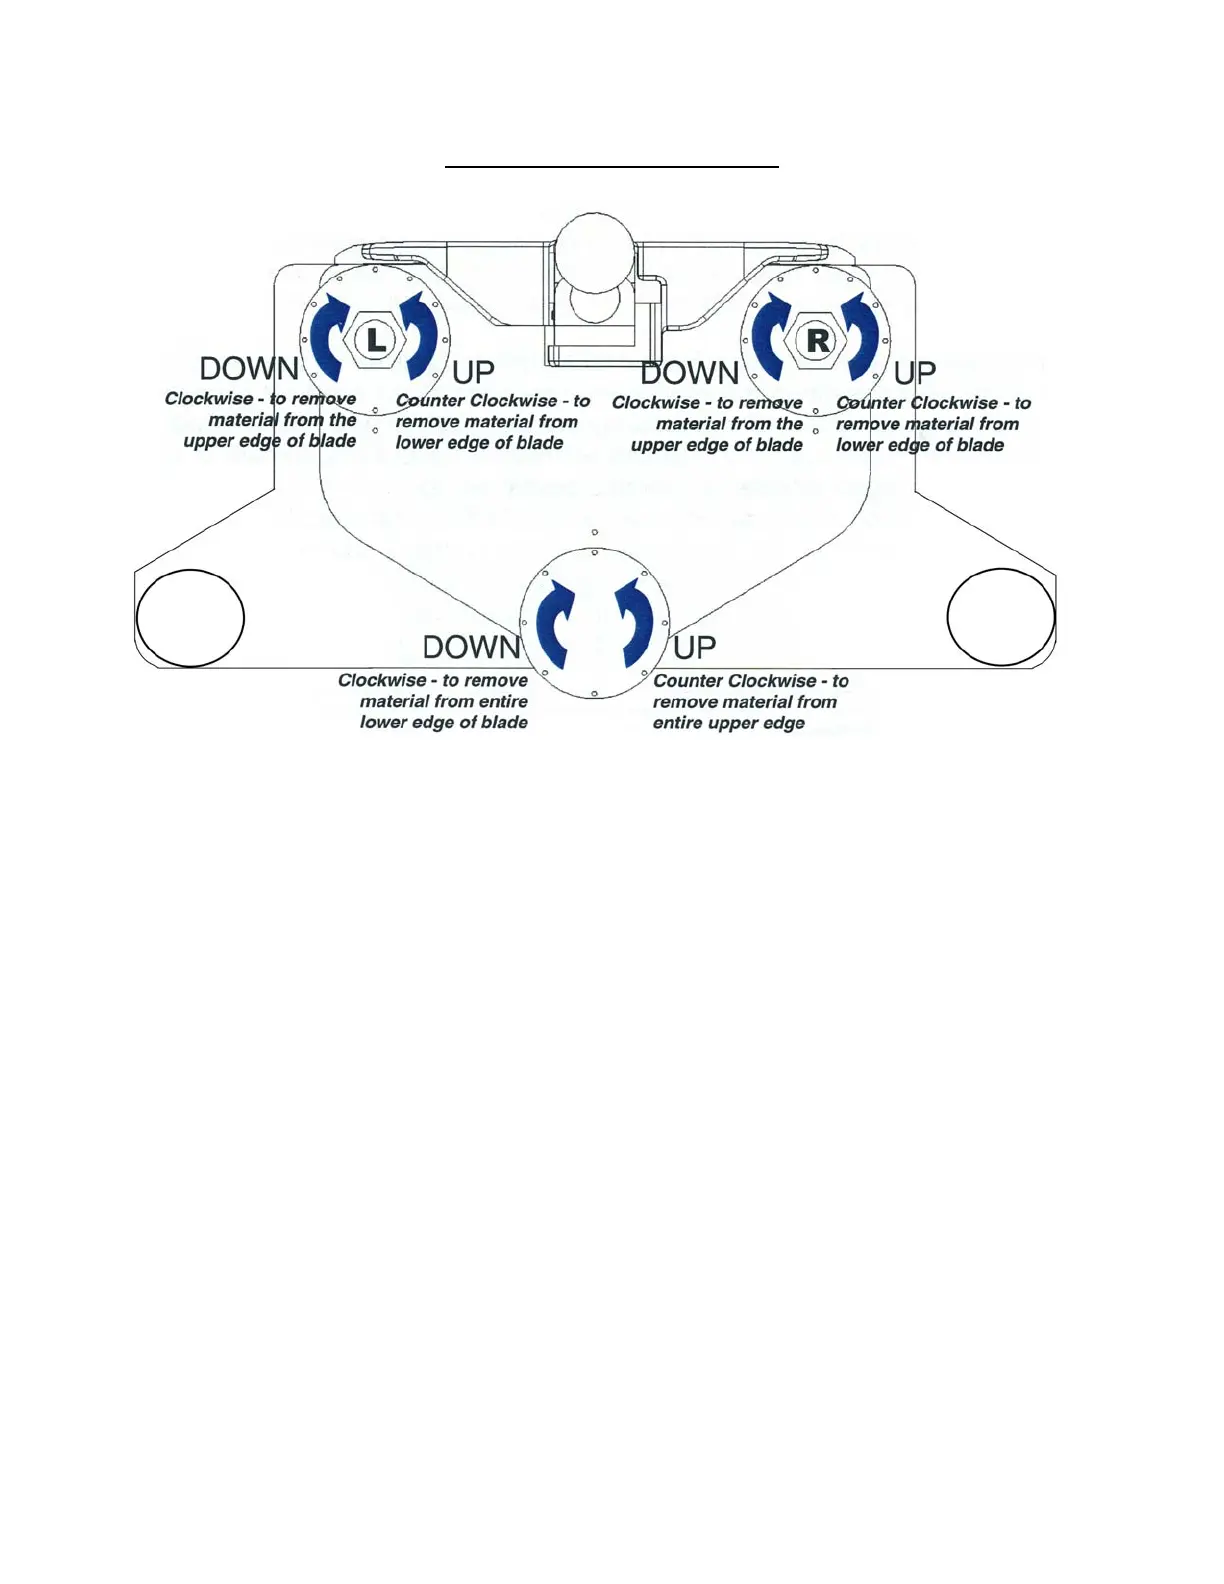
1. The rear detent knob, when turned clockwise, will allow the sharpener to remove material off the lower edge of
the skate blade across its entire length. Turning it counter-clockwise will allow the sharpener to remove material
off the upper blade across its entire length. When the rear knob is turned one detent position, the blade will move
about ½ degree or ½ of a position as measured on the Blademaster Pro-Square.
2. The left and right detent knobs will raise or lower the top plate equally or one side more that the other, whatever
is required to produce square blade sharpening. Turning the knobs clockwise will lower the top plate, allowing the
sharpener to remove material from the upper edge of the skate blade. Turning them counter-clockwise will raise
the top plate, allowing the sharpener to remove material from the lower edge of the skate blade. When the left or
right knobs are turned one detent position, the blade will raised up or be lowered down about .0005”. The amount
of angle removed from the blade during sharpening will depend on the radius (hollow) that is dressed on the
grinding wheel and the thickness of the blade.
3. When first starting out with the SH6000 Skate Sharpening Fixture, it should be calibrated to the machine being
used. This can be achieved with the use of a squared skate blade and the Blademaster Pro-Square or the BHC2005
Blade Height Comparator. By adjusting the appropriate knobs and bringing the blade in contact with the wheel,
the fixture can be precisely calibrated with adjustments to the knobs after measuring the sharpened blade with the
Pro-Square. Once a perfectly squared blade has been created, the detent knobs can be marked with a felt tipped
marker to denote the calibrated positions of the three knobs.