Architectural Spot & Flood Light
INSTALLATION GUIDE
GVA Lighting, Inc. 3400 Ridgeway Drive, #14 Missisauga, Ontario L5L 0A2
Tel: + 1 905 569 6044 Email: info@gvalighting.com gvalighting.com
IG-LIRA, 2018-08-28 | Page 2 / 9
Specifications are subject to change without notice. Every effort has been made to ensure that the information provided in this manual is accurate.
GVA Lighting Inc. is not responsible for printing or clerical errors. Refer to www.gvalighting.com for additional information.
LIRA
™
1
LUMINAIRE
INSTALLATION
1.1
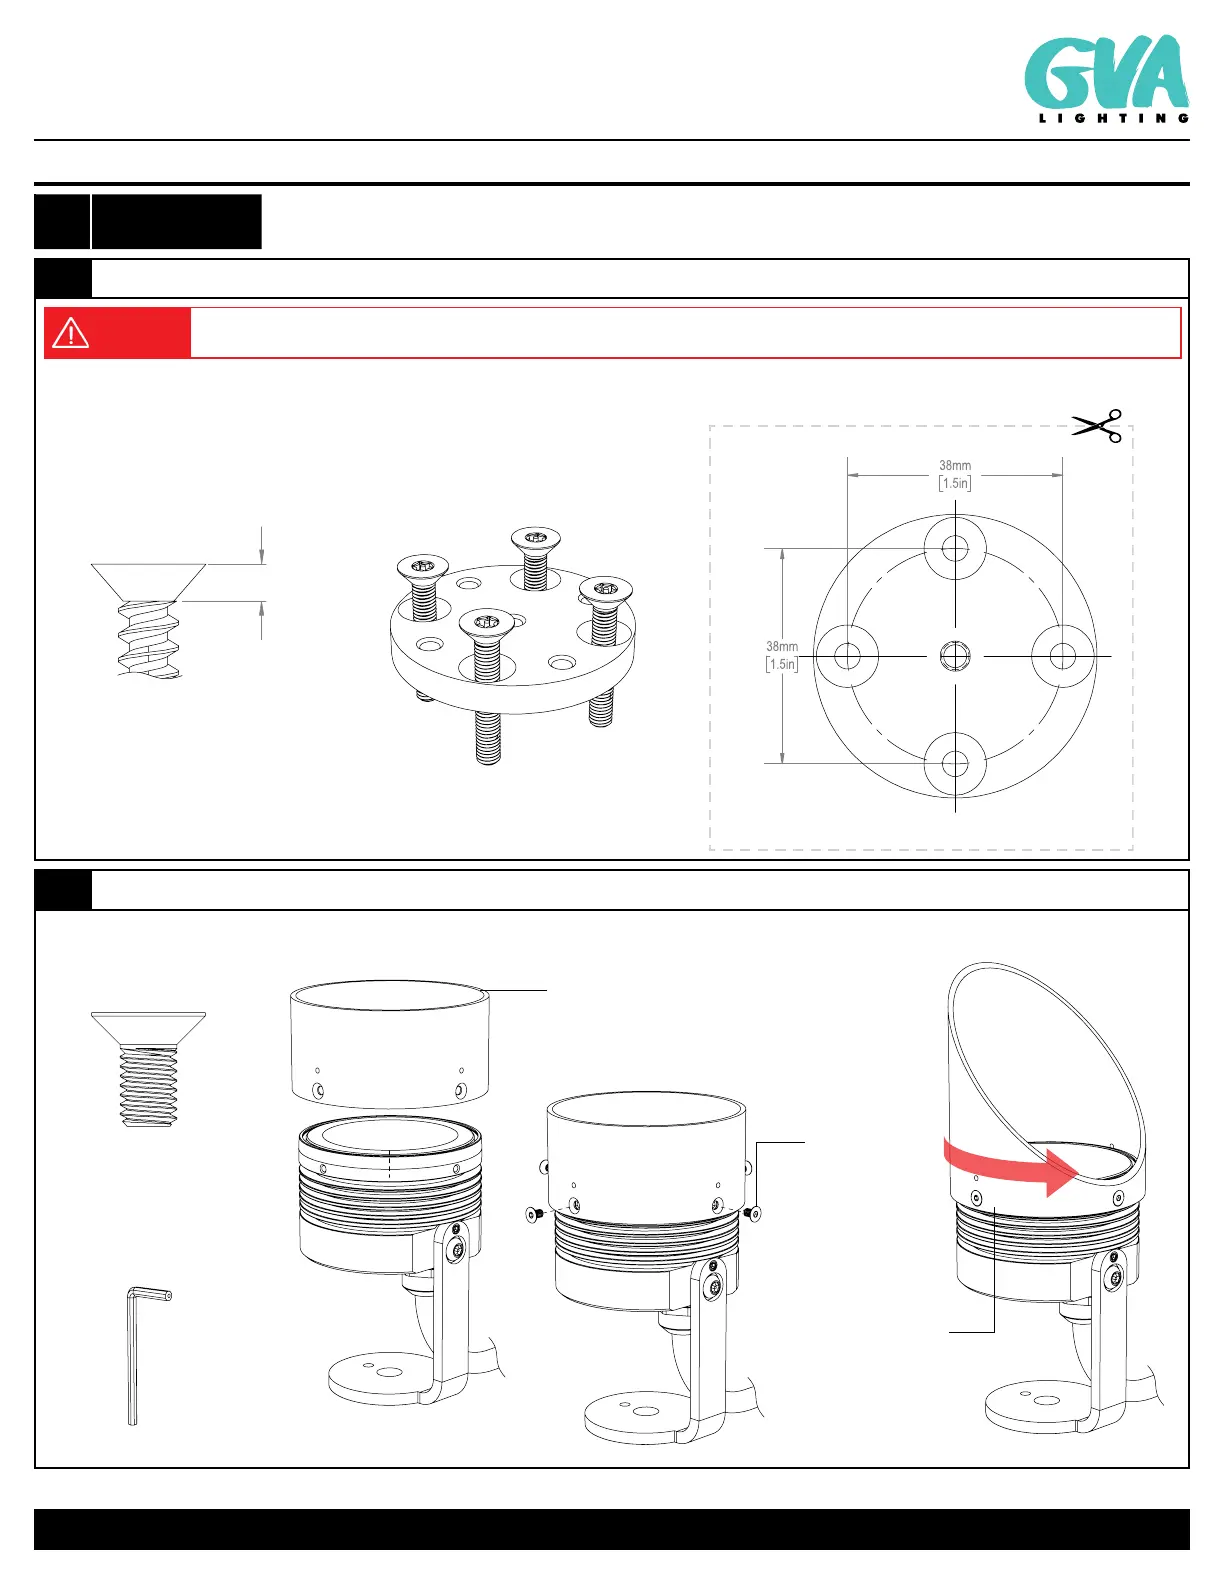
MOUNTING PLATE
WARNING
Use mounting hardware suitable for the mounting surface. Use of innappropriate hardware may result in dismounting of
the plate and can result in equipment damage, personal injury, or death.
Using 4 x M4 or No.8 Flathead Screws (supplied by others) suitable for the mounting surface, install the mounting plate in desired location.
See "MOUNTING HOLE TEMPLATE" to mark holes prior to installation, if required.
MOUNTING HOLE
TEMPLATE
(1:1 SCALE)
NOTE: To ensure document is printed to scale measure
dimensions prior to use of template.
3.2mm
0.12in
Max.
M4 OR NO.8
FLATHEAD SCREW
(supplied by others)
4X
1.2
OPTICAL ACCESSORY INSTALLATION
Using 4 x M3x0.5x5mm Flathead Screws (supplied), install LIRA optical accessory to luminaire as shown. If not installing LIRA optical
accessory skip to Step 1.3.
M3x0.5x5MM
FLATHEAD SCREW
(supplied)
4X
4 X M3 SCREW
NOTE: APPLY
LOCTITE 271
(supplied by others)
PRIOR TO INSTALL
NOTE: TORQUE
SCREWS TO 1NM
LIRA GEN.2
OPTICAL
ACCESSORY
(optional)
45° VISOR
ADJUSTABLE IN 90°
INCREMENTS
241622
2MM ALLEN KEY
(supplied)
 Loading...