1
DOC273.99.90506
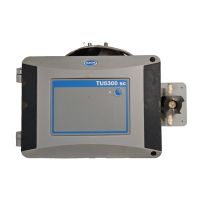
TU5300sc/TU5400sc
EN: Before the instrument is plumbed, make sure that the desiccant cartridge
and vial are installed. Make sure that power is supplied to the instrument and that
the instrument is set to on. Remove the process head and put it on the service
bracket. Do a leakage test after the sample flow is set to on.
DE: Stellen Sie sicher, dass die Trockenmittelpatrone und Küvette installiert
sind, bevor Sie die Schläuche anschließen. Stellen Sie sicher, dass das Gerät mit
Strom versorgt wird und eingeschaltet ist. Entfernen Sie den Prozesskopf und
setzen Sie ihn auf die Servicehalterung. Führen Sie nach dem Aktivieren des
Probendurchflusses eine Dichtheitsprüfung durch.
IT: Prima di collegare lo strumento, accertarsi di aver installato la cartuccia
essiccante e la fiala. Assicurarsi che lo strumento sia alimentato e che sia acceso.
Rimuovere il regolatore di processo e collocarlo sulla staffa di servizio. Effettuare
un test delle perdite dopo aver impostato il flusso del campione su On.
FR: Avant de raccorder l'instrument, vérifiez que la cartouche de dessiccant et le
tube sont installés. Assurez-vous que l'instrument est sous tension et en position
Marche. Retirez la tête et placez-la sur la bride de service. Effectuez un test de
fuite une fois le débit d'échantillon activé.
ES: Antes de hacer la conexión hidráulica del instrumento, asegúrese de que el
cartucho desecante y la cubeta están instalados. Asegúrese de que el
instrumento recibe alimentación eléctrica y de que está encendido. Retire el
cabezal y colóquelo en el soporte de servicio. Realice una prueba de
estanqueidad tras activar el caudal de la muestra.
PT-BR: Antes de ligar a bomba, certifique-se de que o cartucho dessecante e
o frasco estejam instalados. Certifique-se que o instrumento esteja ligado.
Remova o cabeçote do instrumento e coloque-o no suporte. Faça um teste de
vazamento depois que o fluxo da amostra estiver definido como ativado.
ZH: 在连接仪器管道前,请确保干燥剂盒和瓶子已妥善安装。确保已为
仪器供电,并且仪器已开启。拆下测量头并将其放在维修架上。将样品
流设置为开,然后进行泄漏测试。
JA: 装置の配管を行う前に、乾燥剤カートリッジとバイアルが取り付けられて
いることを確認します。 電力が装置に供給されて、装置がオンになっていること
を確認してください。 プロセスヘッドを取り外し、サービスブラケットの上に置
いてください。サンプル流入開始後に漏れ試験を行ってください。
KO: 기기를 배관하기 전에 건조제 카트리지와 유리병이 설치되었는지 확인합
니다 . 전원이 기기에 공급되고 있으며 기기가 켜져 있는지 확인하십시오 . 프로
세스 헤드를 분리한 후 서비스 브래킷에 올려놓습니다 . 샘플 흐름을 켜짐으로 설
정한 후 누출 테스트를 수행합니다 .
TH: ◌
่
.
.
CS: Před zapojením přístroje ověřte, že je nainstalován zásobník vysoušecího
činidla a kyveta. Zkontrolujte, zda je zajištěno napájení přístroje a zda je přístroj
zapnutý. Demontujte procesní hlavu a nasaďte ji na servisní držák. Po spuštění
průtoku vzorku proveďte test netěsnosti.
DA: Før instrumentet forbindes, skal du kontrollere, at tørremiddelbeholderen og
målekammeret er installeret. Sørg for, at instrumentet er strømført, og at
instrumentet er tændt. Afmonter sensorhovedet og placer det på
betjeningsbeslaget. Foretag en lækagetest, når prøveflowet er indstillet til aktiv.
NL: Voordat het instrument wordt aangesloten, moet u ervoor zorgen dat de
droogmiddelpatroon en de kuvet zijn geïnstalleerd. Zorg dat het instrument
voeding krijgt en is ingeschakeld. Verwijder de proceskop en breng deze aan op
de servicebeugel. Voer een lekkagetest uit nadat de monsterstroom is
ingeschakeld.
PL: Przed podłączeniem urządzenia należy upewnić się, że zainstalowano
wkład desykantu i fiolkę. Sprawdzić, czy zasilanie jest doprowadzane i czy
urządzenie jest włączone. Zdjąć głowicę procesową i umieścić ją na wsporniku
serwisowym. Po włączeniu przepływu próbki należy przeprowadzić test
szczelności.
SV-SE: Se till att torkmedelspatronen och kyvetten är installerade innan
instrumentet förseglas. Se till att instrumentet har strömförsörjning och är
påslaget. Ta bort processhuvudet och placera det på underhållsfästet. Utför ett
läckagetest efter att provflödet är påslaget.
FI: Ennen kuin kytket laitteen letkut, varmista, että kuivikepatruuna ja näytepullo
on asennettu. Varmista, että laitteen virransyöttö toimii ja että laitteeseen on
kytketty virta. Poista prosessipää ja aseta se huoltopidikkeeseen. Tee vuototesti,
kun näytteen virtaus on otettu käyttöön.
BG: Преди инструментът да се монтира вертикално, проверете дали
касетата за изсушителя и флаконът са монтирани. Уверете се, че към
инструмента има подадено захранване и че инструментът е включен.
Отстранете обработващата глава и я поставете върху помощната планка.
Изпълнете тест за течове, след като потокът с пробата е зададен на
включено положение.
HU: A műszer vízszerelési munkái előtt ellenőrizze a szárítópatron és a cella
felszerelését. Ügyeljen a készülék tápellátására és bekapcsolására. Távolítsa el a
feldolgozófejet és helyezze a szervizkonzolra. Miután bekapcsolta a
mintaáramlást, végezzen szivárgástesztet.
RO:
Înainte de racordarea instrumentului, asiguraţi-vă că flaconul şi cartuşul cu
desicant au fost instalate. Asiguraţi-vă că se furnizează alimentare electrică la
instrument şi că instrumentul este pornit. Scoateţi capul de proces şi puneţi-l pe
consola de serviciu. Efectuaţi un test de scurgere după ce este activat fluxul de proba.
LT: Prieš prijungdami prietaisą prie vandentiekio, įsitikinkite, kad yra įdėta
sausiklio kasetė ir buteliukas. Įsitikinkite, kad prietaisui tiekiama energija ir kad
prietaisas yra įjungtas. Nuimkite apdorojimo galvutę ir padėkite ją ant techninės
priežiūros laikiklio. Įjungę mėginio srautą, patikrinkite sandarumą.
RU: Перед установкой трубок прибора убедитесь, что на него установлены
картридж с влагопоглотителем и пробирка. Убедитесь, что на прибор
подается электропитание и что прибор включен. Снимите измерительный
модуль и установите его на сервисный кронштейн. После включения подачи
пробы выполните проверку на наличие утечек.
TR: Cihazın akış tesisatının ayarlanmasından önce kurutucu kartuş ve şişenin
takılmış olmasına dikkat edin. Cihaza elektrik gidip gitmediğini ve cihazın açık
olup olmadığını kontrol edin. Proses başlığını çıkarın ve servis bağlantı parçasının
üzerine yerleştirin. Numune akışı açık olarak ayarlandıktan sonra bir sızıntı testi
yapın.
SK: Pred inštaláciou prístroja sa uistite, že je namontovaná kazeta s
desikantom a fľaštička. Skontrolujte, či je prístroj zapojený do elektrickej siete a či
je prístroj zapnutý. Zložte procesnú hlavu a položte ju na servisnú konzolu. Po
zapnutí prietoku vzorky vykonajte test netesnosti.
SL: Pred vgradnjo instrumenta v napeljavo se prepričajte, da sta vložek s
sušilnim sredstvom in viala nameščena. Instrument priklopite na napajanje in
vklopite. Odstranite procesno glavo in jo odložite na servisni nosilec. Ko je pretok
vzorca vklopljen, opravite preizkus tesnjenja.
HR: Prije postavljanja cijevi na instrument uvjerite se da su umetnuti spremnik
sredstva za isušivanje i bočica. Provjerite da li instrument dobiva napajanje i je li
uključen. Skinite glavu protočnog sustava i stavite je na servisni nosač. Nakon što
uključite probni protok, napravite ispitivanje propuštanja.
EL: Προτού πραγματοποιήσετε τις υδραυλικές συνδέσεις του οργάνου,
βεβαιωθείτε ότι έχουν εγκατασταθεί το φυσίγγιο αφυγραντικού και το φιαλίδιο.
Βεβαιωθείτε ότι το όργανο τροφοδοτείται με ρεύμα και ότι είναι ενεργοποιημένο.
Αφαιρέστε την κεφαλή συνεχούς μέτρησης και τοποθετήστε τη στον βραχίονα
service. Εκτελέστε δοκιμή διαρροής αφού η ροή δείγματος ενεργοποιηθεί.
ET: Enne seadme veetorustikuga ühendamist veenduge, et desikandikassett ja
viaal oleks paigaldatud. Veenduge, et seadmel oleks toimiv toitevarustus ja seade
oleks sisse lülitatud. Eemaldage töötluspea ja asetage see hoolduskinnitile.
Pärast proovivoolu sisselülitamist tehke lekketest.
S 100
SC200
SC1000
SC1500
SC4200c
C
T 5300sc
TU5400sc
U


 To Next Page

 General