This document is an instruction manual for a Nagold by Häfele Gas Hob, models 538.01.722 and 538.01.732. It provides comprehensive information on installation, usage, safety, and maintenance.
Function Description:
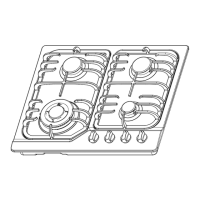
The Nagold by Häfele Gas Hob is a domestic cooking appliance designed for preparing food using gas burners. It features automatic ignition with a flame failure safety device on each burner, which automatically stops the gas flow if the flame goes out. The appliance is intended for domestic use only and not for commercial or industrial purposes.
Important Technical Specifications:
Model 538.01.722:
- Pan Support: Cast Iron
- Wok Pan Support: N/A
- Top Plate: Stainless Steel
- Dimension (WDH): 59050095 mm
- Ignition Device: Continuous Ignition Type
- Gas Connection: G1/2 thread
- Electric Supply: 110~240Vac, 50Hz/60Hz, 2W
- Burner Feature: Triple-Crown (1), Semi-rapid (2), Auxiliary (1)
- Total Heat Input: 7.8kW (568g/h)
- Heat Input and Orifice Size Marked (mm):
- Work Burner: 3.3kW (241 g/h)
- Semi-rapid: 1.75kW (127g/h)
- Auxiliary-rapid: 1.0kW (73g/h)
- Orifice Sizes:
- G30 50mbar: Work burner 0.76, Semi-rapid 0.58, Auxiliary 0.43
- G31 37mbar: Work burner 0.93, Semi-rapid 0.65, Auxiliary 0.50
- G30 29mbar: Work burner 0.93, Semi-rapid 0.65, Auxiliary 0.50
- G20 20mbar: Work burner 1.28, Semi-rapid 0.97, Auxiliary 0.72
- G25 25mbar: Work burner 1.36, Semi-rapid 0.95, Auxiliary 0.70
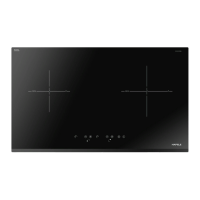
Model 538.01.732:
- Pan Support: Cast Iron
- Wok Pan Support: N/A
- Top Plate: Glass
- Dimension (WDH): 600510110 mm
- Ignition Device: Continuous Ignition Type
- Gas Connection: G1/2 thread
- Electric Supply: 110~240Vac, 50Hz/60Hz, 2W
- Burner Feature: Triple-Crown (1), Semi-rapid (2), Auxiliary (1)
- Total Heat Input: NA (Not Available in the provided table, but burner heat inputs are identical to 538.01.722, suggesting similar total output)
- Heat Input and Orifice Size Marked (mm): (Identical to Model 538.01.722)
- Work Burner: 3.3kW (241 g/h)
- Semi-rapid: 1.75kW (127g/h)
- Auxiliary-rapid: 1.0kW (73g/h)
- Orifice Sizes: (Identical to Model 538.01.722)
- G30 50mbar: Work burner 0.76, Semi-rapid 0.58, Auxiliary 0.43
- G31 37mbar: Work burner 0.93, Semi-rapid 0.65, Auxiliary 0.50
- G30 29mbar: Work burner 0.93, Semi-rapid 0.65, Auxiliary 0.50
- G20 20mbar: Work burner 1.28, Semi-rapid 0.97, Auxiliary 0.72
- G25 25mbar: Work burner 1.36, Semi-rapid 0.95, Auxiliary 0.70
Usage Features:
- Control Knobs: Each burner has a control handle with symbols indicating "gas off" (black circle), "maximum setting" (large flame), and "minimum setting" (small flame). The minimum setting is at the end of the anti-clockwise rotation.
- Automatic Ignition: To ignite a burner, press and turn the control knob anti-clockwise to the maximum position. Keep the knob depressed for 15 seconds after the flame lights to ensure the flame failure safety device is engaged. If the flame doesn't light within 15 seconds, stop and wait at least 1 minute before trying again.
- Flame Regulation: After ignition, adjust the flame by turning the control knob anti-clockwise between the maximum and minimum positions.
- Switching Off: To turn off a burner, turn the control knob fully clockwise to the "gas off" position.
- Power Failure: In case of power failure, burners can be lit manually using a match.
- Pan Diameter: The manual provides a table for recommended pan bottom diameters for each burner type (Triple-Crown, Rapid, Semi-Rapid, Auxiliary) to ensure efficient cooking and prevent gas waste.
- Cookware Guidelines:
- Use cookware suitable for each burner to avoid wasting gas and discolouring the cookware.
- Place a lid on cookware to save energy.
- Use pots, saucepans, and frying pans with a thick, flat bottom.
- Always place cookware directly over the burners, not to one side.
- Place cookware on top of the trivet.
- Handle cookware carefully when on the burner.
- Do not use small diameter cookware on large burners.
- Do not use pans with convex or concave bottoms.
- Avoid cooking without a lid or with the lid half off.
- Do not place cookware on one side of a burner as it could tip over.
- Do not use cookware with a large diameter near controls that could cause overheating.
- Never place cookware directly on top of the burner without a trivet.
- Do not place flame tamers, asbestos mats, or similar between the pan and pan support.
- Do not use excessive weight or hit the cooktop with heavy objects.
- It is not recommended to use roasting pans, frying pans, or grill stones simultaneously on several burners due to potential heat build-up.
- Turn down the flame once liquid starts boiling to simmer.
- Safety Advice:
- Always use heat-resistant pot holders or gloves.
- Do not let pot holders come near open flames.
- Ensure pot holders are not damp or wet.
- Only use burners after placing pots and pans on them; do not heat empty pots.
- Never use plastic or aluminum foil dishes.
- Ensure electrical appliance cables do not contact hot surfaces.
- Do not use tea towels or similar in place of pot holders.
- If using glass cookware, ensure it's designed for top plate cooking. If the glass surface cracks, switch off the appliance to avoid electrocution.
- Turn cookware handles towards the side or center of the top plate to minimize burns, ignition of flammable materials, and spillage.
- Turn burner controls off before removing cookware.
- Watch fried foods carefully at high flame settings.
- Heat fat slowly and watch it.
- Ensure foods for frying are as dry as possible to prevent bubbling and spillage.
- Never move a pan of hot fat until completely cool.
Maintenance Features:
- Cleaning Operations: Must be carried out when the appliance is completely cool and disconnected from the mains supply. Do not use a steam jet or high-pressure cleaning equipment.
- Cleaning Agents: Use water and a little washing-up liquid. Avoid abrasive or caustic cleaning agents, nylon brushes, metal brushes, acidic/alkali detergents, edible oil, abrasives, thinner/benzene.
- Pan Support, Control Handles:
- Remove pan supports.
- Clean pan supports and control handles with a damp cloth, washing-up liquid, and warm water. Soak for stubborn soiling.
- Dry thoroughly with a clean soft cloth.
- Top Plate:
- Regularly wipe with a soft cloth wrung out in warm water with a little washing-up liquid.
- Dry thoroughly after cleaning.
- Promptly remove salty foods or liquids to prevent corrosion.
- Stainless steel parts may discolour over time; clean with a suitable stainless steel product after each use.
- Burners:
- Remove burner lids and flame spreaders by pulling them upwards.
- Soak them in hot water and a little detergent.
- Clean, wash, and dry carefully, ensuring flame holes are clean and dry.
- Wipe fixed parts of the burner cup with a damp cloth and dry.
- Gently wipe the ignition device and flame supervision device with a well-wrung-out cloth and dry with a clean cloth.
- Ensure the injector is not blocked before reassembling.
- Reassembly: Place the flame spreader onto the burner cup, ensuring the ignition and flame supervision devices extend through their holes and the spreader clicks into place. Position the burner lid onto the flame spreader, ensuring retaining pins fit into recesses.
- Important: Replace parts in the correct order, do not mix up top and bottom, and ensure locating pins fit exactly into notches.
- Gas Adjustment (Conversion):
- Only a qualified technician should perform gas conversion.
- Turn off gas and electricity supply before starting.
- Change Injector: Remove pan support, burner lid, and flame spreader. Unscrew the injector with a 7mm box spanner and replace it with the correct injector for the new gas supply. Reassemble and tighten.
- Adjust Minimum Flame Level: Turn taps to minimum. Remove the knob and use a small bladed screwdriver in the center of the tap shaft to adjust the flame. The correct flame length is 3-4mm. For butane/propane gas, screw the adjusting screw tightly in. Refit the knob. Test by quickly turning from maximum to minimum flow; if the flame goes out, readjust. Repeat for all gas taps.
- Post-Conversion: A qualified technician must mark "V" on the rating plate to match the new gas category and perform a full operational test and leakage test (e.g., with soap water or a gas detector). Do not dismantle the tap shaft; replace the whole tap if malfunctioning. Ensure the injector is not blocked before placing burners back.
- Dispose of packaging safely and environmentally.
- When disposing of an old appliance, make it unusable by cutting off the cable.
- The product is marked for separate disposal from household waste at the end of its life to promote sustainable reuse of material resources and prevent harm to the environment.
- Household users should contact their retailer or local government office for recycling information.
- Business users should contact their supplier for disposal terms and conditions. The product should not be mixed with other commercial wastes.