This document describes the operation and maintenance of a split-type room air conditioner, focusing on its various functions, user interface, and care instructions.
Function Description
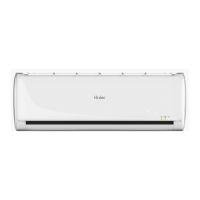
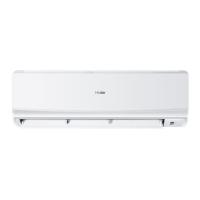
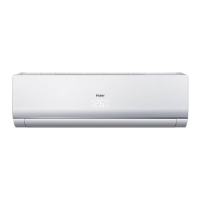
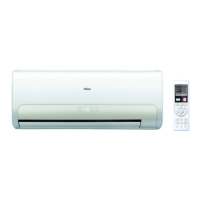
The air conditioner is designed to provide comfortable indoor climate control through various modes of operation including cooling, heating, drying, and fan-only modes. It features a remote controller for convenient operation and an indoor unit with a display board to indicate its status.
Operation Modes:
- AUTO Mode: The unit automatically selects either cooling or heating operation based on the room temperature. The fan speed is also automatically adjusted.
- COOL Mode: Provides cooling to lower the room temperature.
- HEAT Mode: Provides heating to raise the room temperature. (Note: Cooling-only units do not have heating functionality.)
- DRY Mode: Designed to dehumidify the room. In this mode, if the room temperature falls below the set temperature plus 2°C, the unit will run intermittently at low fan speed, regardless of the user's fan setting.
- FAN Mode: Circulates air without cooling or heating. In this mode, temperature setting and sleep operation are not available.
Special Functions:
- Timer On/Off Operation: Users can set a timer for the unit to turn on or off automatically. The timer can be set for up to 24 hours, with increments of 0.5 hours for the first 12 hours and 1 hour thereafter. This allows for both start-stop and stop-start operations.
- POWER Operation (Turbo Mode): This function provides rapid heating or cooling when quick temperature changes are desired. It can be activated through the "EXTRA FUNCTION" button on the remote controller.
- QUIET Operation: Reduces operational noise for a more peaceful environment, suitable for rest or reading. This function is activated via the "QUIET" button on the remote controller. Prolonged use in this mode may result in less uniform temperature distribution.
- Comfortable SLEEP Function: Adjusts the temperature automatically during sleep to optimize comfort and save energy. In COOL/DRY mode, the temperature gradually increases over the first two hours and then maintains for six hours before stopping. In HEAT mode, the temperature gradually decreases over the first two hours, then increases over the next three hours, maintaining for three hours before stopping. This function has no effect in FAN mode.
- Healthy Airflow Operation: Allows users to adjust the vertical flap to specific positions for optimized airflow distribution, promoting a healthier indoor environment. This function is accessed via the "EXTRA FUNCTION" button.
- Air Flow Direction Adjustment: The vertical flap can be adjusted to various positions, including an auto-swing function, to direct airflow as desired. The horizontal blade can be manually adjusted for left and right airflow.
- Anion Generator: Some models include an anion generator to improve air quality.
- Air Purifying Filter: An internal filter designed to remove impurities from the air.
User Interface:
- Remote Controller: The primary interface for controlling the air conditioner. It features buttons for power, mode selection (AUTO, HEAT, COOL, DRY, FAN), temperature adjustment (TEMP+ / TEMP-), fan speed, swing function, timer settings (TIMER ON / TIMER OFF), quiet mode, health mode, lock function, light control, and extra functions. An LCD display shows current settings and additional function indicators.
- Display Board (Indoor Unit): Provides visual feedback on the unit's status, including a remote signal receiver indicator, power indicator, timer mode indicator, and operation mode indicator.
- Emergency Switch: Located on the indoor unit, this switch allows for basic operation (cooling or heating based on room temperature, or fan-only) if the remote controller is lost or defective. It also serves as a test operation switch for specific conditions.
Usage Features
Starting and Stopping the Unit:
- To start, press the ON/OFF button on the remote controller.
- To stop, press the ON/OFF button again.
Temperature Setting:
- Use the TEMP+ and TEMP- buttons to adjust the desired temperature. Each press changes the temperature by 1°C. Holding the button down allows for rapid adjustment.
Fan Speed Selection:
- Press the FAN button to cycle through different fan speeds: LOW, MED, HI, and AUTO. In AUTO mode, the unit adjusts the fan speed based on room temperature.
Battery Loading (Remote Controller):
- To load batteries, remove the battery cover, insert two R-03 batteries, ensuring correct polarity (+/-), and then replace the cover.
- The remote controller should be used within 7 meters of the indoor unit without obstacles. Full or unclear display indicates low battery power.
Cautions During Operation:
- Avoid adjusting the vertical flap manually when the unit is on, as this can cause the grille to run incorrectly.
- In high humidity conditions, condensate water may form at the air outlet if all vertical louvers are adjusted to the left or right.
- It is recommended not to keep the horizontal flap in a downward position for extended periods in COOL or DRY mode to prevent condensate water formation.
- After a power failure, the unit will automatically resume operation after a 3-minute compressor delay.
Maintenance Features
General Care:
- Indoor Body: Wipe with a soft, dry cloth. For stubborn stains, use a neutral detergent diluted with water, wring out the cloth, wipe, and then wipe off any detergent residue.
- Remote Controller: Wipe with a dry cloth. Do not use water, glass cleaner, or chemical cloths.
- Cleaning Agents: Never use gasoline, benzene, thinner, or other harsh cleansers, as they can damage the unit's coating. Hot water above 40°C (104°F) can cause discoloration or deformation.
Air Filter Cleaning:
- Frequency: Clean the air filter approximately every two weeks.
- Procedure:
- Open the inlet grille by pulling it upward.
- Remove the filter by pushing up its center tab slightly and then pulling it downward.
- Clean the filter using a vacuum cleaner to remove dust, or wash it with water. Ensure the filter is completely dry in the shade before reinstallation.
- Attach the filter correctly, ensuring the "FRONT" indication faces forward and the filter is securely fixed behind the stopper.
- Close the inlet grille.
Air Purifying Filter Replacement (Optional Part):
- Procedure:
- Open the inlet grille using the grille-support device on the right side of the indoor unit.
- Detach the standard air filter by sliding the knob upward and withdrawing it.
- Insert the air purifying filter appliances into the right and left filter frames.
- Attach the standard air filter (necessary installation).
- Close the inlet grille.
- Photocatalyst Air Purifying Filter: The white side should face outside, and the black side face the unit. This filter needs to be solarized every 6 months for normal family use.
- Bacteria-Killing Medium Air Purifying Filter: The green side should face outside, and the white side face the unit. This filter does not require replacement but should be cleaned frequently with a vacuum cleaner or by lightly flapping to remove dust. Store in cool, dry conditions away from direct sunlight when not in use to preserve its sterilization ability.
Smart Use Practices:
- Set a proper room temperature.
- Do not block the air inlet or outlet.
- Close doors and windows during operation to improve efficiency.
- Use the timer effectively.
- If the unit will not be used for a long time, turn off the main power supply switch.
- Use the louvers effectively to direct airflow.
Troubleshooting (Before Calling Service):
- System does not restart immediately: There is a 3-minute delay for system protection after stopping or power reinsertion.
- Noise is heard: Swishing/gurgling noises are normal due to refrigerant flow. Cracking noises are due to casing expansion/contraction. A big noise from airflow may indicate a dirty air filter.
- Smells are generated: The system may circulate smells from furniture, paint, or cigarettes.
- Mist or steam blown out: This can occur in COOL or DRY mode due to sudden cooling of indoor air.
- Fan speed cannot be changed in DRY mode: The unit runs intermittently at LOW speed if room temperature is low.
- Poor cooling: Check if the power plug is inserted, if there's a power failure or blown fuse, if the air filter is dirty, if there are obstacles blocking airflow, if the temperature is set correctly, if doors/windows are open, if direct sunlight is entering the room (use curtains), or if there are too many heat sources/people in the room.