Installation & Adjustment
Drain hose
5
2. First connect the drain hose to the connection
point on the lower right side of the cabinet, and fasten
with drain hose clamp (provided).
3. Connect drain hose guide on to the outside of
drain hose. To guide the drain hose over the
tub or standpipe, the bracket MUST be fitted
to the drain hose.
Drain hose
clamp
Drain hose joint
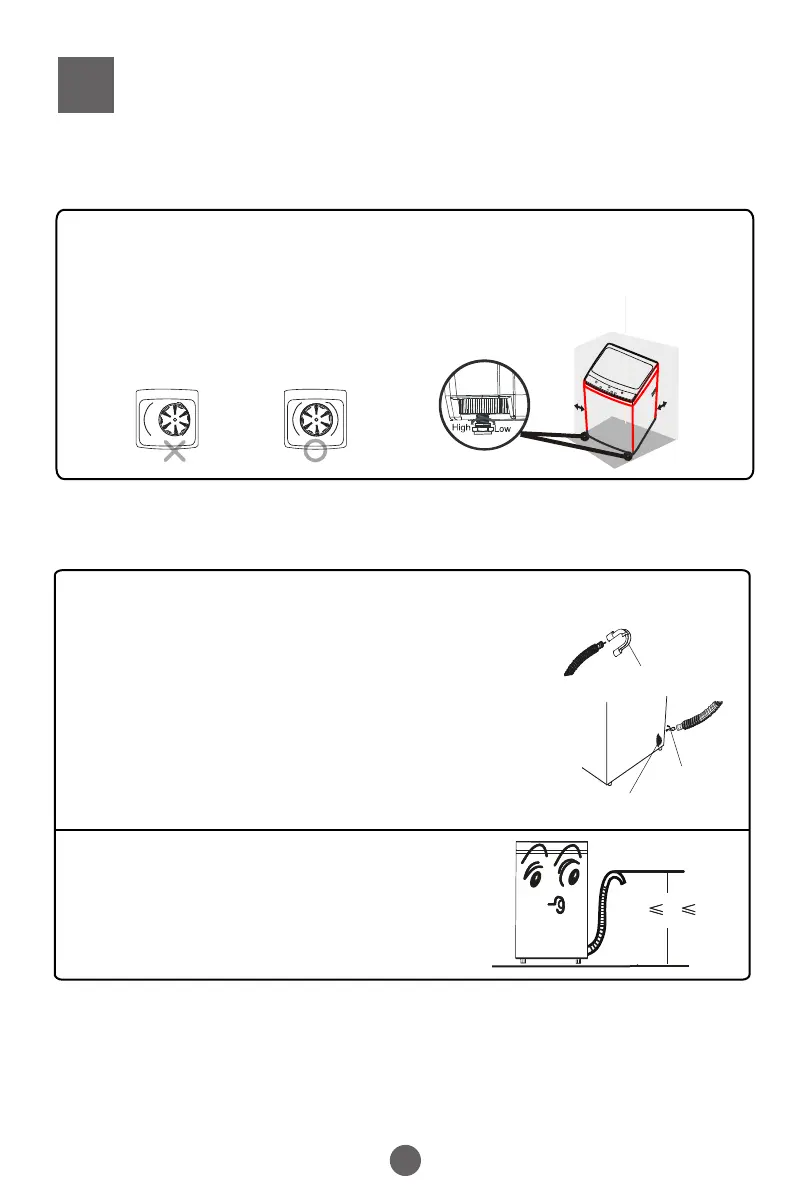
1.The height of the standpipe or tub should be
between 0.8 - 1.2 m.
2.To avoid syphoning, the drain hose should not
extend more than 20 mm from the end of the guide.
Ensure drain hose is held in place to avoid
leaks or spills.
Bracket
0
.
8
m
h
1 .2
m
1. Remove the cap of the drain hose outlet.
Note: A small amount of water may come out when the cap is removed. This is
normal as there maybe some water left in the pump as the
machine is tested during manufacture.
Installation on an uneven surface can lead to ‘out of balance’ events, instability in the
machine operation, or even failure to successfully complete a wash cycle.
Please refer to the following method for adjustment:
1.Confirm whether the machine is level.
2. Lift the lid and ensure that the bowl is central to the top deck opening.
Adjust the two front leveling feet as necessary.
Balancing the washing machine
Note:
The distance between the washing machine
and the wall should be at least 20mm.
Not level level
20mm
20mm
 Loading...