EasyManua.ls Logo

Haier YR-E06 User Manual

Haier YR-E06
6 pages
To Next Page IconTo Next Page
Page #1 background imageLoading...
Page #1 background image
No. 0010573682
C
Table of Contents
Operation
5-9
Parts and Functions
1-4
11
10
Use shielede wires for telecommunication
between wire controller and indoor unit;
indoor unit and outdoor unit. Ground the
shield on one side.
Otherwise misoperation because of noise
may occur.
Signal wire is self-provided by user.
Shielded wire
ground
OPERATION MANUAL
YR-E06&YR-H71
Please read this operation manual before using the air conditioner.
Please keep this manual carefully and safely.
Health Function and Installating the Reciever
Installating the
wire controller
11
Installating the
wire controller
5. Replace the upper cover of wire controller
Note
Try as far as possible a flat surface for installation.
Don't use excessive force when tightening screws,
or lower part might got deformed.
Hint
1. Power supply switch and signal wire should be prepaired by the user.
2. Don't touch PCB with hand.
Be careful not to hold down the wiring.
1. Remove upper cover of wire controller
Remove upper part of wire controller by press.
Lower cover of wire
controller
Upper cover of wire
controller
2. Install the wired remote controller
Please drill two holes on the wall according to the
back cover screw hole position of the wire remote
controller, then strike the wood block to the holes
respectively, then align the 2 screw hole of the wire
controller back cover to the wood block, fasten the
wire reote controller to the wall use wood screws.
3. Switch setting
The switchs setting as follows:1.ON 2.OFF 3.ON 4.OFF
4. Connecting method as the following chart
Back cover of the wire
controller
PCB is mounted on lower part of wire
controller, be careful not to damage it.
Switch button
Screw hole
No
Symbol
colour
contents
1
2
3
4
A
B
C
D
White or Green
Red
Yellow
COM
Gnd
12V
Question and Answer IconNeed help?

Do you have a question about the Haier YR-E06 and is the answer not in the manual?

Haier YR-E06 Specifications

General IconGeneral
BrandHaier
ModelYR-E06
CategoryRemote Control
Compatible DevicesHaier Air Conditioners
Power SourceBattery
Battery TypeAAA
Number of Batteries2

Summary

Installing the Wire Controller

Remove Upper Cover

Remove the upper part of the wire controller by pressing, being careful not to damage the PCB.

Install Wired Remote Controller

Drill holes, attach a wood block, align screw holes, and fasten the controller back cover to the wall.

Switch Settings and Notes

Details switch settings (1.ON, 2.OFF, 3.ON, 4.OFF) and installation advice.

Connecting Method

Specifies wire colors (White/Green, Red, Yellow) for 12V, Gnd, and COM connections.

Replace Upper Cover

Reattach the upper cover of the wire controller, ensuring no wiring is held down.

Parts and Functions

Wired Remote Controller Usage

Explains using a single wired controller or dual control mode with an additional remote.

Remote Controller and Receiver

Details using a separate remote controller with a matching receiver for series units.

Health Function and Receiver Installation

Health Function Explained

Describes the health mode, oxygen pump, and negative ion generator functions.

Receive Display Installation

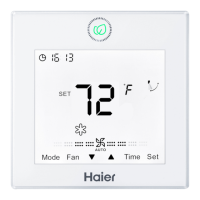
Guidelines for installing the receive display to avoid environmental interference.

Receiver Wiring and Safety

Instructions for connecting the receiver, referencing wiring diagrams and safety cautions.

Operation Modes and Features

Auto Restart Function

Details on setting and canceling the auto restart feature for power failure recovery.

MRV Auto Restart Considerations

Explains MRV system auto restart and its impact on individual indoor units.

User Cautions

Important user advice regarding remote control operation and sleep function.

Remote Controller Functions

Display Indicators Overview

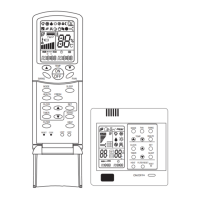
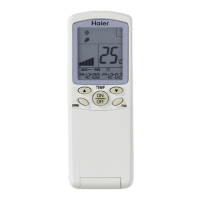
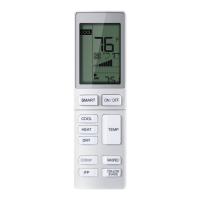
Details on various display elements like temperature, clock, timer, and operational modes.

Control Buttons Explained

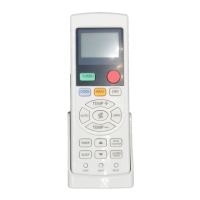
Explanation of buttons for ON/OFF, mode selection, fan speed, temperature, timer, and sleep.

Utility and Maintenance Buttons

Covers buttons for clock setting, reset, and air filter reset.

Clock Calibration Guide

Step-by-step instructions for correctly setting the clock on the remote controller.

Operation - Sleep and Timer Functions

Sleep Function Details

Explains how to set and use the sleep function for comfortable temperature adjustments.

Sleep Function in Cooling/Heating

Describes temperature changes during sleep mode in cooling and heating operations.

Timer Functionality

Instructions on setting and confirming TIMER ON and TIMER OFF functions.

Timer Mode Cancellation

How to cancel the timer mode by pressing the TIMER button repeatedly.

Operation - Timer ON/OFF

Setting Timer ON/OFF

Step-by-step guide to select operation mode and set TIMER ON/OFF.

Time Setting for TIMER ON

Procedure to set the desired ON time, adjusting in 10-minute increments.

Confirming TIMER ON Setting

Confirms the set ON time, stopping the blinking of the 'ON' indicator.

Time Setting for TIMER OFF

Procedure to set the desired OFF time, adjusting in 10-minute increments.

Confirming TIMER OFF Setting

Confirms the set OFF time, stopping the blinking of the 'OFF' indicator.

Operation - Recommendations and Timer

Operational Recommendations

Advice on using COOL, HEAT, and DRY modes for different seasons and climates.

Unit Start and Mode Selection

Instructions for starting the unit and cycling through operation modes.

Temperature and Fan Speed Settings

Guidance on setting temperature and fan speed, including auto and manual options.

Timer Operation Setup

Instructions for setting timer ON/OFF operations for automatic unit start/stop.

Timer Mode Cancellation

How to cancel the timer mode to return to normal operation.

Related product manuals