YR-HD REMOTE CONTROLLER OPERATION MANUAL
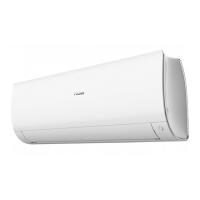
Remote controller
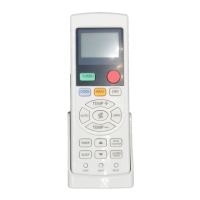
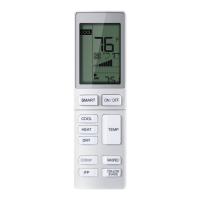
Parts and Functions
1
18
19
20
21
23
24
25
22
11
10
12
13
14
15
16
17
2
3
4
5
6
7
8
9
1. Mode display
Operation mode AUTO COOL DRY
Remote controller
Operation mode HEAT FAN
Remote controller
2. Signal sending display
3. SWING display
4. FAN SPEED display
LO MED HI AUTO
Display
circulated
5. LOCK display
6. TIMER OFF display
TIMER ON display
7. TEMP display
8. Additional functions display
Operation
mode
QUITE SLEEP TURBO FRESH
Remote
controller
Operation
mode
ELECTRICAL
HEATING
HEALTH
Remote
controller
9. QUIET button
10. HEAT button
11. COOL button
12. AUTO button
13. FAN SPEED button
14. TIMER button
15. HEALTH button
16. LOCK button
Used to lock buttons and LCD display.
17. LIGHT button (This model has not
this function.)
Control the lightening and extinguishing
of the indoor LED display board.
18. POWER ON/OFF button
19. DRY button
20. TEMP button
21. SWING button
22. Timer adjust button
23. EXTRA FUNCTION button
Function: Fan only function, health
airow upwards and downwards
sending function, sleep function, Fresh
function, Fahrenheit Celsius conversion,
Power setting function, left and right
swing function, 10°C heating function,
B code, Electrical Heating function.
24.CANCEL/CONFIRM button
Function: Setting and cancel to the
timer and other additional functions.
25. RESET button
When the remote controller appears
abnormal, use a sharp pointed article
to press this button to reset the remote.
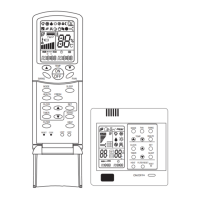
Loading of the battery
1. Remove the battery cover;
2. Load the batteries as illustrated. 2
R-03 batteries, resetting key (cylinder);
3. Be sure that the loading is in line with
the " + "/"-";
4. Load the battery,then put on the cover
again.
Note:
• The distance between the signal transmission head and the receiver
hole should be within 7m without any obstacle as well.
• When electronic-started type uorescent lamp or change-over type
uorescent lamp or wireless telephone is installed in the room, the
receiver is apt to be disturbed in receiving the signals, so the distance
to the indoor unit should be shorter.
• Full display or unclear display during operation indicates the batteries
have been used up. Please change batteries.
• If the remote controller can't run normally during operation, please
remove the batteries and reload several minutes later.
Hint: Remove the batteries in case won't be in use for a long period. If
there is any display after taking-out, just press reset key.
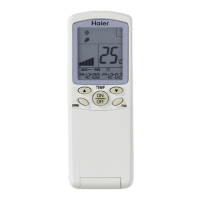
Operation
Base Operation
1
3
2
4
1. Unit start
Press ON/OFF on the remote controller, unit starts.
2. Select operation mode
COOL button:Cooling mode; HEAT button: Heating mode; DRY button: Dehumidify mode
3. Select temp.setting
Press
/ button
Every time the button is pressed, temp.setting increase 1°C, if kept depressed,
it will increase rapidly.
Every time the button is pressed, temp.setting decrease 1°C, if kept depressed,
it will decrease rapidly.
Select a desired temperature.
4. Fan speed selection
Press FAN button. For each press, fan speed changes as follows:
Remote controller:
LO MED HI AUTO
Display
circulated
Air conditioner is running under displayed fan speed. When FAN is set to AUTO, the air
conditioner automatically adjusts the fan speed according to room temperature.
NO. 0150520000