EasyManua.ls Logo

HaiLin Controls HL-ESNC-025 - User Manual

HaiLin Controls HL-ESNC-025
2 pages
Print Icon
To Next Page IconTo Next Page
Loading...
HaiLin Controls
Page 1 of 2
NON-PROGRAMMABLE
DIGITAL THERMOSTAT
HL-ESNC-025 (220V) / HL-ESND-026 (24V)
-L
arge, Easy To Read Display
-Blue Backlight
-Fahrenheit or Centigrade
-CoolHeat and Automatic Heat/Cool Changeover
-Keypad Lock
-Auto Recovery
Specification
Set-Point Range: 5℃~35 (41℉~95 )
Operating difference: ± 1
Switch current rating: < 2 A
Sensing element : NTC
Display: LCD
Power supply:
HL-ESNC-023/ HL-ESND-023: 220V AC±10%, 50Hz
HL-ESNC-024/ HL-ESND-024: 24V AC, 50Hz
Dimension: 86 × 86 × 35 mm ( W × H × D )
Housing: ABS Flame Retardant
Basic Operation
Power ON/OFF
" To turn the thermostat on, press “ ”. Mode symbol ( , or ),
“RT”, and room temperature will be displayed.
" To turn the thermostat off, press “ ” again. There is no any display
on LCD and no any output.
Select Mode
" Cool SettingPress “ ”, the “SET” icon will flash, until the “ ” is
displayed, it will be confirmed automatically after 6 seconds;
" Heat SettingPress “ ”, the “SET” icon will flash, until the “ ” is
displayed, it will be confirmed automatically after 6 seconds;
" Auto SettingPress “ ”, the “SET” icon will flash, until the “ ” is
displayed, it will be confirmed automatically after 6 seconds.
NOTE:
" Heating Mode: When the heating temperature is higher than the
current room temperature, it will display ” and the thermostat will turn
on; otherwise, it will flash ” and the thermostat will turn off;
" Cooling Mode: When the cooling temperature is lower than the
current room temperature, it will display ” and the thermostat will turn
on; otherwise, it will flash ” and the thermostat will turn off;
" Auto ModeIt will display and the working mode active status
refers to the cool and the heat working mode, when does not satisfy the
above condition, the thermostat will have no output and will stop.
Select Desired Temperature
" Press the UP or DOWN buttons until the desired heating or cooling
temperature set point is displayed.
" Press the MODE button to select the second temperature setting
(either HEAT or COOL)
Setting fan operation
Press the Fan button to switch among Hi Med Low
and AUTO fan settings. When the Hi, Med or Low mode is selected, the
fan runs continuously for improved air circulation.
When the AUTO mode is selected, the fan runs only as needed to
maintain the desired indoor temperature.
Service filter feature
" The thermostat reminds you when it’s time to change or clean the
filter by displaying the “
” indicator.
" Hold the Fan button down for approximately 5 seconds after you
have changed or cleared your filter to reset the timer. Then the “ ” will
be turned off and filter timer cleared manually.
Checking the outdoor temperature
" Hold the Mode button down for approximately 5 seconds.
" Outdoor temperature will be displayed for about 5 seconds.
NOTE: If “E2” is displayed, the thermostat does not include the outdoor
temperature function or the function is not properly check with your
dealer if you are unsure.
(Only used in HL-ESND-023 and HL-ESND-024 model)
OPERATIONAL INFORMATION
Compressor Timeguard
" This timer prevents the compressor from starting unless it has been
off for at least 5 minutes. It can be defeated for 1 cycle by
simultaneously
pressing the FAN mode button and the UP button.( Option 12 default
setting is 3 )
Minimum On Time
" In normal operation, when a stage turns on, it will not turn off for a
minimum of 3 minutes. (Option 13 default setting is 3)
Auto Changeover
" When the auto changeover mode is selected, a change from heat to
cool (or vice versa) will not occur until an opposite mode demand has
existed for 20 minutes. If the set point is changed, the 20 minute
requirement is deleted. Auto mode may be disabled. (Option 14 default
setting is 20 )
Heat On and Cool On Icons
" When a heating or cooling demand exists, the HEAT ON or COOL
ON icon will either remain on or flash. If flashing, the equipment is
temporarily prevented from turning on by one of the timers. While the
icon remains on without flashing, the equipment is on.
Error Codes
E1 — If the thermostat cannot properly read room temperature, and it
needs to be adjusted, E1 will be displayed.
E2 — If the thermostat cannot properly read outdoor temperature, and it
needs to be adjusted, E2 will flash alternately with room temperature.
F1— Keypad is locked.
Set Thermostat Configuration
" Configuration options are intended to be selected at installation and
normally should not be modified by the home owner. These options are
not discussed in the Homeowner’s Guide and therefore must be made
as part of the installation. A special procedure allows entry in to the
configuration mode. The thermostat will automatically exit this if no
button is pressed for 90 seconds.
" An explanation for each of these and how to enter the configuration
mode follows.
To enter the configuration mode
" Turn off the thermostat and hold the fan button down for
approximately 15 seconds. After 15 seconds, Option “01” will appear in
the display.
OPTION 01 – OUTDOOR SENSOR SETTING
" This option is used to choose whether the outdoor sensor exists. If
the thermostat connected the outdoor sensor, set this option ON,
otherwise set OF.
TO ADJUST:
1. Enter configuration mode (if not already there).
2. Use Up and Down buttons to display Option 01.The “SET” icon
should be off.
3. Press Mode button once. The “SET” icon will be come on. The
display now shows Option 01 setting.
4. Use Up and Down buttons to move between the available Option 01
choices of ON or OF. Factory default is OF.
5. Press Mode button again to return to Option 01. The SET icon will
now be off.
6. Use Up and Down buttons to select another Option, or press Power
button to exit configuration mode.
OPTION 02 – CLEAN FILTER TIMER
" This option selects the number of hours of blower operation (Heating,
cooling, or fan).Time selection can be from 400 to 3600 hours by
selecting numbers from 1 to 9. (Time is 400 X number selected.)
Factory default is 2 (800 hours).Recommended selection are :
disposable filter 800 hours, media filter 1200 to 1600 hours, or
electronic air cleaner 1600 to 2400 hours of blower operation.
TO ADJUST:
1. Enter configuration mode (if not already there).
2. Use Up and Down buttons to display Option 02.The “SET” icon
should be off.
3. Press Mode button once. The “SET” icon will be come on. The
display now shows Option 02 setting.
4. Use Up and Down buttons to move between the available Option 02
values 1 to 9. Factory default is 2.
5. Press Mode button again to return to Option 02. The “SET” icon will
now be off.
6. Use Up and Down buttons to select another Option, or press Power
button to exit configuration mode.
OPTION 03 –FAHRENHEIT/ CELSIUS SELECTION
" This option selects Fahrenheit or Celsius operation.
TO ADJUST:
1. Enter configuration mode (if not already there).
2. Use Up and Down buttons to display Option 03.The “SET” icon
should be off.
3. Press Mode button once. The “SET” icon will be come on. The
display now shows Option 03 setting.
4. Use Up and Down buttons to move between the available Option 03
choices of F (Fahrenheit) or C (Celsius). Factory default is C.
5. Press Mode button again to return to Option 03. The SET icon will
now be off.
6. Use Up and Down buttons to select another Option, or press Power
button to exit configuration mode.
OPTION 04 –FAN (Hi. Med and Low) ON WITH W/W1 OUTPUT
" This selection determines whether the FAN output is to be ON or
OFF when any W output is ON. Most furnaces and fan coils manage
their own blowers and do not require a separate FAN signal. For these
applications, select OFF. Some auxiliary heaters require a separate
FAN signal to turn on the blower. In this case, select On. Factory default
is OF (OFF).
TO ADJUST
1. Enter configuration mode (if not already there).
2. Use Up and Down buttons to display Option 04.The “SET” icon
should be off.
3. Press Mode button once. The “SET” icon will be come on. The
display now shows Option 04 setting.
4. Use Up and Down buttons to move between the available Option 04
choices of ON or OF. Factory default is OF.
5. Press Mode button again to return to Option 04. The “SET” icon will
now be off.
6. Use Up and Down buttons to select another Option, or press Power
button to exit configuration mode.
OPTION 05 –INDOOR SENSOR SELECTING
" To use this function, option 01 must be set to be On and an outdoor
sensor must be connected. Select ON, outdoor sensor will be replaced
the building sensor and OPTION 08 will not work. Factory default is OF.
TO ADJUST
1. Enter configuration mode (if not already there).
2. Use Up and Down buttons to display Option 05.The “SET” icon
should be off.
3. Press Mode button once. The “SET” icon will be come on. The
display now shows Option 05 setting.
4. Use up and down buttons to move between the available Option 05
choices of ON or OF. Factory default is OF.
5. Press Mode button again to return to Option 05. The “SET” icon will
now be off.
6. Use Up and Down buttons to select another Option, or press Power
button to exit configuration mode.
OPTION 06ROOM TEMPERATURE OFFSET
" This option allows calibration (or deliberate miscalibration) of room
temperature sensor. There are various reasons why the home owners
want to adjust the displayed temperature. The selected number is the
number of degrees, plus or minus, which will be added to the actual
temperature. The number can range between -5 and +5. Factory default
is 0. This adjusted value will be used as actual temperature for both
display and control action. For example, if 2 is selected, 72F actual will
read 74F. If set point is 72, the room will control to an actual value of 70
which will be displayed and acted upon as if it were 72. The effect is that
a positive number selection will make the room temperature lower and
vice versa. This thermostat is factory calibrated within an accuracy of
plus or minus 1F, so this adjustment will provide the best accuracy when
set to 0.
TO ADJUST
1. Enter configuration mode (if not already there).
2. Use Up and Down buttons to display Option 06.The “SET” icon
should be off.
3. Press Mode button once. The “SET” icon will be come on. The
display now shows Option 06 setting.
4. Use Up and Down buttons to move between the available Option 06
choices of -5 through +5 in 1 step. Factory default is 0.
5. Press Mode button again to return to Option 06. The “SET” icon will
now be off.
6. Use Up and Down buttons to select another Option, or press Power
button to exit configuration mode.
OPTION 07AUTO MODE ON/OFF SELECTION
" This option allows the installer to enable or disable AUTO mode
Room temperature
Set desired
temperature
Change mode
Cool mode
Heat mode
A
uto mode
Service filter feature
Fan
Power button
Mode button
Fan button
Up button
Down button
Shows room temperature,
desired temperature, and
other feature information
as required.
Question and Answer IconNeed help?

Do you have a question about the HaiLin Controls HL-ESNC-025 and is the answer not in the manual?

Summary

Basic Operation of Digital Thermostat

Power ON;OFF Control

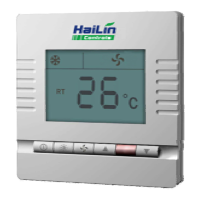
Turns the thermostat on or off, displaying mode and room temperature.

Mode Selection

Allows switching between Cool, Heat, and Auto modes with visual confirmation.

Adjusting Desired Temperature

Use UP/DOWN buttons to set target heating or cooling temperature.

Fan Speed Settings

Configure fan operation to Hi, Med, Low for continuous airflow or Auto.

Thermostat Operational Features

Service Filter Reminder

Indicates when to change/clean the filter; reset by holding Fan button.

Outdoor Temperature Display

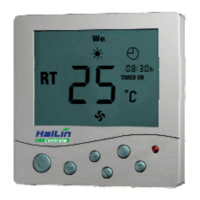
Shows outdoor temperature for 5 seconds when Mode button is held.

Compressor Timeguard Function

Prevents compressor cycling by enforcing a minimum 5-minute off-time.

Minimum On-Time Protection

Ensures heating/cooling stages run for a minimum of 3 minutes.

Auto Changeover Logic

Manages automatic mode transitions after a 20-minute demand.

Heating;Cooling Status Icons

Icons indicate active heating/cooling or timer delays.

Error Code Explanations

Details error codes (E1, E2, F1) for troubleshooting.

Thermostat Configuration Settings

Entering Configuration Mode

Procedure to access installer settings by holding Fan button for 15 seconds.

Outdoor Sensor Configuration (Option 01)

Enables or disables the use of an outdoor temperature sensor.

Filter Timer Setting (Option 02)

Configures the blower operation hours for filter change reminders.

Temperature Unit Selection (Option 03)

Sets the display to Fahrenheit (F) or Celsius (C).

Fan Output Control (Option 04)

Determines if the fan output is ON or OFF when W/W1 output is ON.

Indoor Sensor Selection (Option 05)

Selects the indoor sensor to replace the building sensor.

Room Temperature Offset (Option 06)

Adjusts the room temperature sensor reading by +/- 5 degrees.

Auto Mode Enabling (Option 07)

Enables or disables the automatic changeover between heat and cool modes.

Cooling Lockout Setting (Option 08)

Prevents cooling below 55°F (12°C) if an outdoor sensor is used.

Keypad Lockout Function (Option 09)

Locks or unlocks the keypad, requiring a button hold to unlock.

Setpoint Difference Control (Option 10)

Enforces a minimum temperature difference between heat/cool setpoints.

Reversing Valve Control (Option 11)

Selects when the reversing valve is energized in heat pump operation.

Compressor Protection Timer (Option 12)

Sets minimum off-time for compressor protection (0-12 min).

Minimum On-Time Setting (Option 13)

Sets minimum run-time for heating/cooling stages (0-5 min).

Auto Mode Transition Time (Option 14)

Defines demand duration (0-20 min) for auto mode changeover.

Auto Recovery Feature (Option 15)

Retains previous operating status after power is restored.

System Type Selection (Option 16)

Selects between Air Conditioning (AC) or Heat Pump (HP) applications.

Wiring and Installation Guide

Thermostat Wiring Diagrams

Illustrates connections for Air Conditioner and Heat Pump systems.

Optimal Thermostat Placement

Guidelines for mounting the thermostat in a frequently used room.

Overview

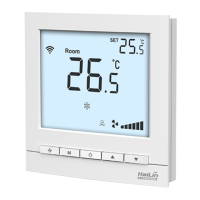
This document describes a non-programmable digital thermostat, available in two models: HL-ESNC-025 (220V) and HL-ESND-026 (24V). It features a large, easy-to-read display with a blue backlight, and supports both Fahrenheit and Celsius temperature units. The thermostat offers Cool, Heat, and Automatic Heat/Cool Changeover modes, along with a keypad lock and auto-recovery function.

Function Description

The thermostat's primary function is to maintain a desired indoor temperature. It operates by controlling heating and cooling equipment based on the user-selected mode and set point.

Temperature Control:

In Heat mode, if the heating temperature is higher than the current room temperature, the thermostat will activate heating. Otherwise, it will flash a symbol, indicating that heating is off. In Cooling mode, if the cooling temperature is lower than the current room temperature, the thermostat will activate cooling. Otherwise, it will flash a symbol, indicating that cooling is off. In Auto mode, the thermostat automatically switches between heating and cooling as needed to maintain the set point. If neither heating nor cooling conditions are met, the thermostat will have no output and will stop.

Fan Operation:

The thermostat allows users to select various fan settings: High, Medium, Low, and Auto. In High, Medium, or Low modes, the fan runs continuously to improve air circulation. In Auto mode, the fan runs only when necessary to maintain the desired indoor temperature.

Compressor Timeguard:

This feature prevents the compressor from starting unless it has been off for at least 5 minutes, protecting the equipment. This timeguard can be temporarily overridden for one cycle by simultaneously pressing the FAN mode button and the UP button.

Minimum On Time:

Once a heating or cooling stage turns on, it will remain on for a minimum of 3 minutes, ensuring stable operation and preventing short cycling.

Auto Changeover:

When Auto Changeover mode is selected, a change from heat to cool (or vice versa) will only occur after an opposite mode demand has existed for 20 minutes. If the set point is changed, this 20-minute requirement is deleted. This mode can also be disabled.

Heat On and Cool On Icons:

These icons indicate when heating or cooling is active. If an icon is flashing, it means the equipment is temporarily prevented from turning on by one of the internal timers. If the icon remains on without flashing, the equipment is actively running.

Outdoor Temperature Display:

The thermostat can display the outdoor temperature for approximately 5 seconds by holding down the Mode button. This feature is only available in HL-ESND-023 and HL-ESND-024 models and requires an outdoor sensor to be connected. If "E2" is displayed, it indicates that the outdoor temperature function is not available or not properly checked.

Keypad Lock:

The keypad can be locked to prevent unauthorized changes to settings. When locked, "F1" is displayed, and the keypad is locked out. To unlock, press and hold the UP and DOWN buttons simultaneously for approximately 5 seconds. The "F1" icon will disappear, and the keypad will be unlocked. If no button is pressed for a certain duration (e.g., 30 seconds), the keypad will automatically re-lock.

Auto Recovery:

This feature ensures that the thermostat returns to its normal operating state after a power interruption or other event.

Room Temperature Offset:

This option allows for calibration or deliberate miscalibration of the room temperature sensor. Users can adjust the displayed temperature by adding or subtracting up to 5 degrees from the actual temperature. This adjusted value is used for both display and control. For example, if a +2 offset is selected, an actual temperature of 72°F will read as 74°F. If the set point is 72°F, the room will control to an actual value of 70°F, which will be displayed and acted upon as if it were 72°F. A positive offset makes the room temperature lower, and vice versa. The thermostat is factory calibrated within an accuracy of plus or minus 1°F, so setting the offset to 0 provides the best accuracy.

Usage Features

Power ON/OFF:

To turn the thermostat on, press the "O" button. The mode symbol (or), "RT", and room temperature will be displayed. To turn it off, press the "D" button again; the LCD will be blank, and there will be no output.

Selecting Mode:

To select Cool Setting, press the "" button until the "*" icon flashes. It will be confirmed automatically after 6 seconds. To select Heat Setting, press the "" button until the "" icon flashes. It will be confirmed automatically after 6 seconds. To select Auto Setting, press the "" button until the "&" icon flashes. It will be confirmed automatically after 6 seconds.

Setting Desired Temperature:

Press the UP or DOWN buttons until the desired heating or cooling temperature set point is displayed. Then, press the MODE button to select the second temperature setting (either HEAT or COOL).

Configuration Mode:

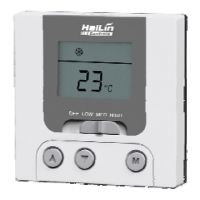
The thermostat has a configuration mode that allows installers to set various options. These options are typically set during installation and should not be modified by homeowners. To enter configuration mode, turn off the thermostat and hold the fan button down for approximately 15 seconds. After 15 seconds, "Option 01" will appear on the display. The thermostat will automatically exit this mode if no button is pressed for 90 seconds.

Adjusting Options in Configuration Mode:

  1. Enter configuration mode.
  2. Use the Up and Down buttons to display the desired option (e.g., Option 01 for outdoor sensor setting). The "SET" icon should be off.
  3. Press the Mode button once. The "SET" icon will turn on, and the display will show the option's current setting.
  4. Use the Up and Down buttons to move between the available choices for that option (e.g., ON or OF for Option 01).
  5. Press the Mode button again to return to the option display. The "SET" icon will turn off.
  6. Use the Up and Down buttons to select another option, or press the Power button to exit configuration mode.

Maintenance Features

Service Filter Reminder:

The thermostat reminds you when it's time to change or clean the filter by displaying the "O" indicator.

Resetting the Filter Timer:

After changing or cleaning your filter, hold the Fan button down for approximately 5 seconds to reset the timer. The "O" indicator will turn off, and the filter timer will be cleared manually.

Clean Filter Timer Option (Option 02):

This option in configuration mode allows selecting the number of hours of blower operation (heating, cooling, or fan) before the filter reminder appears. Time selection can range from 400 to 3600 hours by selecting numbers from 1 to 9 (where time is 400 multiplied by the selected number). The factory default is 2 (800 hours). Recommended selections are: 800 hours for disposable filters, 1200 to 1600 hours for media filters, or 1600 to 2400 hours for electronic air cleaners.

HaiLin Controls HL-ESNC-025 Specifications

General IconGeneral
ModelHL-ESNC-025
CategoryThermostat
Input Voltage24 VAC
Output TypeSPDT Relay
Enclosure RatingIP20
Accuracy±1°F (±0.5°C)

Related product manuals