3
General warning symbol
Beforecommissioning, read the enclosed operating
instructions.
Youmust comply with the safety instructions at all times.
• This device is not intended for use by children.
• Avoid touching the intake opening with hands, clothing
or hair.
• Unplug the device if it is not going to be used for a
prolonged period.
Children must be supervised when using the device.
Do not insert paper clips into the intake shaft.
Do not reach into the intake shaft.
Keep clothing away from the intake shaft.
Keep jewellery,e.g. necklaces, away from the intake shaft.
Keep hair away from the intake shaft.
Do not use any aerosol products on or near the device.
Insert no morethan 6sheets of paper at any one time into the
intake shaft (see 7. Technical Data).
2.4 Safety device
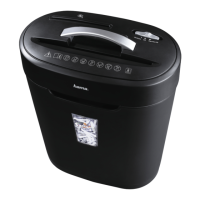
The device is equipped with asafety switch and can only be operated if the device head (1)
is correctly placed on the waste container (6).
Warning
Any tampering with or modication of the safety features can result in serious injury
and is not permitted.
3. Installation /Setup
Warning
• Only operate the product from asocket that has been approved for the device. The
socket must be installed close to the product and must be easily accessible.
• Disconnect the product from the power supply using the On/Off switch –ifthis is not
available, unplug the power cordfromthe socket.
• If using amulti-socket power strip, make surethat the total power consumption of
all connected devices does not exceed the power strip's maximum throughput rating.
• If you will not be using the product for aprolonged period, disconnect it from
mains power.
Note
• Set the product up on alevel, horizontal and suciently stable surface.
• Route all cables so that thereisnorisk of tripping.
• Do not bend or crush the cable.
• Protect the connecting cable from hot surfaces and sharp edges.
• Connect the power pack to aproperly installed and easily accessible mains socket.
4. Operation
Note
• Be awarethat the thickness of paper increases when it is folded, leading to the
device's maximum page capacity being exceeded.
• Always wait until one cutting operation is nished beforestarting the next one.
• Do not use the device continuously for morethan 2minutes at atime.
• Empty the container regularly in order avoid damaging the device.
4.1 Switching the device on
• Move the operating switch (2) to the "On/Auto" position.
• The device is now ready for use.
4.2 Switching the device off
• Move the operating switch (2) to the "Off" position.
4.3 Shredding paper
• Insert the paper into the centreofthe intake shaft (3).The cutting rollers switch on
automatically.
• Let go of the paper. Once the cutting process is complete, the device switches itself
off again.
4.4 Forwards /backwards mode
Note
These modes aredesigned to release any blockages of the cutting mechanism.
• Move the slider switch (2) to the "REV" position. The rollers on the cutting mechanism
now rotate in the reverse direction.
• Move the slider switch (2) alternately to the "ON/AUTO" position and the "REV" position.
Repeat this process around three times.
• Then switch the device off -asdescribed in 4.2 Switching the device off -and
disconnect the mains plug.
• Remove the blocked cut material carefully from the intake shaft (3).
• Reconnect the device -asdescribed in 3. Installation/Setup -tothe power supply.