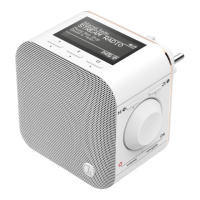
5
6.1 Interface/layout of the UNDOK home screen
1
2
3
4
5
7
6
1 Update the audio system list
2 Preview for ungrouped radios
3 Set up new audio system
4
Icon for managing an existing multi-room
group
5
Create anew multi-room group with this
device
6 Check for system update for all devices
7
Further information, such as app info, change
app theme, and data logging
6.2 First-time setup of the device with UNDOK
The rst time you switch on an UNDOK-enabled product
from Hama, or when you have set it to the factory settings,
it creates amicroaccess point –aseparate WiFi network
that you can connect to with your tablet or smartphone.
Note
• The UNDOK app uses the language selected in your
smartphone’ssystem.
6.2.1 Procedure for iOS users
• Open the UNDOK app on your iPhone or iPad.
• Tapthe Set up audio system menu item.
• Make surethat the radio or speaker is in SETUP mode.
Set the product to the factory settings, if necessary.
Conrm the query with Next.
• The UNDOK app now prompts you to connect to the
product’sWiFi network using the iPhone/iPad settings
–todoso, switch to the system settings on your iPhone
and select the WiFi network (for example, Setup Hama
DIR3120LED). Then return to the UNDOK app and tap
Next.
• Now choose aname for the radio (for example, Oce
DIR3120) and conrm your entry with Next.
• The various network conguration options arethen
offered to you (whereapplicable, WiFi, WPS and
Ethernet). Tapthe desired method; the UNDOK app
switches to the next window.
• Depending on the selected method, you can now select
and congurethe desired WiFi network, set up aWPS
connection or set up the connection using aLAN cable.
• Finally,the radio connects to the network; by tapping
Start using my audio system, you will be able to use the
device in the UNDOK app.
• The network connection LED indicator (7) is now
constantly lit.
 Loading...