2
G Operating instruction
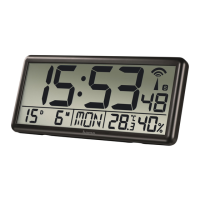
1. Controls and displays
1. Time
2. Battery symbol
3. Radio symbol
4. Summertime
5. Day
6. Month
7. Day of the week
8. Room temperature
9. Ambient humidity
A. button
=Settings /conrmation of the setting value
B. button
=Activation /deactivation of the manual radio signal reception
C. button
=Increase the current setting value /change the display mode
D. button
=Reduce the current setting value /switch between °C and °F
E. Battery compartment
F. Stand
G. Cut-out for wall mounting
Thank you for choosing aHama product.
Take your time and read the following instructions and information completely.
Please keep these instructions in asafe place for futurereference. If you sell the
device, please pass these operating instructions on to the new owner.
2. Explanation of warning symbols and notes
Warning
This symbol is used to indicate safety instructions or to draw your attention to
specichazards and risks.
Note
This symbol is used to indicate additional information or important notes.
3. Package contents
• "Jumbo" digital radio wall clock
• 4AAbatteries
• These operating instructions
4. Safety instructions
• The product is intended for private, non-commercial use only.
• Use the product only for the intended purpose.
• Protect the product from dirt, moistureand overheating and use it in dry
environments only.
• Do not use the product in the immediate vicinity of heaters, other heat sources
or in direct sunlight.
• As with all electrical products, this device should be kept out of the reach of
children.
• Do not operate the product outside the power limits specied in the technical
data.
• Do not use the product in areas in which electronic products arenot permitted.
• Do not use the product in adamp environment and avoid splashing water.
• Do not place the product near interference elds, metal frames, computers, TVs,
etc. Electronic devices and window frames can negatively affect the product’s
functionality.
• Do not drop the product and do not expose it to any major shocks.
• Do not modify the product in any way.Doing so voids the warranty.
• Keep the packaging material out of the reach of children due to the risk of
suffocation.
• Dispose of packaging material immediately in accordance with the locally
applicable regulations.
Warning -Batteries
• When inserting batteries, note the correct polarity (+ and -markings) and
insert the batteries accordingly.Failuretodosocould result in the batteries
leaking or exploding.
• Only use batteries (or rechargeable batteries) that match the specied type.
• Beforeyou insert the batteries, clean the battery contacts and the polar
contacts.
• Do not allow children to change batteries without supervision.
• Do not mix old and new batteries, or batteries of different types or from
different manufacturers.
• Remove the batteries from products that arenot being used for an extended
period (unless these arebeing kept ready for an emergency).
• Do not short-circuit batteries.
• Do not charge batteries.
• Do not burn batteries.
• Keep batteries out of the reach of children.
• Never open, damage or swallow batteries or allow them to enter the
environment. They can contain toxic, environmentally harmful heavy metals.
• Remove spent batteries from the product and dispose of them without delay.
• Do not store, charge or use the device in extreme temperatures.
5. Getting started
5.1. Inserting the battery
Open the battery compartment cover (E), remove the contact interrupter and close
the battery compartment cover (E) again. The clock is ready for operation.
5.2. Changing the battery
• Remove and dispose of the spent battery if required. Insert four new batteries
(AA). Take caretoensurethe correct polarity as shown in the diagram in the
battery compartment (E).
5.3. Low battery
• As soon as the battery symbol
(2) appears on the wall clock's display,the
battery capacity is very low.Change the battery immediately.
6. Installation
Warning -installation instructions
• Beforemounting, check that the wall you have chosen is suitable for the weight
to be mounted. Also make surethat thereare no electric, water,gas or other lines
running through the wall at the mounting site.
• Obtain suitable attachment material from specialist retailers.
• Do not mount the product above locations wherepersons might sit or stand.
• Youcan attach the wall clock to awallusing the cut-out on the back (G).
• Alternatively,place the wall clock on a at surface using the stand (F).
7. Operation
Information -entry
Hold the button (C) or button (D) down to
select the values morequickly.
7.1 Automatic adjustment according to the DCF signal
• After the batteries areinserted, the clock automatically starts to search for aDCF
signal. The radio symbol (3) ashes during the search process.
 Loading...