Do you have a question about the Hamilton Beach DURATHON and is the answer not in the manual?
Explains how the iron automatically turns off based on its position for safety.
Instructions for cleaning and maintaining the iron's soleplate.
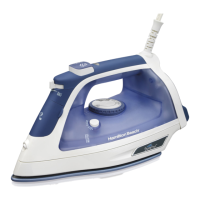
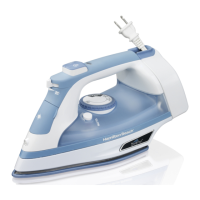
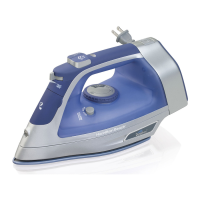
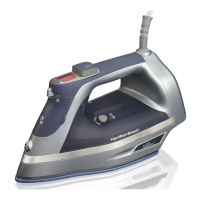
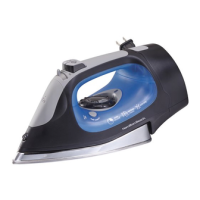
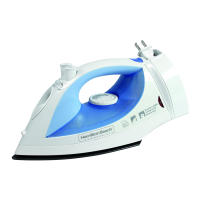
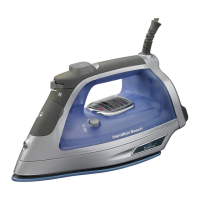
This document describes the Hamilton Beach Extra-Large Electronic Durathon™ Iron, a household appliance designed for dry and steam ironing.
The Hamilton Beach Durathon™ Iron is designed to efficiently smooth wrinkles from various fabrics. It offers both dry ironing and steam ironing capabilities, with adjustable temperature settings to suit different garment types. The iron features a Durathon™ Nonstick Soleplate for smooth gliding over fabrics and is equipped with an Auto Shutoff function for safety, which automatically turns off the iron when left motionless for a certain period. A Self-Clean feature helps maintain the iron's performance by clearing steam vents of mineral buildup. The iron also includes a spray nozzle and steam burst buttons for targeted wrinkle removal.
General Use: Before use, it is crucial to read all instructions to ensure safe operation. The iron is intended for household use only and should always be used on an ironing board. It is not recommended to iron or vertical-steam clothes while they are being worn, nor to direct vertical steam towards people or pets. During initial use, a slight "smoking" effect may occur, which is normal and will cease. Some irons may also spit or sputter during the first few uses with tap water as the steam chamber conditions; this will also stop after a few uses. To prepare the steam vents before first use, the iron should be set up for steam ironing, then ironed over an old cloth for a few minutes while steaming, and the Steam Burst button pressed several times to clean the vents.
Dry Ironing: To dry iron, first plug in the iron. Set the Adjustable Steam Switch to the dry iron position (indicated by a symbol). Press the Temperature Settings Button to select the desired fabric temperature. Allow approximately 2 minutes for the iron to reach its maximum temperature; the light will blink during preheating. To turn the iron off, press the Temperature Settings Button until "OFF" is illuminated. The light will remain on until the iron is unplugged.
Steam Ironing: For steam ironing, ensure the iron is plugged in and the Adjustable Steam Switch is set to the desired steam level. Press the Temperature Settings Button to select a fabric setting within the steam range. Similar to dry ironing, allow 2 minutes for the iron to preheat, during which the light will blink. Attempting to steam iron at a lower temperature setting or without sufficient preheating can lead to hot water dripping from the soleplate, posing a burn hazard. For vertical steaming, hold the iron approximately 6 inches (15 cm) from the garment, ensuring the hot soleplate does not touch delicate fabrics. Press and release the Steam Burst Button to remove wrinkles, waiting at least 5 seconds between presses. To turn off the iron after steam ironing, set the Adjustable Steam Switch to the dry iron position, then press the Temperature Settings Button until "OFF" is illuminated.
Auto Shutoff Feature: The iron is equipped with a position-sensing Auto Shutoff feature for safety. It will automatically turn off when left motionless in certain positions:
Fabric Settings and Garment Labels: Always check garment labels for fabric composition and ironing instructions to prevent damage. The manual provides a fabric setting chart with recommended temperatures for synthetics, silk/wool, and cotton/linen, indicating whether dry ironing or steam ironing is appropriate. It also explains common garment care symbols related to ironing temperature and whether ironing or steaming is allowed.
Tips for Best Ironing Results:
Care and Cleaning: After each use, allow the iron to cool completely. To empty any remaining water, open the water tank cover and slowly tilt the pointed end of the iron over a sink until all water runs out. Do not store the iron lying flat on its soleplate.
Soleplate Care: To clean the iron's soleplate, preheat the iron to the highest temperature setting and iron over a damp, 100% cotton cloth. This generates heavy steam that helps transfer grime from the soleplate to the cloth. Exercise caution during this process as steam can cause burns. Avoid ironing over zippers, buttons, pins, metal rivets, or snaps, as these can scratch the soleplate surface. For occasional buildup, allow the iron to cool, then wipe the soleplate with a soapy, soft damp cloth. Never use abrasive cleaners or metal scouring pads, as they can scratch the surface.
Self-Clean Feature: To prevent mineral buildup in the steam vents and maintain optimal steam performance, use the Self-Clean feature regularly, ideally each time you iron with steam.
Troubleshooting: The manual provides a troubleshooting guide for common issues:
| Type | Dry & Steam iron |
|---|---|
| Cord length | - m |
| Product color | Blue, White |
| Soleplate type | - |
| Variable steam | Yes |
| Steam boost performance | - g/min |
| Iron power | 1500 W |