EasyManua.ls Logo

HAMPTON BAY REDWOOD VALLEY SECTIONAL User Manual

HAMPTON BAY REDWOOD VALLEY SECTIONAL
26 pages
To Next Page IconTo Next Page
Page #1 background imageLoading...
Page #1 background image
USE AND CARE GUIDE
REDWOOD VALLEY SECTIONAL
1-855-HD-HAMPTON
HOMEDEPOT.CA
Questions, problems, missing parts? Before returning to the store,
call Hampton Bay Customer Service
8 a.m. - 7 p.m., EST, Monday - Friday, 9 a.m. - 6 p.m., EST, Saturday
Item #0000 000 000
Model #FSS60428L-ST
THANK YOU
We appreciate the trust and confidence you have placed in Hampton Bay through the purchase of this set. We strive to continually
create quality products designed to enhance your home. Visit us onlineto see our full line of products available for your home improvement needs.
Thank you for choosing Hampton Bay!
Question and Answer IconNeed help?

Do you have a question about the HAMPTON BAY REDWOOD VALLEY SECTIONAL and is the answer not in the manual?

HAMPTON BAY REDWOOD VALLEY SECTIONAL Specifications

General IconGeneral
BrandHAMPTON BAY
ModelREDWOOD VALLEY SECTIONAL
CategoryOutdoor Furnishing
LanguageEnglish

Summary

Important Safety Information

Save These Instructions

Keep manual for future reference to ensure safe and proper use.

Read All Instructions Before Use

Crucial step to understand product operation and prevent injury.

Warranty Information

What Is Covered

Details the product components and defects protected by the limited frame warranty.

What Is Not Covered

Outlines exclusions from warranty, including usage and shipping costs.

Pre-Assembly Guide

Planning Assembly

Preparation advice, including surface protection and potential need for assistance.

Hardware Included

Visual guide and list of all included bolts, nuts, and wrenches for assembly.

Package Contents - Left Arm Chair

Left Arm Chair Parts List

Inventory of all parts required for assembling the left arm chair component.

Package Contents - Right Arm Chair

Right Arm Chair Parts List

Inventory of all parts required for assembling the right arm chair component.

Package Contents - Corner Chair

Corner Chair Parts List

Inventory of all parts required for assembling the corner chair component.

Package Contents - Table

Table Parts List

Inventory of all parts required for assembling the patio table.

Left Arm Chair Assembly

Step 1: Attach Seat to Backrest

Connect left arm seat (B) to backrest (A) using M6x30 bolts (CC).

Left Arm Chair Assembly Continued

Step 2: Attach Corner Brace

Secure corner brace (D) to seat (B) and backrest (A) with M6x15 bolts (AA).

Left Arm Chair Assembly Continued

Step 3: Attach Left Arm

Connect left arm (C) to seat (B) and backrest (A) using M6x15 bolts (AA).

Left Arm Chair Assembly Final Check

Step 4: Final Tightening

Turn chair upright and fully tighten all bolts for stability.

Right Arm Chair Assembly

Step 1: Attach Seat to Backrest

Connect right arm seat (H) to backrest (G) using M6x30 bolts (CC).

Right Arm Chair Assembly Continued

Step 2: Attach Corner Brace

Secure corner brace (D) to seat (H) and backrest (G) with M6x15 bolts (AA).

Right Arm Chair Assembly Continued

Step 3: Attach Right Arm

Connect right arm (I) to seat (H) and backrest (G) using M6x15 bolts (AA).

Right Arm Chair Assembly Final Check

Step 4: Final Tightening

Turn chair upright and fully tighten all bolts for stability.

Corner Chair Assembly

Step 1: Attach Seat to Left Backrest

Connect corner chair seat (L) to left backrest (K) using M6x30 bolts (CC).

Corner Chair Assembly Continued

Step 2: Attach Brace to Seat and Backrest

Secure corner brace (D) to seat (L) and left backrest (K) with M6x15 bolts (AA).

Corner Chair Assembly Continued

Step 3: Attach Right Backrest to Seat

Connect right backrest (J) to corner chair seat (L) using M6x30 bolts (CC).

Corner Chair Assembly Continued

Step 4: Attach Right Backrest to Left Backrest

Connect right backrest (J) to left backrest (K) with M6x30 bolts (CC).

Corner Chair Assembly Final Check

Step 5: Ensure Security

Ensure all connections on the corner chair are secure before use.

Table Assembly

Step 1: Connect Legs to Table Top

Attach table legs (R) to the upside-down table top (P) using M6x15 bolts (AA).

Table Assembly Continued

Step 2: Attach Leg Connector

Secure leg connector (Q) to table legs (R) using M6x25 bolts (BB).

Table Assembly Final Check

Step 3: Final Tightening

Fully tighten all bolts and turn the table upright to check stability.

Set Assembly

Step 1: Connect Chairs to Form Sectional

Join left, right, and corner chairs using M6x45 bolts (DD), M6 washers (EE), and M6 nuts (FF).

Set Assembly Continued

Step 2: Place Cushions and Check Set

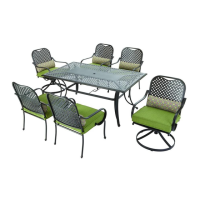
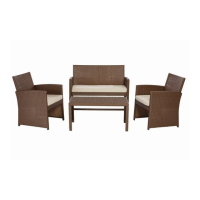
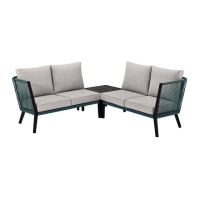
Arrange seat and back cushions, then ensure all connections are secure.

Care and Cleaning

Cleaning and Maintenance Guidelines

Advice on cleaning frames/cushions and storing the set to prevent damage.

Related product manuals