APRON SPEED AND BEATER CONTROL
One cable controls the beater and apron drive two speed
gearbox. To compensate for wear or stretching of this cable
adjust turnbuckle behind shield at left hand front of spreader.
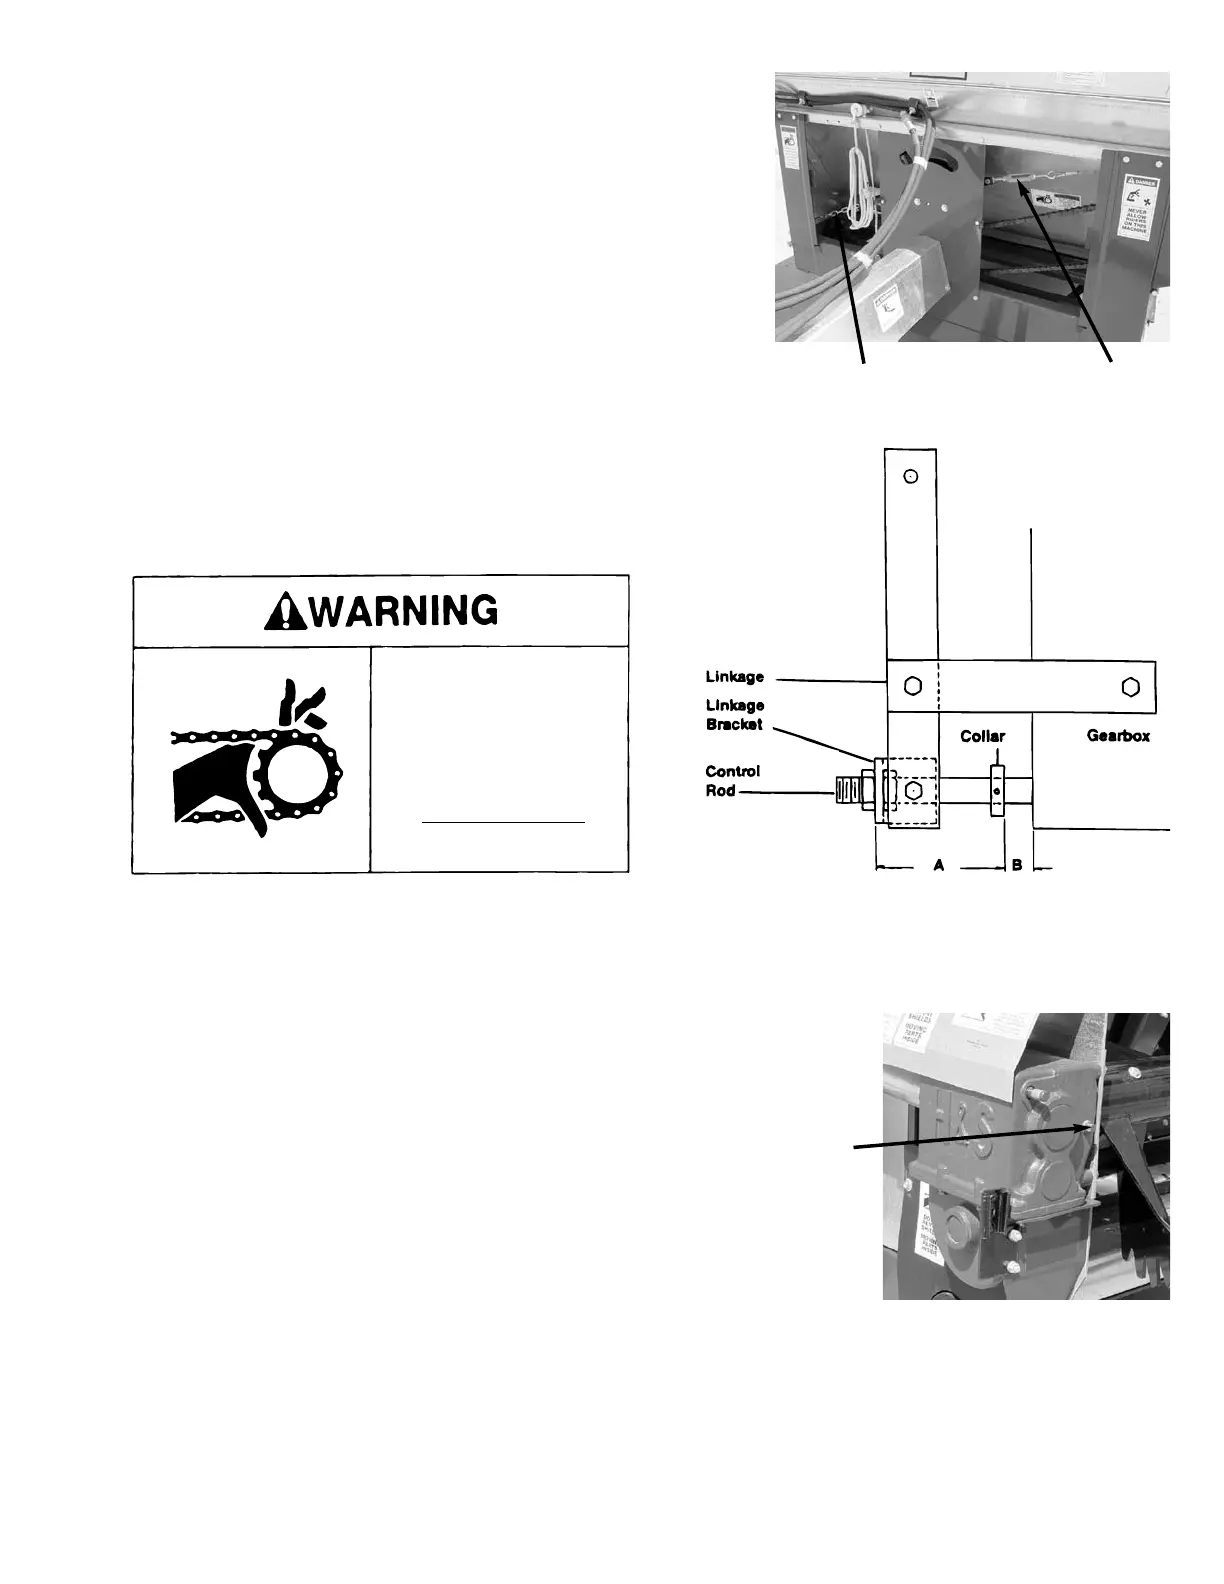
Refer to drawing to properly adjust manure spreader. Position
speed control in HI Speed. Measurement (A) is 2-1/2 inches.
This is factory set and should not be changed. Do not move
bracket or collar on control rod. The distance between collar
and face of gearbox should be as follows for the different
speeds: (distance B)
LO Speed: 0’’ (tight against gearbox)
HI Speed: 7/16-1/2’’
CLEAN OUT: 3/4-1 1/16’’
If Collar on control rod does not pull tight to gearbox in LO
Speed, after Hi Speed has been properly adjusted, apply
more tension to return spring behind shield at right hand front
of spreader. To adjust spring, hook end of spring one chain
link shorter on spring attaching chain.
-13-
GEARBOX – Before using your new machine, check the
oil in the main apron drive and beater drive gearbox.
Keep the gearbox filled to the oil plug on the rear of the
gearbox as shown with Mobilube SHC 75W90 (Or
Equivilant) gear lube.
DRIVE CHAINS – Lubricate the drive chains with a light
machine oil. Keep chains aligned with sprockets, this will
lengthen the life of the sprockets and chain. Lubricate
chains often.
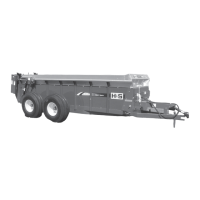
Attaching Chain Turnbuckle
DO NOT CLEAN
OR WORK ON THIS
MACHINE WITHOUT
FIRST DISENGAGING
POWER AND
SHUTTING OFF
TRACTOR ENGINE.
LUBRICATION GUIDE
The operator should become familiar with all lubrication points and establish a systematic routine to insure
complete and quick lubrication of the machine.
GREASE FITTINGS – There are eleven grease fittings on the spreader, thirteen, if equipped with hydraulic
endgate. If these are lubricated properly and often enough, it will prolong the life of the spreader. (Grease
every 20 hours, also before storage and after power washing.) Make certain that the grease fittings are free
of paint and dirt, force a high-quality grease into them until the grease comes out around the shaft on the
sleeve-type bearings. On the sealed ball bearings, grease should be added slowly until a slight bead forms
at the seals indicating the correct amount of lubricant. Wipe off excess grease to prevent the accumulation
of chaff and grit around the bearings. (See page 14 for grease zerk location.)
OIL LEVEL
 Loading...