76
OPERATIONAL GUIDE
POWER CONNECTION
Plug the supplied 12 Vdc adapter into the proper instrument socket
and to the mains.
Note: Insure the main line is fuse protected.
Note: Always turn the meter off before unplugging it to ensure no
data is lost.
MEASUREMENT PROCEDURE
• Turn the meter on by pressing
the ON/OFF key.
• The meter will carry out a self-test
by displaying a full set of figures.
• When the LCD displays “- - --” the
meter is ready to take measure-
ments.
• Fill a clean cuvet up to 0.5 cm
(one quarter inch) from its rim
with the thoroughly agitated
sample.
• Allow sufficient time for bubbles to escape before securing the cap.
Note: Do not overtighten the cap.
1/4“
0.5 cm
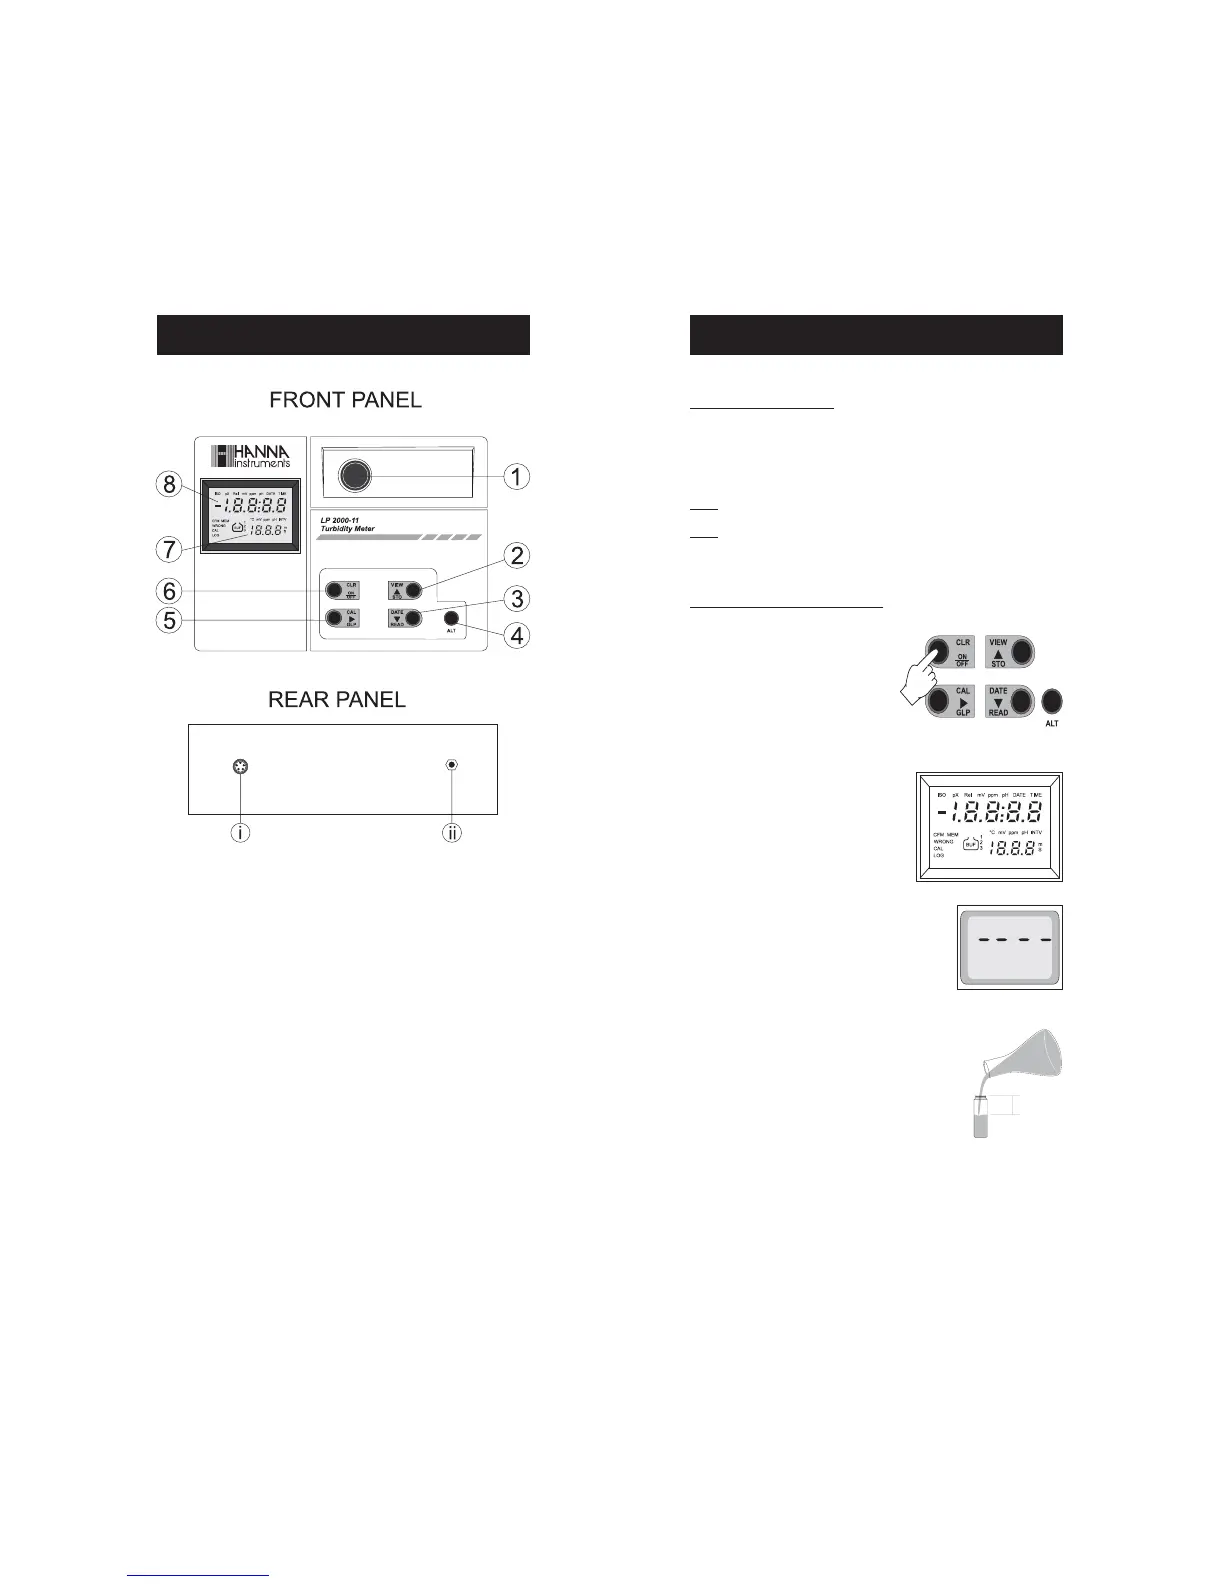
FUNCTIONAL DESCRIPTION
1. Measurement cell
2. STO/VIW key, to store sample after reading and view log memory
3. READ/DATE key, to perform measurements and display (toggle)
current date/time
4. ALT key, to activate the ALT functions (orange keys)
5. GLP/CAL key, to display (toggle) last calibration date/time and
enter the calibration mode
6. ON/OFF/CLR key to switch the meter ON and OFF, and clear log
memory
7. Secondary LCD (displays the year when date is on the primary level,
the sample index when storing a value or viewing the log memory)
8. Primary LCD (Liquid Crystal Display)
i. 5-pin RS232 connector
ii. Power supply socket
 Loading...