11
Installation of the control panel
Electrical connection
Always disconnect the power supply prior to working on the
electric components. it is not sufficient to just switch off at
the control panel !
The appliance must be disconnected from the vehicle
main power supply when carrying out any electric welding
work on the vehicle body.
If the connections are transposed there is a risk of cable
burning. This also rules out any guarantee or liability
claims.
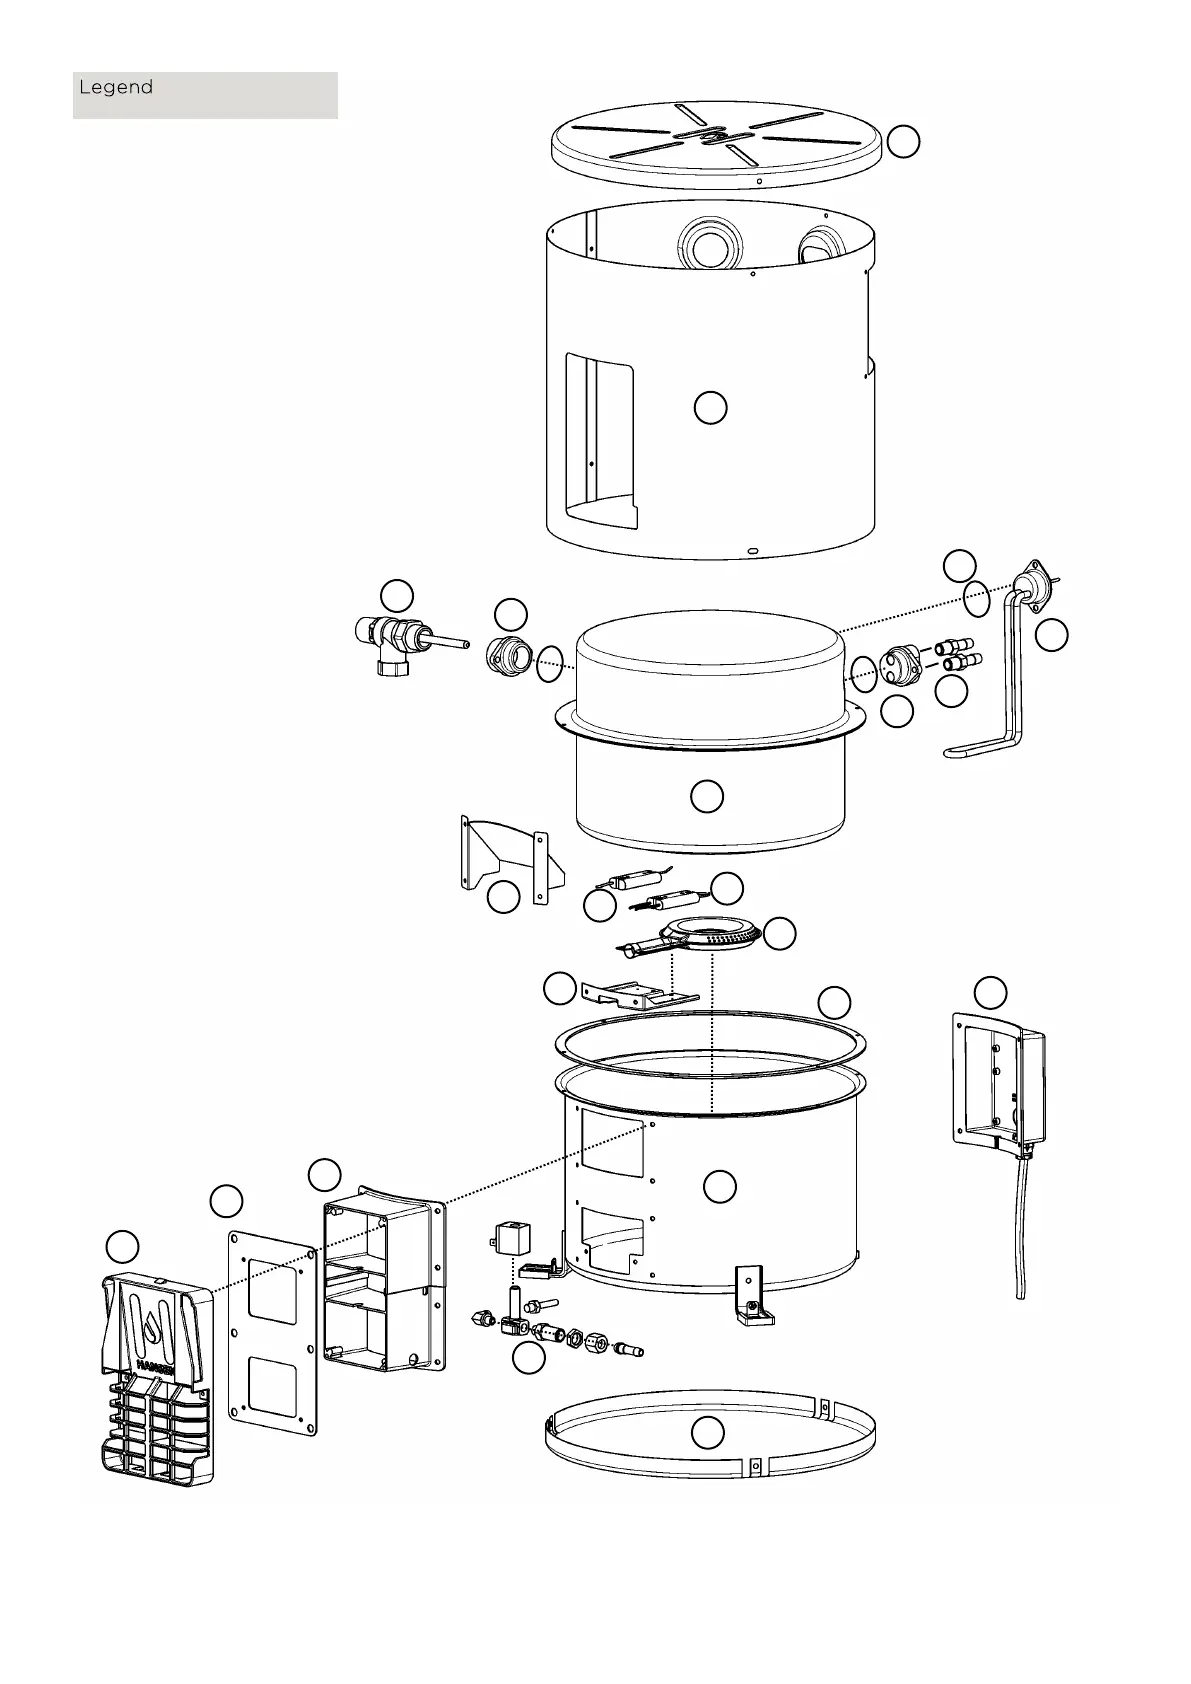
1
2
3
4
5
6
7
11
8
9
10
12
13
14
15
16
17
18
19
20
21
22
1 Water tank
2 Silicone seal
3 Outer container
4 Base cover
5 Outer cover
6 Top cover
7 Gas burner
8 Burner mount
9 Sense electrode
10 Spark electrode
11 Intake cowl
12 Heating element
13 Water fittings
14 Water fittings boss
15 T&P valve boss
16 T&P safety valve
17 Gas valve assembly
18 Flue intake casting
19 Wall mount plate
20 Flue grill
21 Electric cover
22 O ring
23 Electronic control
board