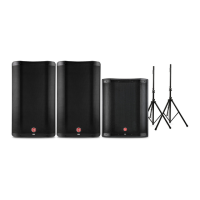
V2300 SERIES OWNER’S MANUAL
5
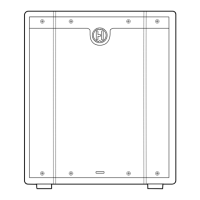
V2312/V2315 BACK PANEL
1
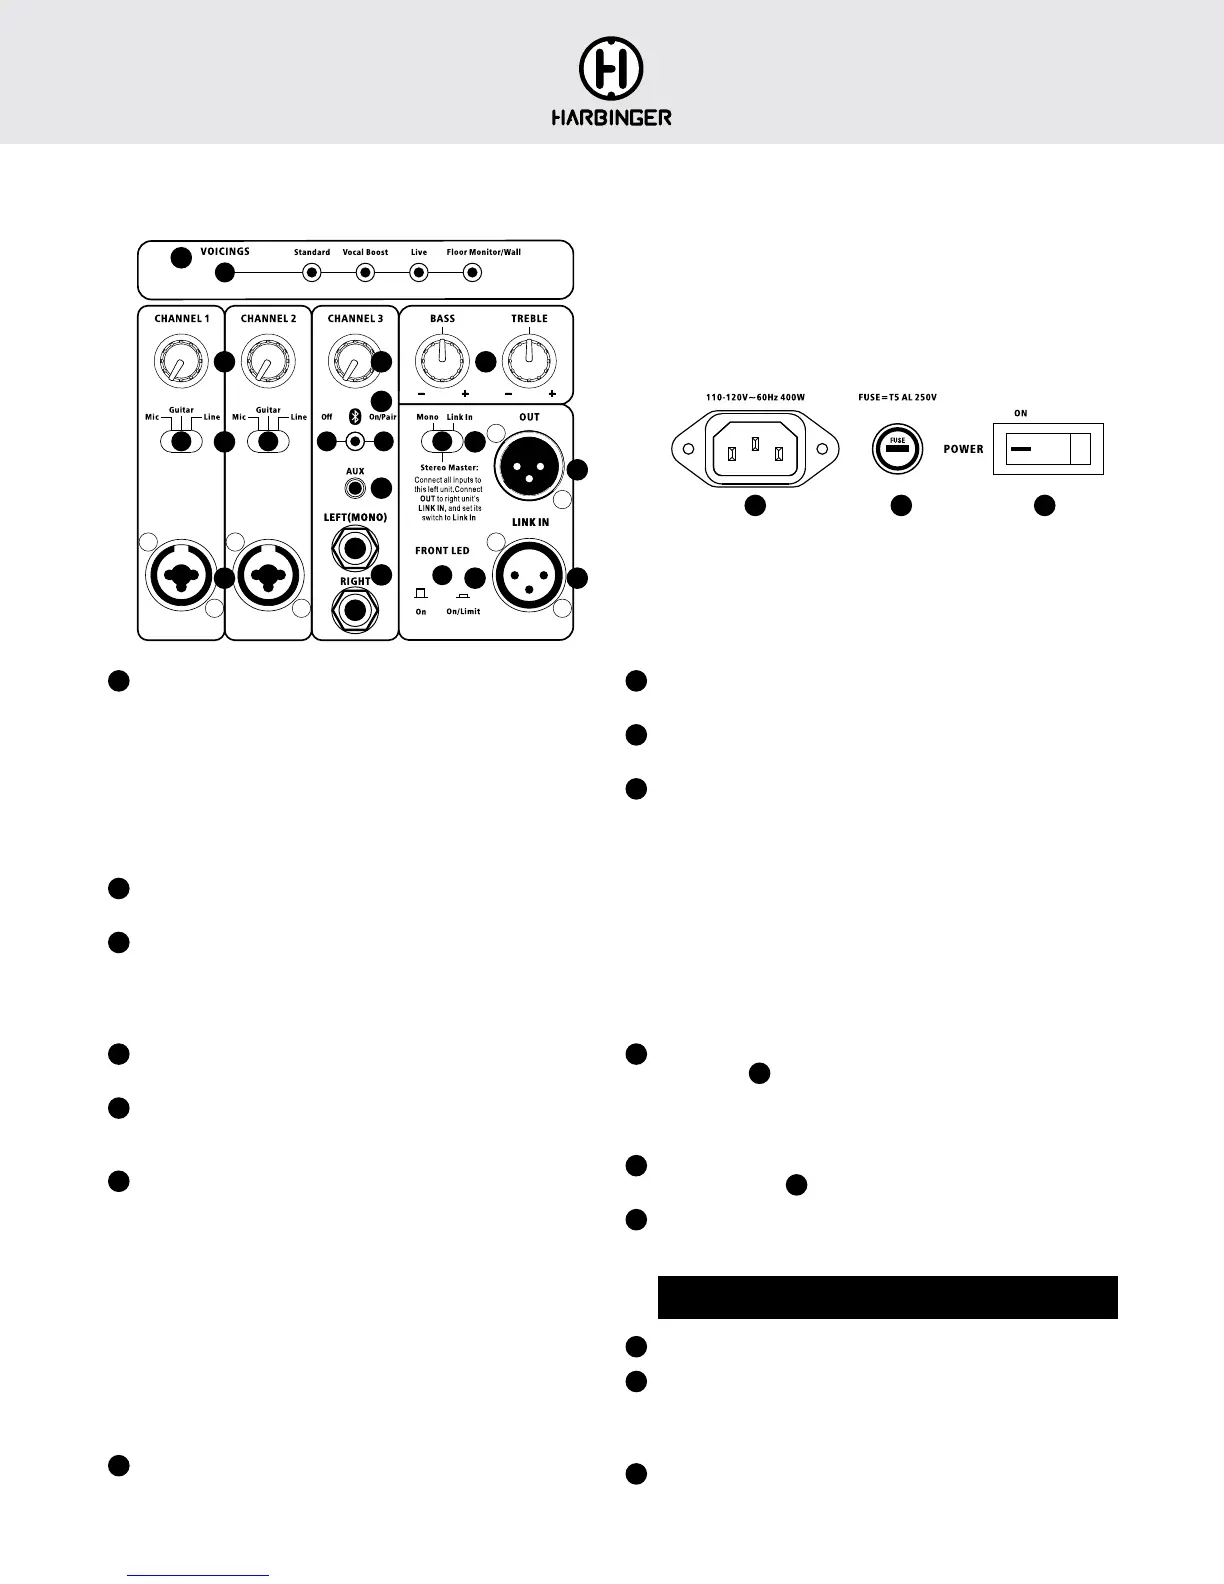
VOICINGS
Pressing the button selects from the available voicings (tunings) for
different applications:
- Standard: for general use including music playback
- Vocal Boost: for public speaking, may also be helpful for solo
performers who are singing along with acoustic guitar
- Live: for live band main PA speakers
- Floor Monitor/Wall: for enhanced clarity and reduced feedback
potential for floor monitors, also may be helpful to avoid excessive bass
from wall mounted speakers
2
CHANNEL 1 AND 2 KNOBS
These knobs set the volume for the inputs below them
3
MIC/GUITAR/LINE SWITCHES
Set these to match the type of source connected to the input below them
- Mic: for microphones, or line level sources with low output volumes
- Guitar: for acoustic guitar or guitar pedal board
- Line: for line level sources
4
CHANNEL 1 AND 2 INPUT JACKS
Connect XLR or 1/4-inch cables
5
CHANNEL 3 KNOB
Sets the volume for all the inputs below, including Bluetooth audio, aux
and line inputs
6
BLUETOOTH AUDIO INPUT
Bluetooth audio input is automatically enabled each time you turn the
speaker on, will automatically reconnect to the previous Bluetooth audio
source if it is available, and will otherwise be available for Bluetooth
pairing from a source audio device such as a smartphone.
- To pair, look for V2312 or V2315 from your Bluetooth audio
source device.
- LED is lit solid when currently paired, blinking when available for
pairing, and off if Bluetooth has been disabled by a press of the
Bluetooth Off button.
- On/Pair button forces any currently connected Bluetooth audio source
to disconnect, and makes the speaker available for pairing.
- Off button disables Bluetooth. (Bluetooth will be re-enabled next time
you turn power off and on, or if you press the On/Pair button.)
7
AUX INPUT
Audio from smartphones, computers and other consumer audio devices
can be connected here
8
BALANCED LINE INPUTS
Balanced or unbalanced line level sources can be connected here
9
BASS AND TREBLE KNOBS
Adjust the sound of your speaker
10
MONO / STEREO MASTER / LINK IN SWITCH
- Mono: This speaker will output mono audio, and send mono audio to
the OUT jack so it’s available for any other speaker or sound system.
- Stereo Master: This speaker will operate as the master speaker of a
Smart Stereo(TM) pair. Use a mic cable to connect this speaker’s OUT
to the LINK IN jack of a second speaker of the same type. All inputs
should be connected to the first master speaker, which will also set the
volume and tone of both speakers.
- Link In: Use this setting for the second speaker of a Smart Stereo(TM)
pair. The audio from the LINK IN will be routed directly to the power
amp and speaker, with all other inputs and controls being ignored. This
can also be used to accept mono audio from a previous speaker, with
that previous speaker determining volume and tone.
11
OUT JACK
Configured by
10
switch
- Mono: sends out mono audio
- Stereo Master: sends out right audio, for second speaker’s LINK IN
- Link In: sends out the same audio received at the LINK IN jack
12
LINK IN JACK
Activated only when
10
switch is set to LINK IN
13
FRONT LED SWITCH
- On: Front LED is lit white when power is on
- On/Limit: LED lights red when limiter is active, and otherwise is lit white
If limiter is continuously or frequently active, turn down Channel 1, 2 or 3
knobs to reduce volume
14
Connect power cable here.
15
If the speaker will not power on and you suspect its fuse may have blown,
turn off the power switch, and open the fuse compartment using a small
flat blade screwdriver. If metal strip in fuse is broken, replace with T5AL
250V fuse.
16
Switches the power on and off
1
2
3
4
5 9
10
11
16
12
14 15
13
6
7
8