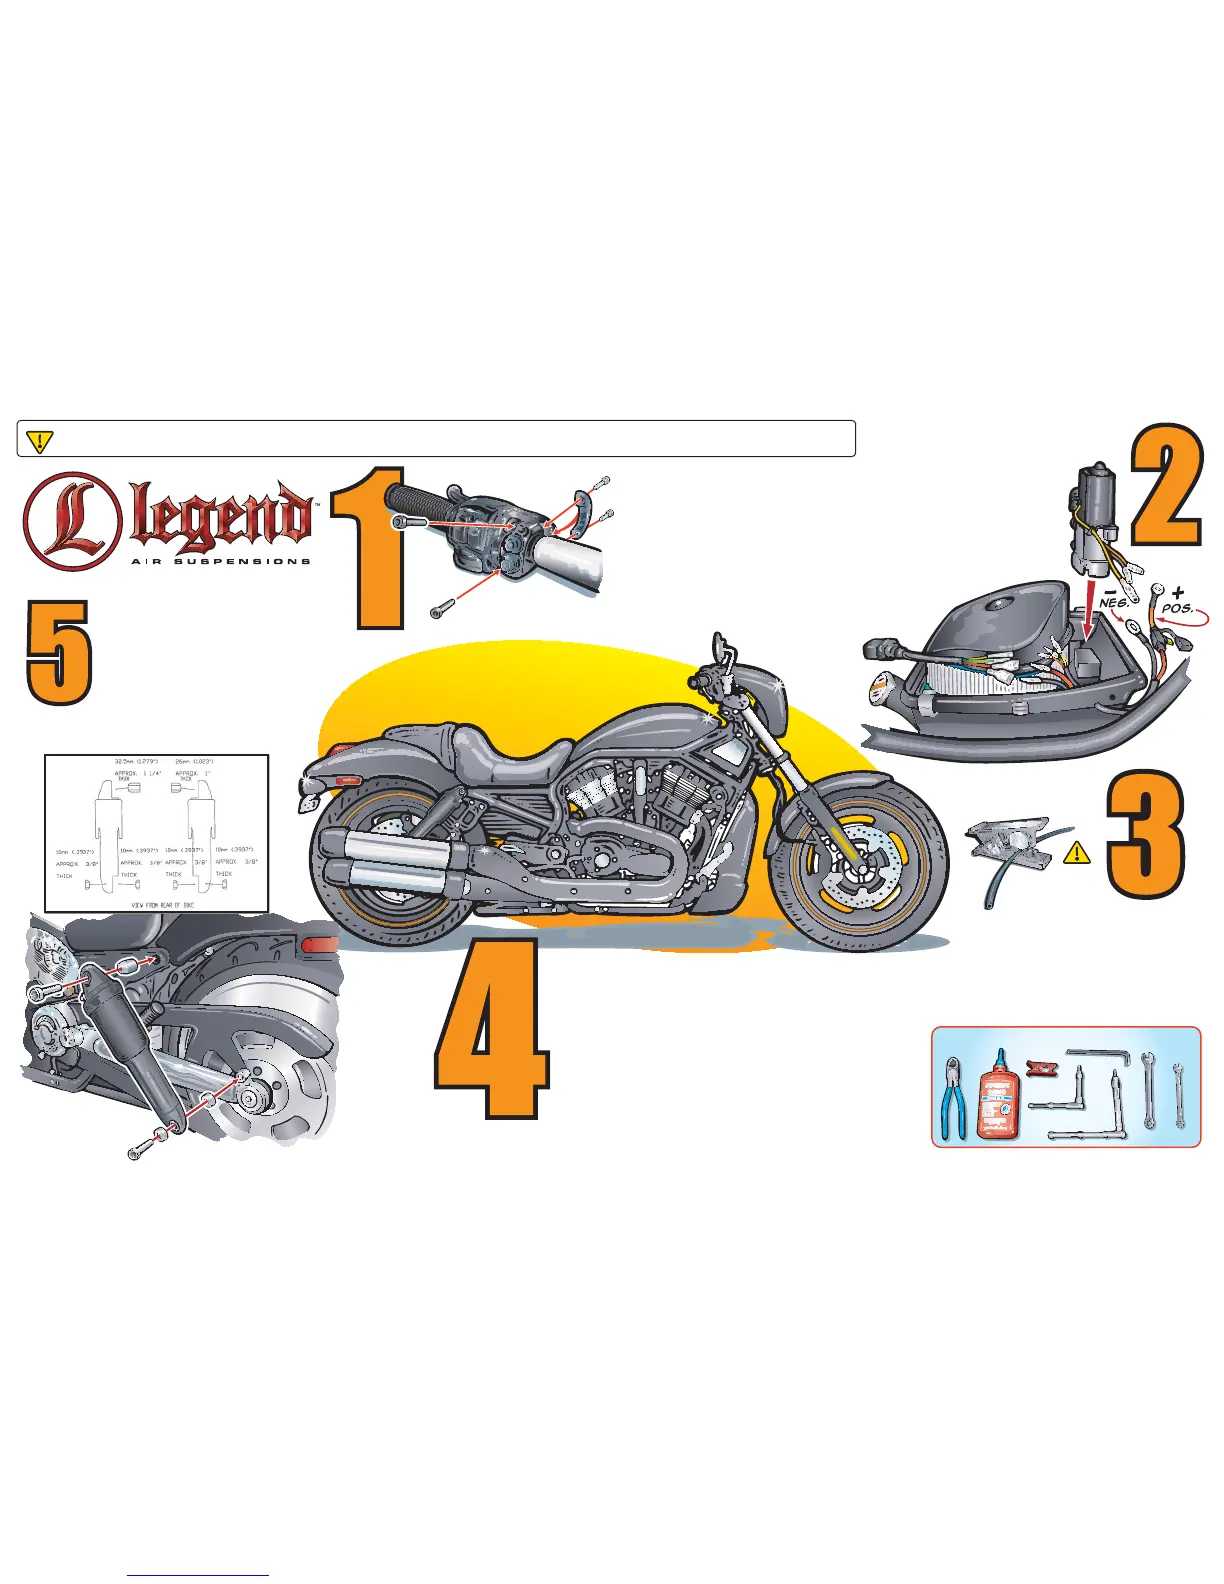
STEP FOUR: SHOCKS
A. With motorcycle properly supported
on jack, remove stock shocks.
B. Apply blue Loc-Tite™ to faste ner s
and install Legend Air Suspension™
giving attention to spacer orientation.
C. Run air line from shocks to the
air line from the compressor and connect
using supplied. “Y” fitting.
D. Lower bike on rear tire so shocks are
fully compressed.
Properly Support Your Motorcycle Prior To Air Suspension Installation!
warning
03.21.11
ST EP F IV E : O P E RATION
A. Install fuse in fuse holder and
pu s h to p b ut to n to a d d a ir to t he syst em .
B. Push bottom button to release ai r an d
make sure system is working properly.
C. Check fender to tire clearance
to make sure nothing is rubbing.
D. Assemble air box lid & cover.
ST EP O N E : H AN D LEBAR SW ITC H
A. Remove stock clutch clamp.
B. Re-usin g stock hardware,
install Legend handlebar switch
housing making sure not to pinch wires.
C. Route wires down through pre-drilled
hole into the air box.
ST EP T H R E E : W I R I N G
A. Secure relay harness to the inside
of the airbox with supplied Velcro.
B. Connect w ires from com pressor ,
handlebar switch, and relay harness
us i n g color coded w iring.
C. Connect color coded w ires an d route
the positive and negative cables
to b attery.
CAUT IO N
MAKE SURE TUBING IS
CUT AT A CLEAN 90° ANGLE
TOOLS NEEDED…
T40
T27
10mm
3/4”
STEP TWO: COMPRESSOR MOUNT
A. Remove air box cover lid.
B. Drill 3/8” hole in right front
corner of ai r box .
C. Using supplied Vel-Cro, install
air compressor and relay harness.
D. Route air line from the solenoid
through 3/8” hole to the rear of
the motorcycle under the seat.



 To Previous Page