2005 PDI: VRSC Models 6-5
Pressure Cap Location
NOTES
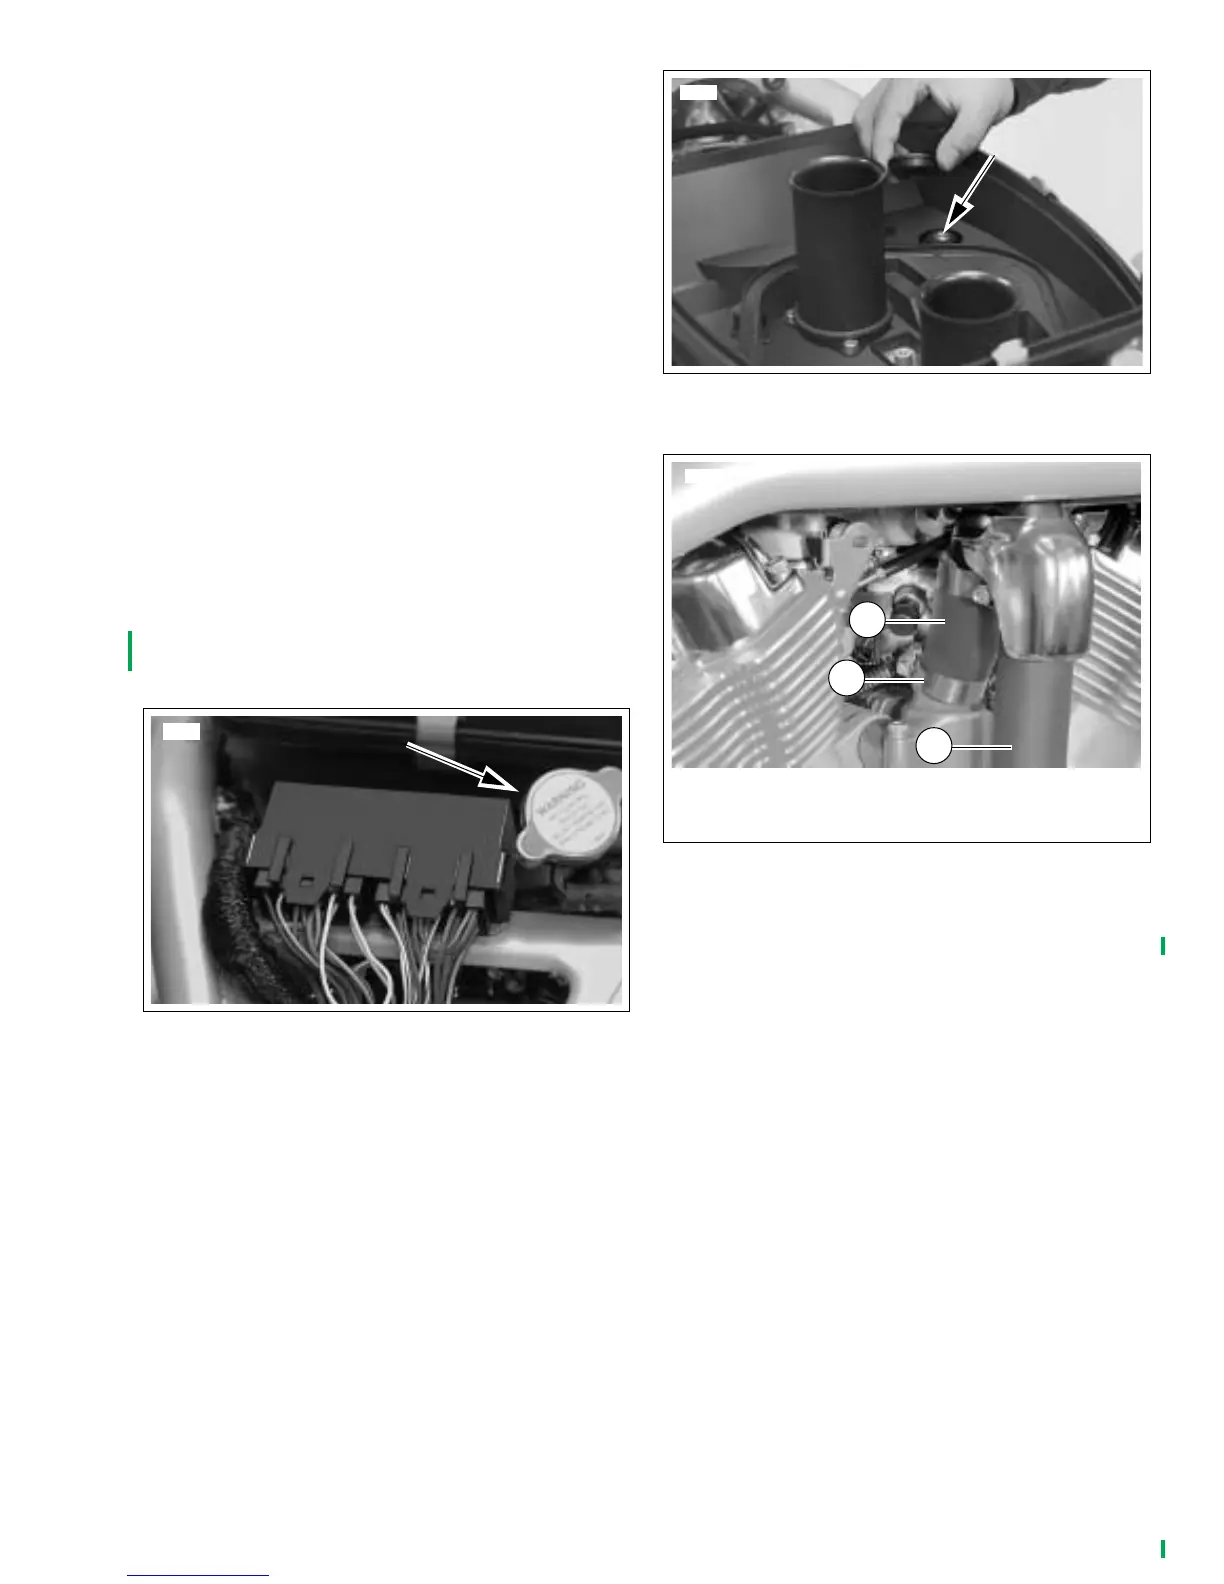
● See Figure 6-5. The pressure cap is located beneath
seat behind the air box. Normally the pressure cap does
not need to be removed. Coolant level can be checked at
the expansion tank located on right side behind steering
head. Coolant can be added at the expansion tank if
level is low. To verify that the coolant system has been
filled perform the check following these notes.
● See Figure 6-6. If the coolant system is drained, remove
the air bleed plug and then fill through filler neck at pres-
sure cap.
Verifying Coolant System Is Filled
1. See Figure 6-5. Remove pressure cap.
2. See Figure 6-7. Gently squeeze center of hose (1) while
looking into coolant filler neck. Coolant should rise in
filler neck.
3. If coolant is not visible in filler neck, remove air bleed
plug shown in Figure 6-6.
4. Add enough premixed HARLEY-DAVIDSON EXTENDED
LIFE ANTIFREEZE & COOLANT (Part No. 99822-02) so
coolant is visible in filler neck. Replace air bleed plug and
pressure cap. Tighten air bleed plug to 9-11 Nm (80-97
in-lbs).
Check Hose Clamps For Tightness
1. See Figure 6-7. Check the four hose clamps (two each
on hoses) for tightness.
2. With a long bladed screwdriver check two hose clamps
one at top left and one at top right of radiator.
NOTE
The engine ends of the radiator hoses are secured with a
plastic “shrink” clamp and do not require checking.
Figure 6-5. Pressure Cap
9030
Figure 6-6. Coolant System Air Bleed Plug
Figure 6-7. Coolant Hoses (Engine right side)
1
2
3
9098
1. Hose
2. Hose (To thermostat housing)
3. Hose clamps (4) (2 on each hose)



 To Next Page