2005 PDI: VRSC Models 6-9
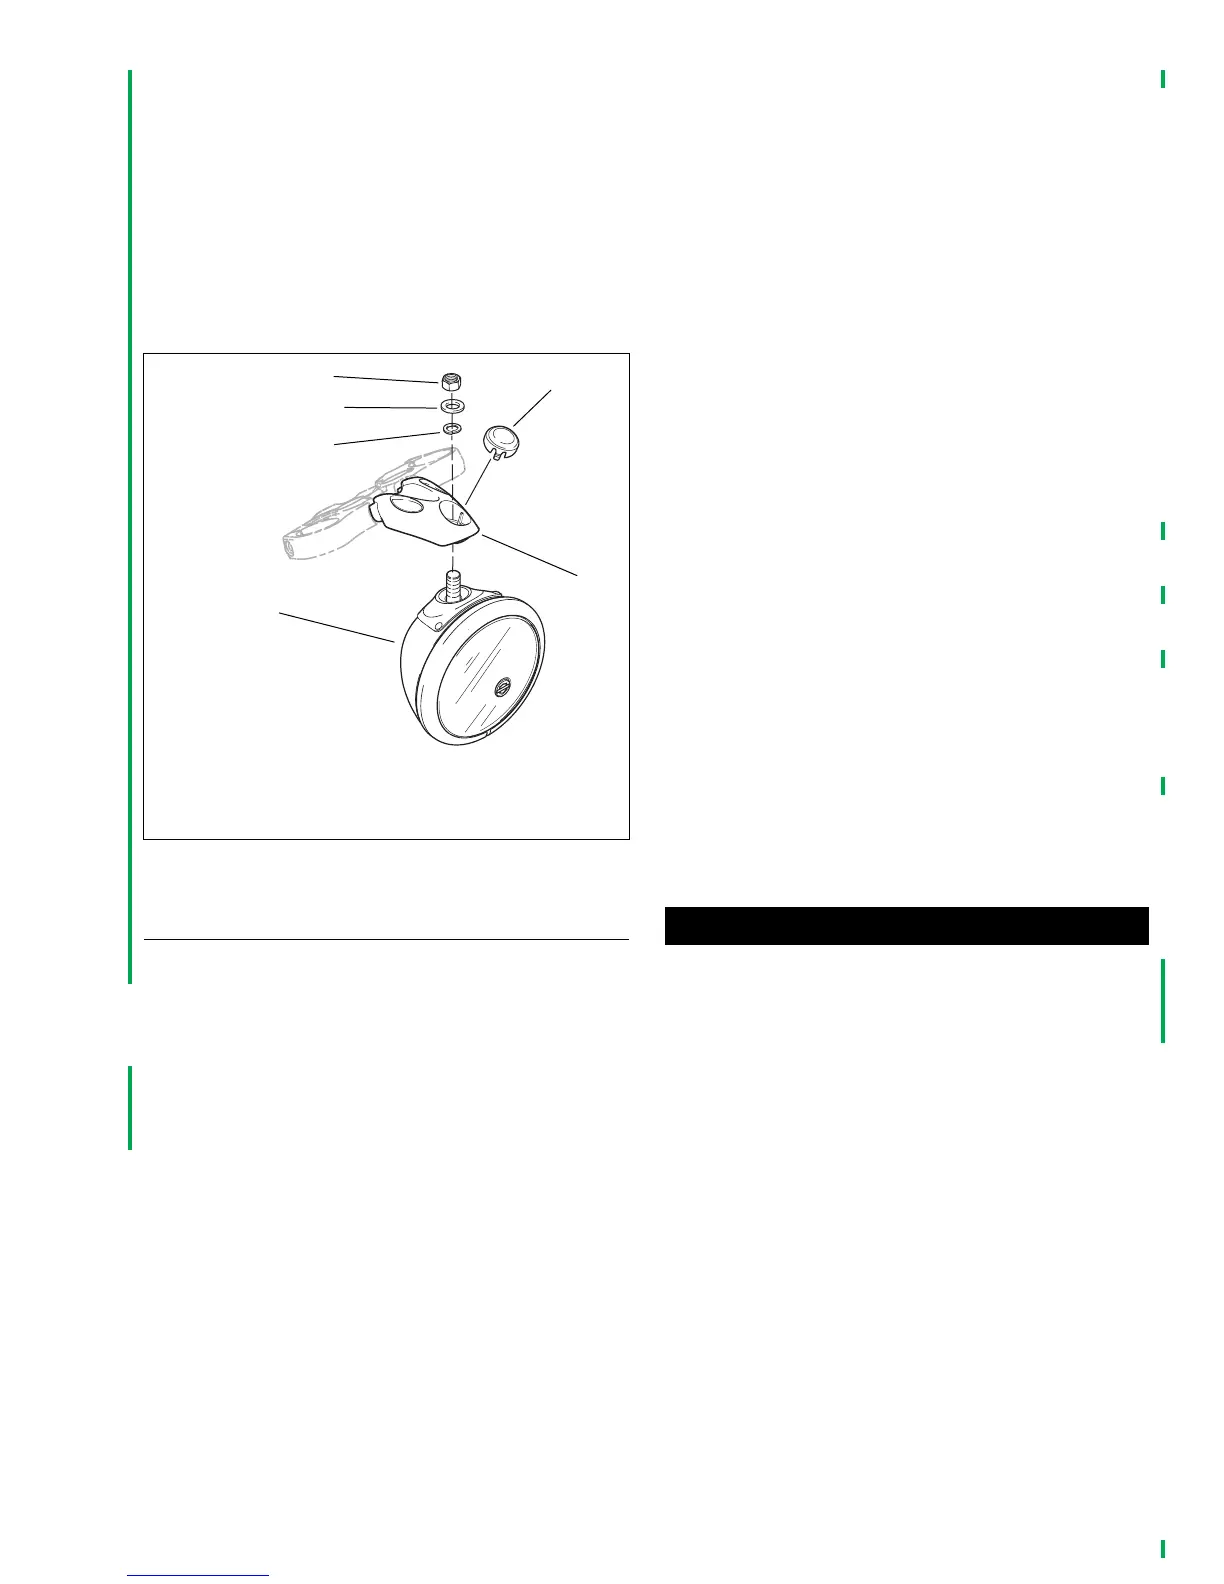
VRSCB models:
1. See Figure 6-12. Loosen headlamp clamp nut (1).
2. Tilt headlamp (6) up or down to properly aim it in relation
to the horizontal line, and, at the same time, turn it right
or left to direct light beam straight ahead.
3. Tighten headlamp clamp nut to 13.6-20.3 Nm (120-180
in-lbs) after headlamp is properly positioned.
4. Locate headlamp bracket plug (4), packaged in traveler
included with motorcycle in crate. Snap plug into place in
headlamp bracket (5).
INDICATOR LAMPS/CONTROLS
NOTES
● All VRSC models have an Instrument Module with self-
diagnostic capabilities. Refer to VRSC Model Electrical
Diagnostic Manual for service instructions.
● VRSCSE models are equipped with a separate speed-
ometer, tachometer and instrument console. See BAT-
TERY TESTING AND CHARGING under 7.1 VRSCSE
MODEL.
1. View instrument cluster and turn ignition switch to “IGNI-
TION” position. Check that the oil pressure indicator
lamp turns on (before engine is started). The Check
Engine indicator lamp will illuminate for about four sec-
onds and then go off. If cycle is equipped with optional
Security System (TSSM), a key icon (Security lamp) will
illuminate for about four seconds and then go off. The
Battery icon will illuminate to indicate low voltage. Fuel
gauge should also indicate fuel tank level. Engine Cool-
ant temperature icon will illuminate to verify bulb filament
and then go off.
NOTE
For any systems problems, please refer to the appropriate
Electrical Diagnostic manual for your model.
2. Shift transmission to neutral position, and verify that neu-
tral indicator lamp turns on.
3. Start engine; check operation of starter.
4. Check that oil pressure indicator lamp turns off when
engine is running above 1200 RPM. Check that battery
icon turns off. Engine Coolant temperature icon must not
illuminate.
5. Check that tachometer is functioning.
6. Disengage clutch (depress clutch lever), and verify that
neutral indicator lamp turns off when transmission is
shifted to any forward gear. Shift transmission to neutral
position, and verify that neutral indicator lamp turns on
again.
7. Check horn operation.
8. Check operation of all remaining lamps:
● headlamp–low and high beams
● headlamp high beam indicator lamp
● left directional (turn signal) lamps–front and rear
● Ieft directional (turn signal) indicator lamp
● right directional (turn signal) lamps–front and rear
● right directional (turn signal) indicator lamp
● Ieft front running lamp
● right front running lamp
● tail lamp–running lamp and brake lamp filaments
9. After engine has reached normal operating temperature,
turn engine off.
10. Check engine oil level in manner previously specified.
This time, fill sump to upper mark on filler cap/dipstick.
To avoid over-filling the oil sump, wait approximately
three minutes after adding oil before checking the oil
level with the dipstick. An over-filled sump can cause
engine damage. (00188a)
Figure 6-12. Headlamp Adjustment–VRSCB Model
pd0223
1. Headlamp clamp nut
2. Lock washer
3. Washer
4. Headlamp bracket plug
5. Headlamp bracket
6. Headlamp assembly
4
3
1
2
5
6



 To Next Page