2-20 2005 PDI: Touring Models
DEALER ROAD TEST 2.8
ROAD TEST
After you complete motorcycle inspection, take motorcycle for
a road test. Check all systems and overall operation of motor-
cycle: engine, transmission, clutch, brakes, handling, etc. On
Ultra models, check Cruise Control, rear speakers and rider/
passenger sound system controls. Refer to Touring Models
Owner’s Manual to check for proper operation.
After road test, return motorcycle to shop and thoroughly
clean off any road dirt. Check and correct any problems you
may have found during road test.
Before You Begin
Check the following items before road test of vehicle:
● Lamps and indicators.
● Check amount of gasoline in tank and add (if
needed).
● Adjust mirrors to proper riding positions.
● Check tire condition and pressure (adjust if neces-
sary).
● Check controls to verify proper function.
● Check all electrical equipment and switches includ-
ing stop lamp, turn signals and horn for proper oper-
ation.
Road Test of Vehicle: Low Speed
1. Shift from first through third gear, checking clutch opera-
tion, throttle control, and transmission operation.
2. Verify low-speed braking for front and rear brakes.
3. Handling under braking conditions.
4. Low speed handling. Verify that vehicle does not pull to
left or right.
5. Check for any abnormal vibrations.
6. Check electrical lamps, indicators.
Road Test of Vehicle: Highway Speed
1. Shift from first through fifth gear, checking clutch opera-
tion, throttle control and transmission operation.
2. Verify highway-speed braking operation of front and rear
brakes.
3. Verify proper handling at highway speeds.
4. Check for any abnormal vibrations.
● Program Security System (if equipped)
● Engine Oil:
Check and correct hot level.
● Clean Vehicle
NOTE
Be sure to submit a Dealer Product Quality Audit (DPQA) on
ANY adjustments and/or warranty work performed required to
deliver the vehicle to the customer.
IDLE SPEED: CARBURETED ONLY
NOTE
The idle speed on fuel injected models can only be set using
a diagnostic tool such as DIGITAL TECHNICIAN (Part No.
HD-44750).
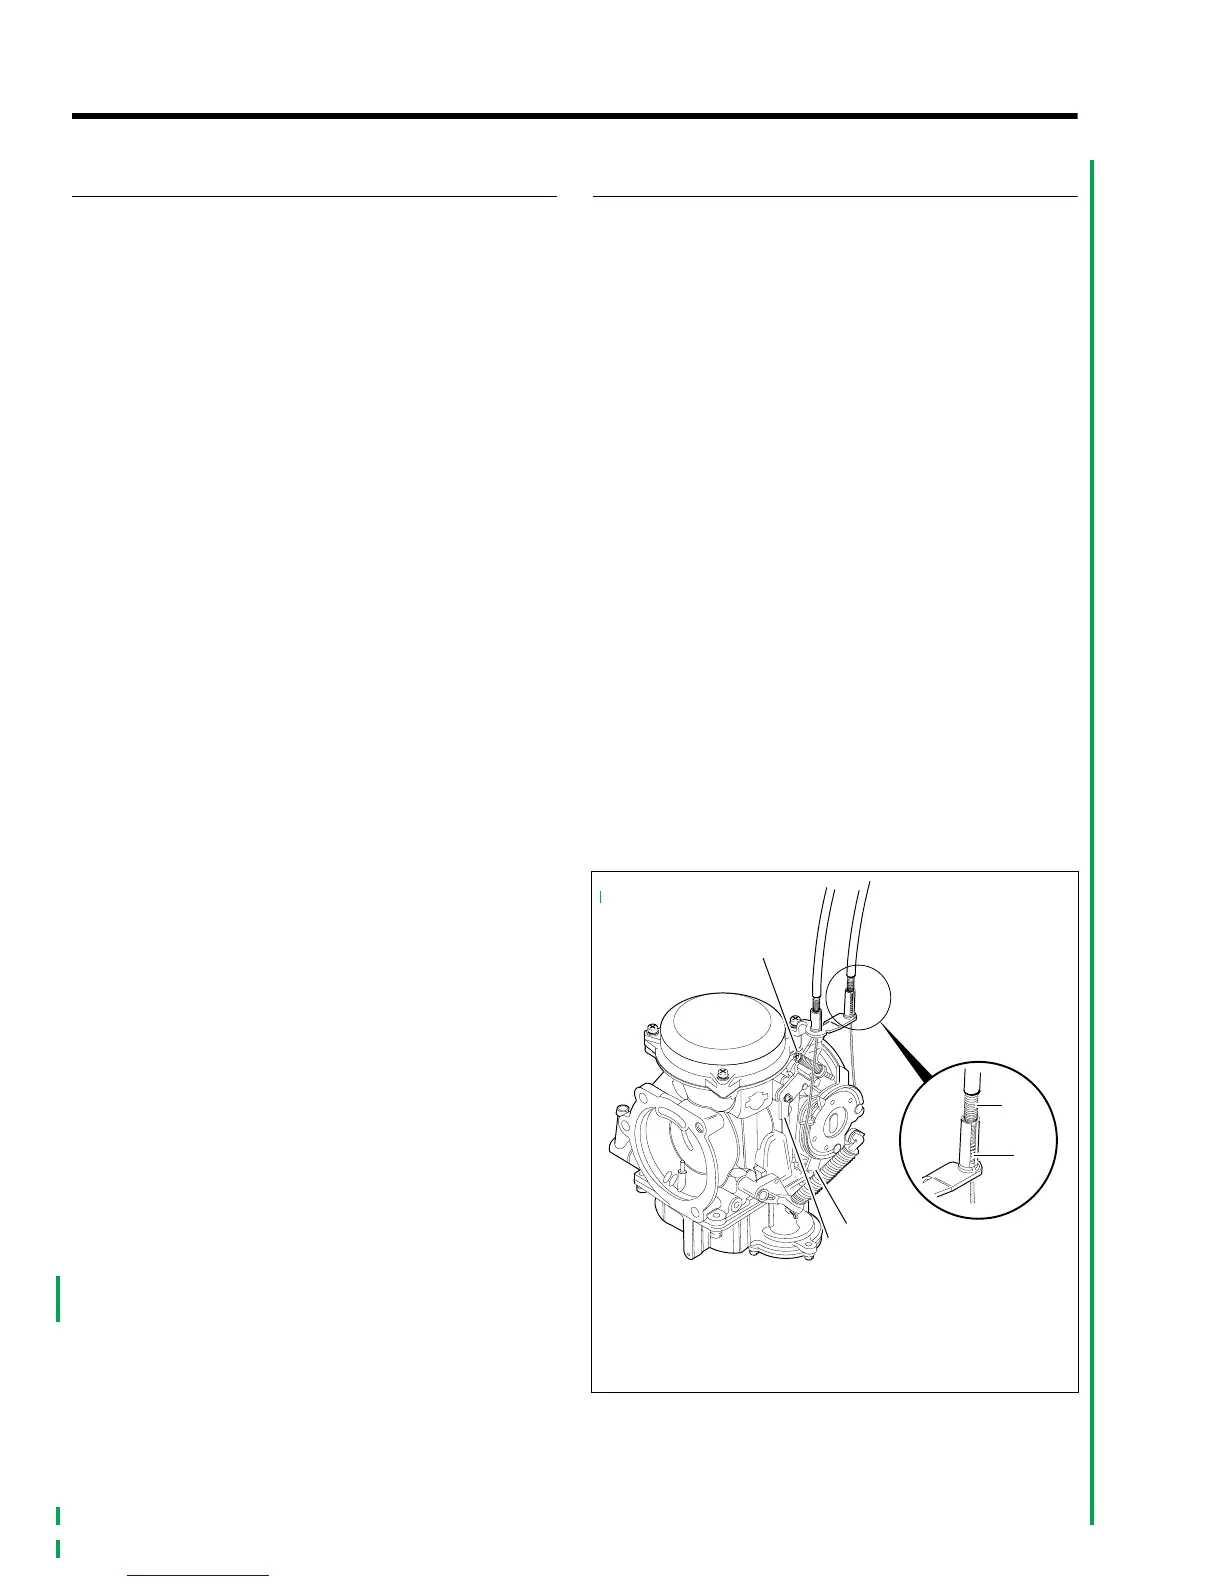
See Figure 2-23. Set engine slow idle speed of 950 RPM with
engine running at normal operating temperature and with
enrichment control knob pushed in fully. Turn carburetor idle
speed adjusting screw (5) clockwise to increase speed, or
counterclockwise to decrease speed.
NOTE
The C.V. carburetor has an enrichment circuit that will cause
the engine to idle above the normal idle range (950-1050
RPM) with the engine at normal operating temperature and
the enrichment knob pulled out fully. The increase in idle
speed is intended to alert the rider that the engine is warmed
up to normal operating temperature and that the enrichment
knob should be pushed in all the way. Continuing to use the
enrichener when the engine is at full operating temperature
will cause fouled plugs.
Be sure the engine is warmed up to normal operating temper-
ature and the enrichment knob is pushed all the way in before
adjusting engine idle speed. Be aware that, because there
are variations in individual components, it is possible for a
properly warmed-up engine to idle above the normal idle
range (950-1050 RPM) with the enrichment knob pulled out
partially.
Figure 2-23. Carburetor Adjustments
1. Carburetor stop plate
2. Cable housing
3. Spring
4. Throttle cam stop
5. Idle speed adjusting screw
f1381a2x
4
3
1
5
2